Thermoforming Process
I researched various manufacturing processes to create my case, including vacuum forming, thermoforming, plastic injection molding, fiberglass epoxy, and a basic construction of a simplified design with flat surfaces. I decided to use the thermoforming process because it enabled me to create a more complex and optimized shape. The thermoforming process involves heating a sheet of plastic in an oven, then transferring it onto a mold where a vacuum pulls the softened plastic into the desired form.
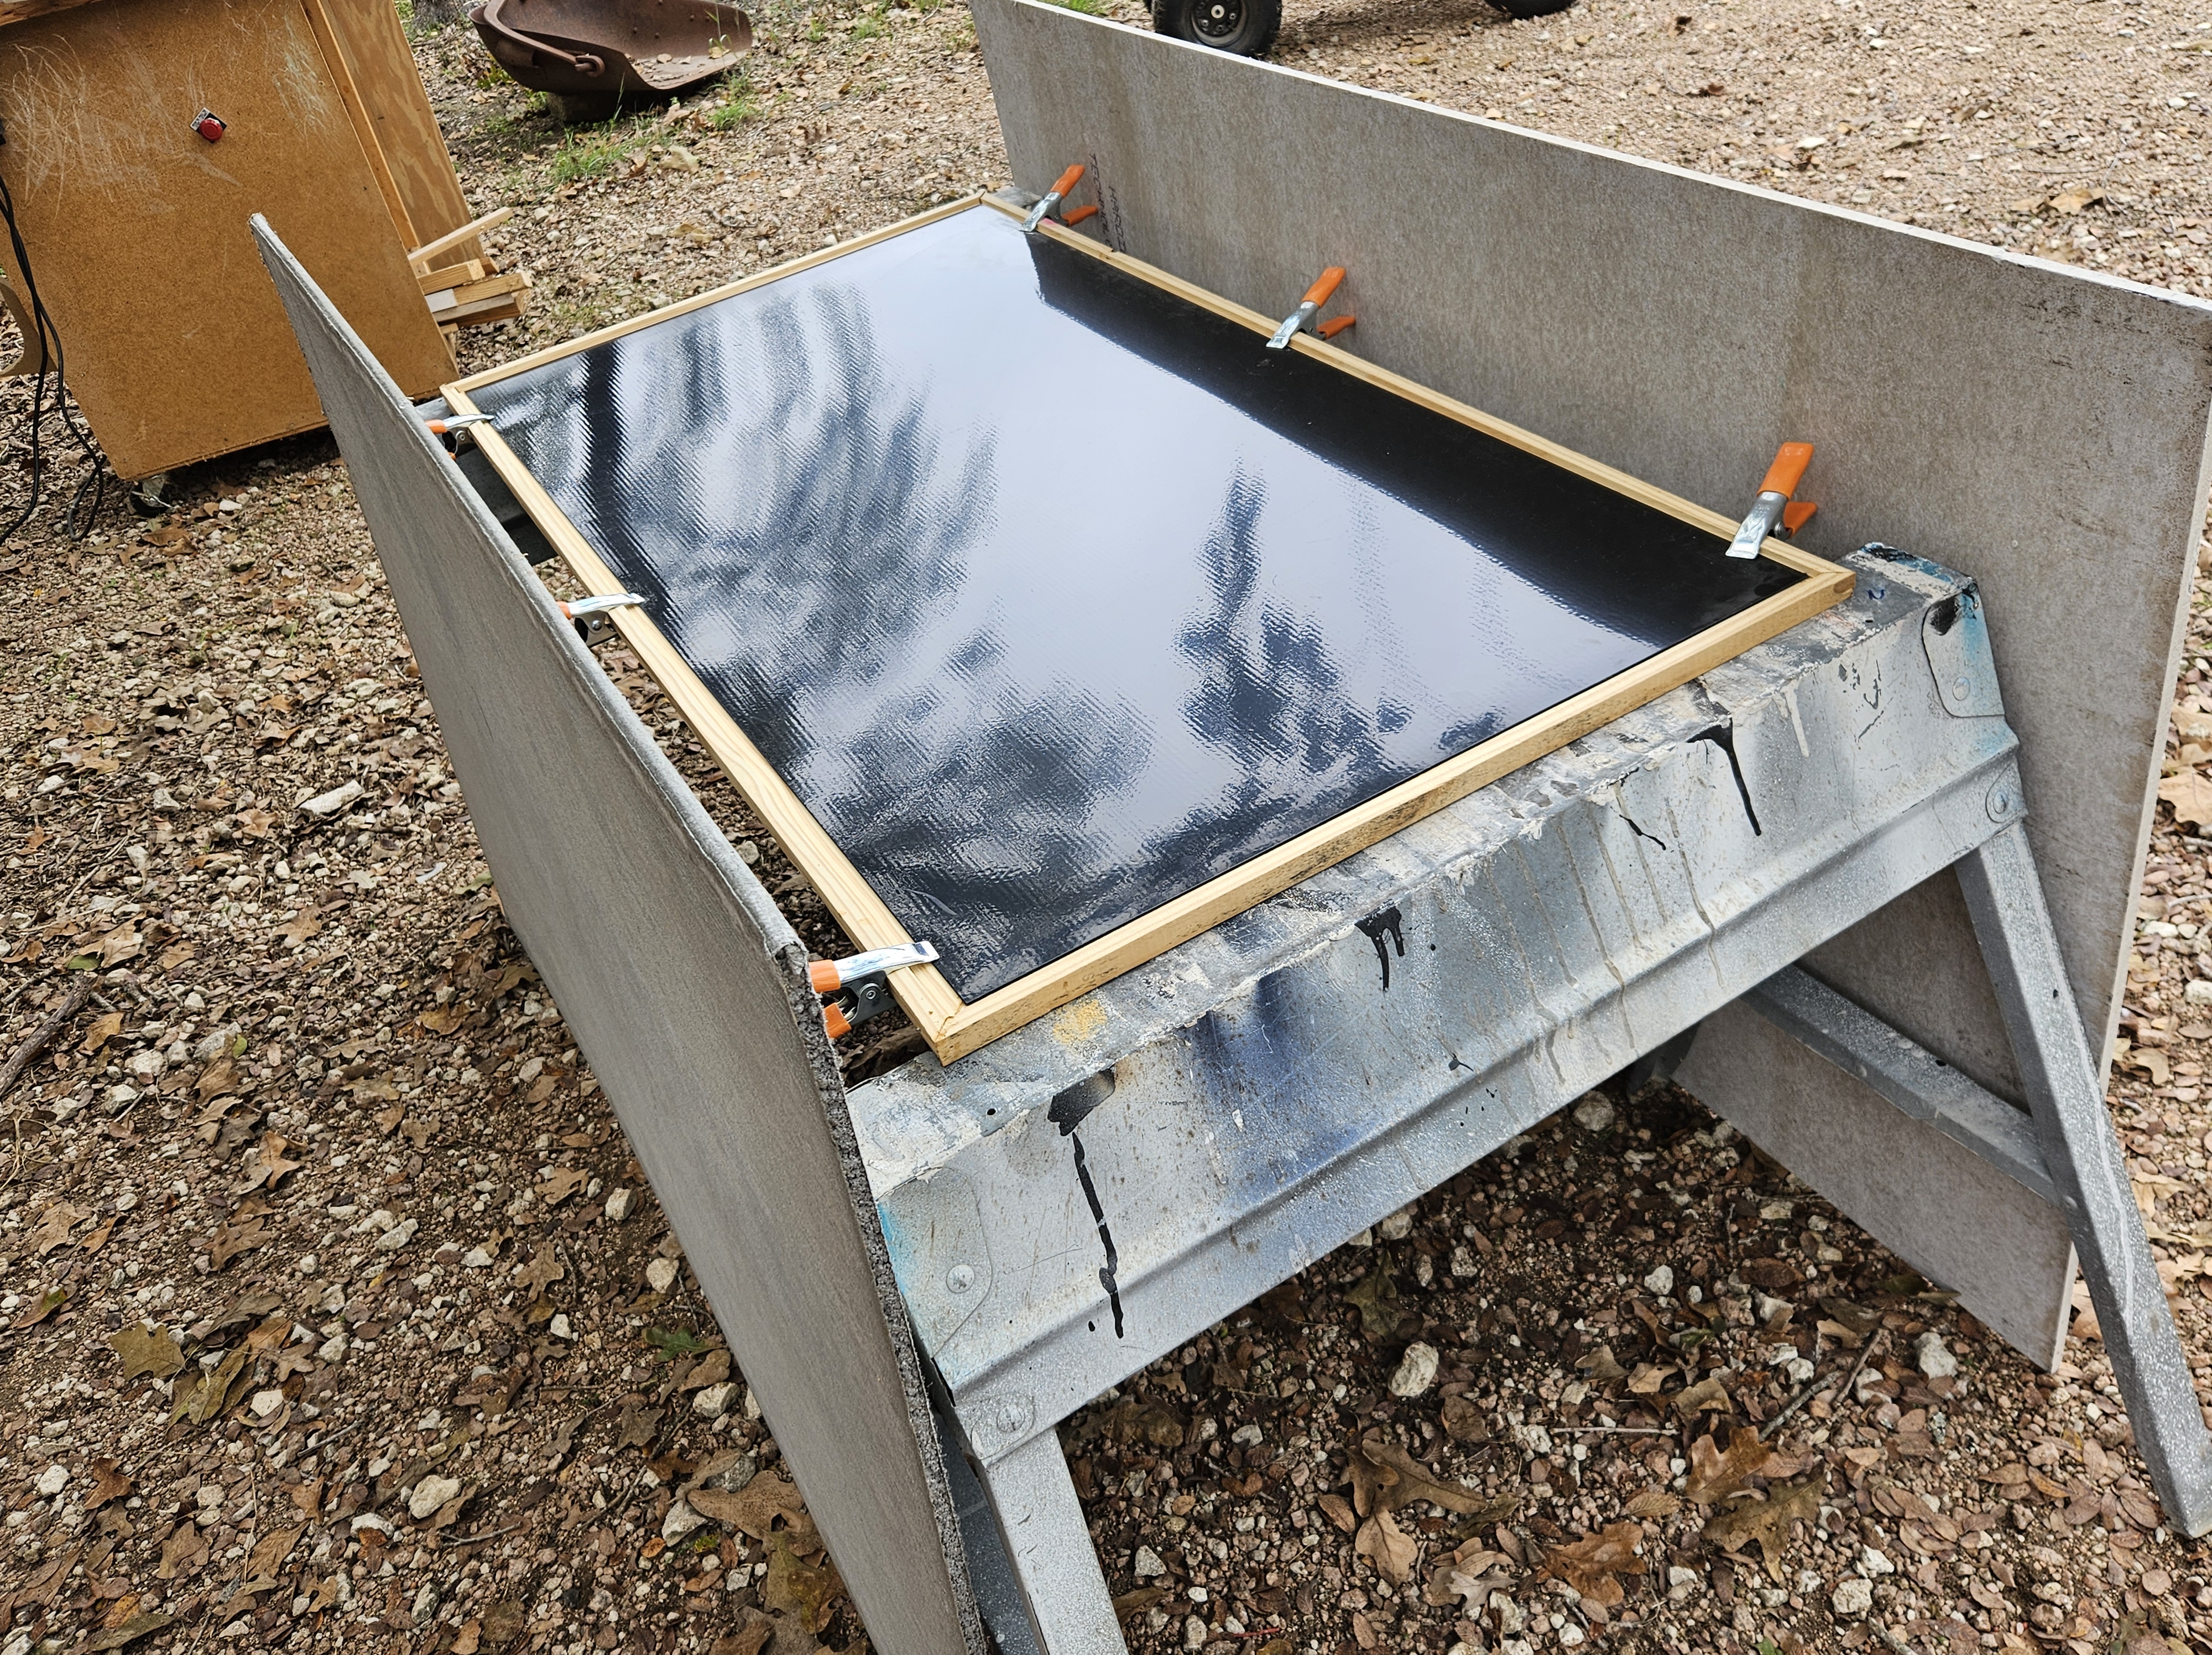
1. First I created a wooden frame that the plastic sheet is clamped into. The plastic is laid on top of the frame and held in place with clamps. This will allow the plastic to be pulled down onto the mold after being heated.
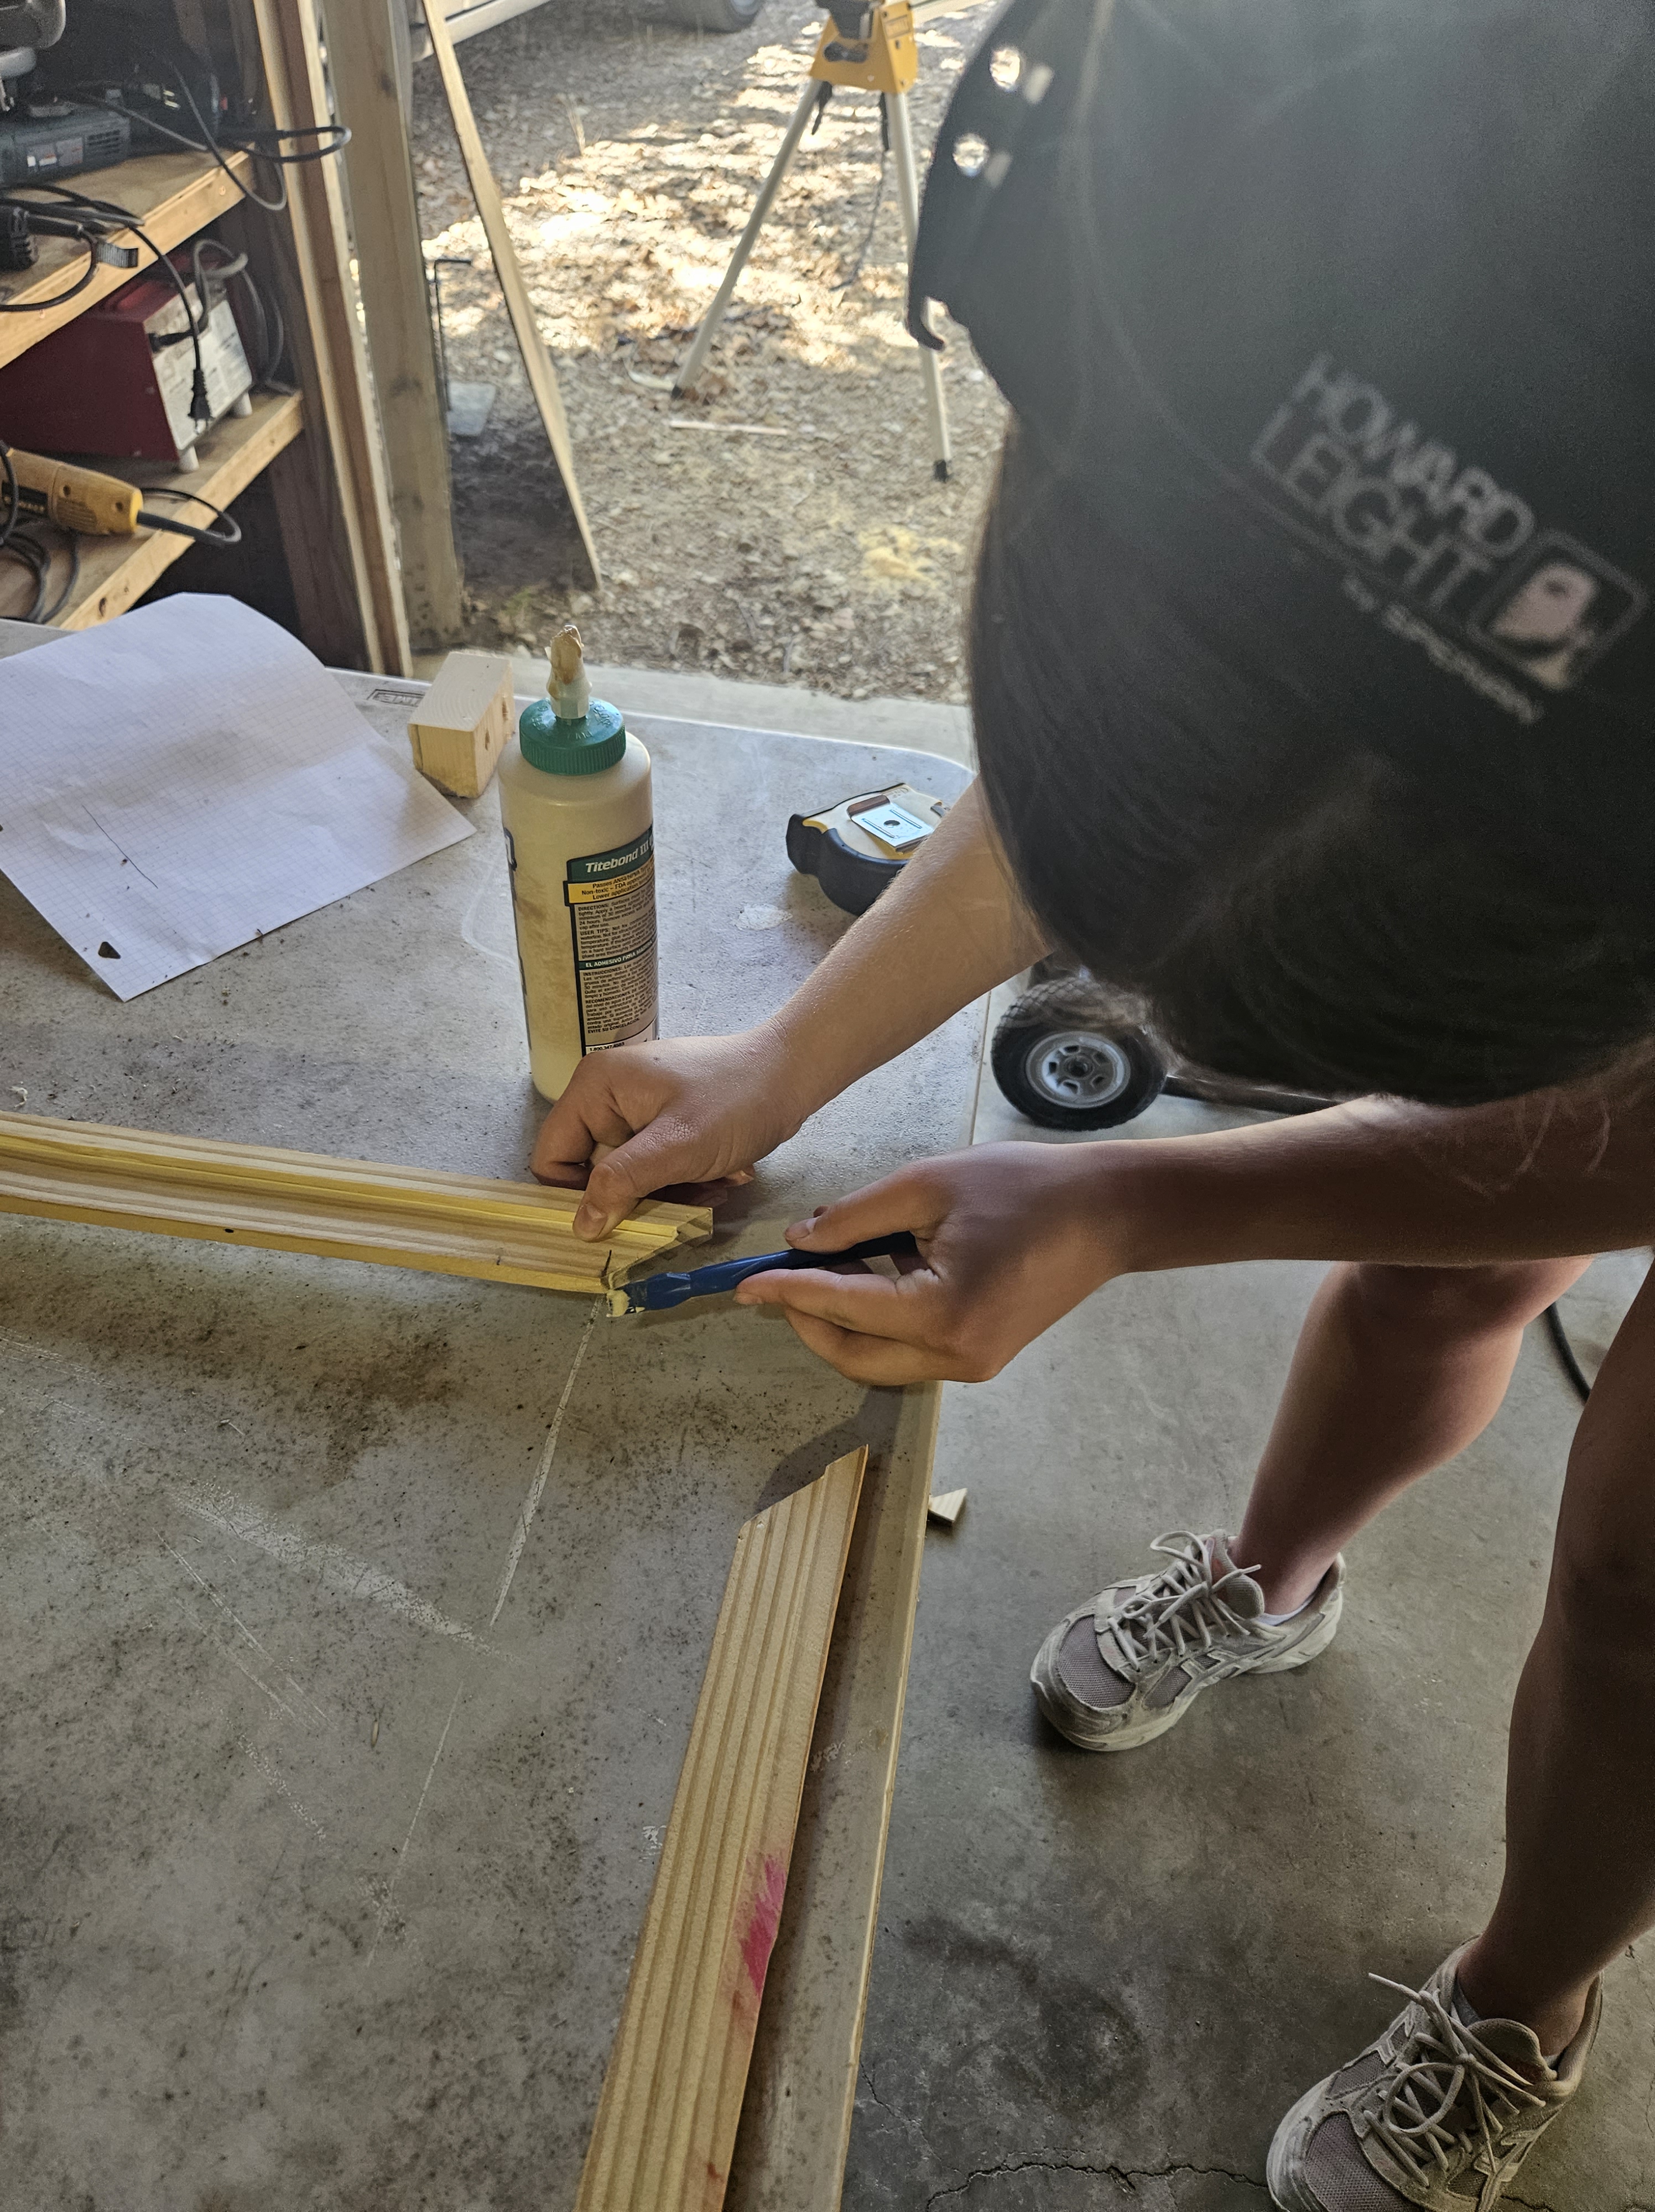
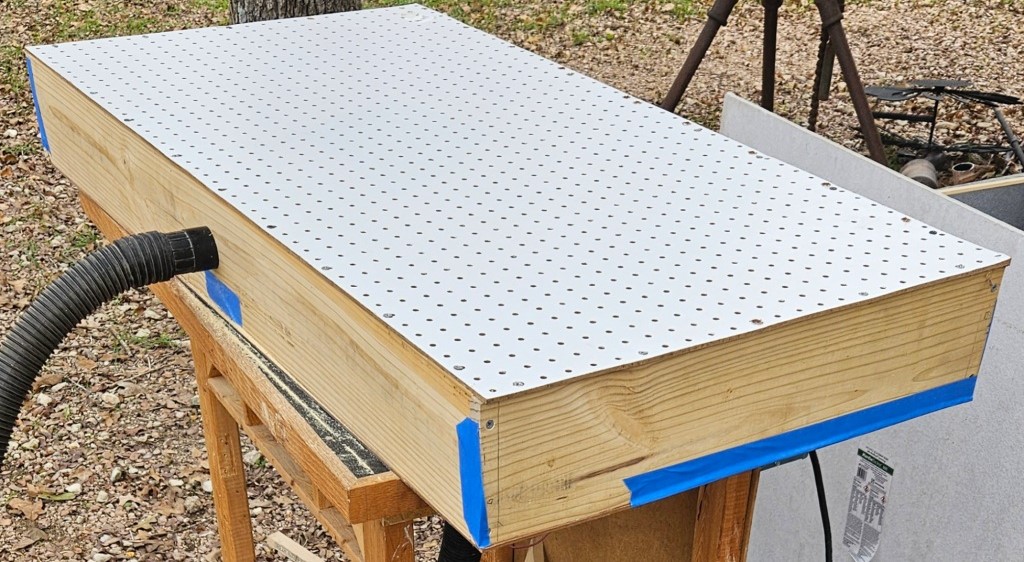
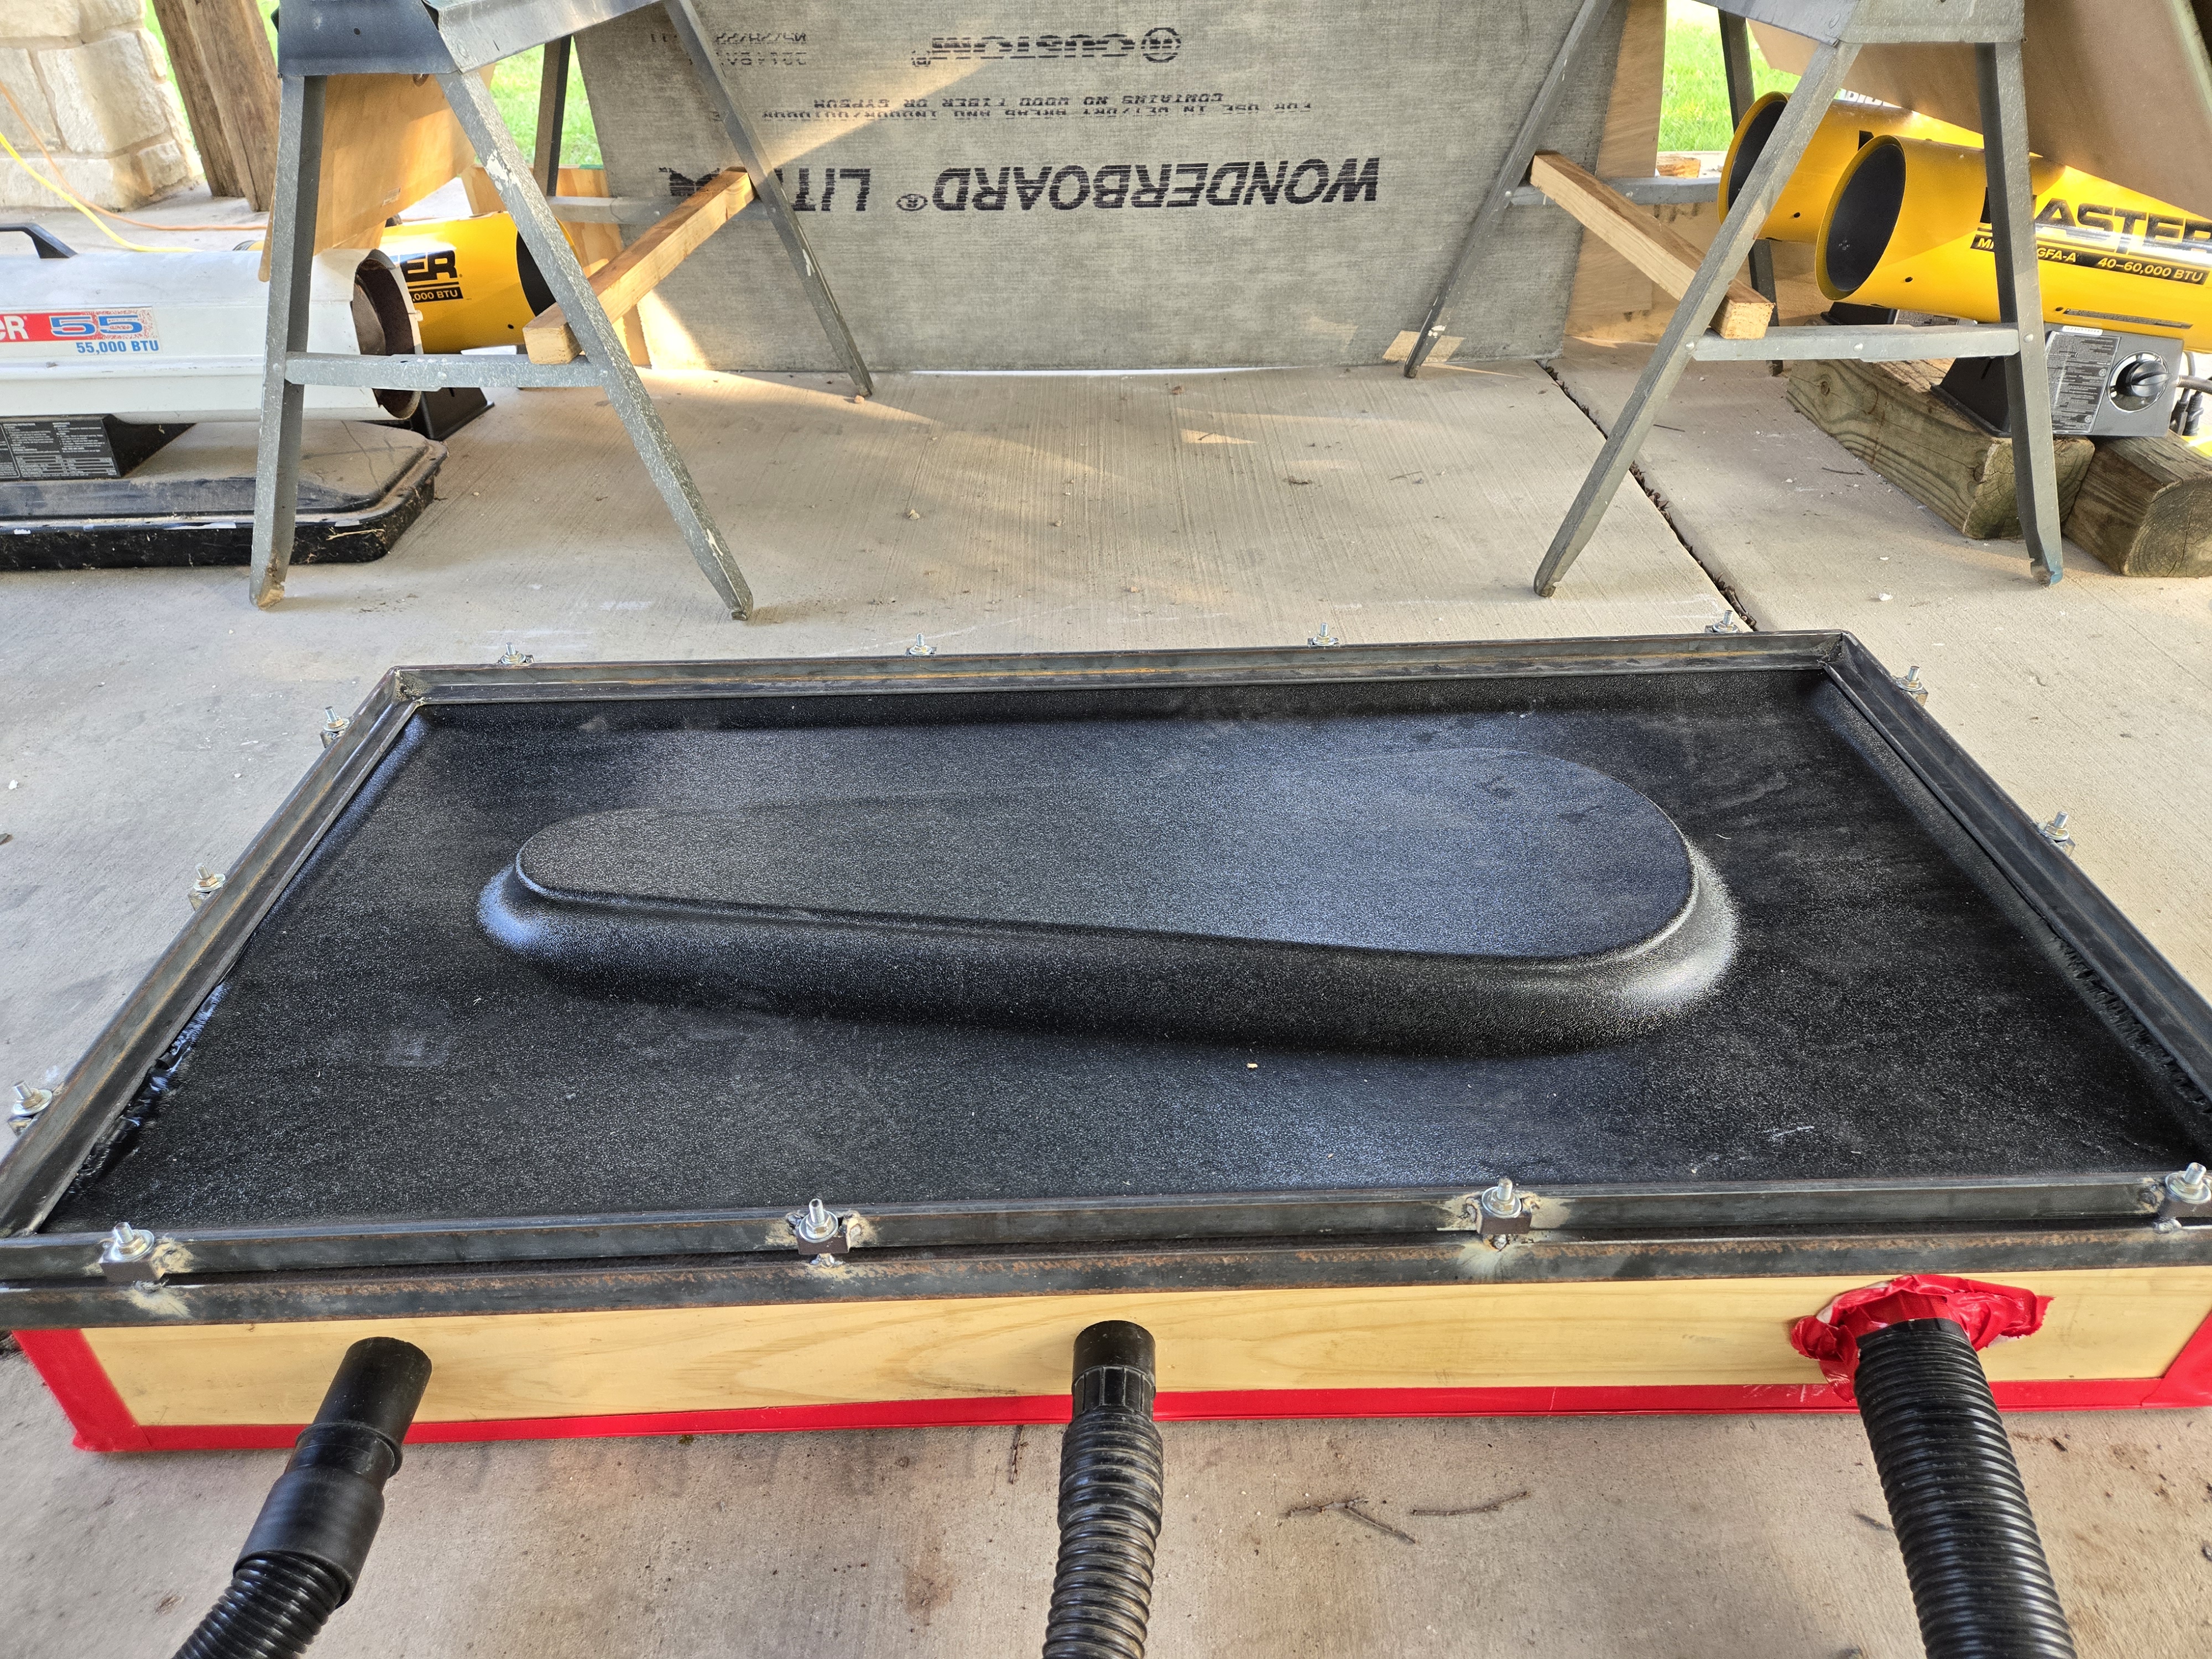
2. I then made a box that serves as a vacuum table during the thermoforming process. The box fits the dimensions of the frame so the frame can be pulled down onto the box with the edges fitting perfectly around the perimeter. The top surface of the box is perforated hardboard, so that air can be sucked through the top allowing the heated plastic to be pulled down onto the mold.
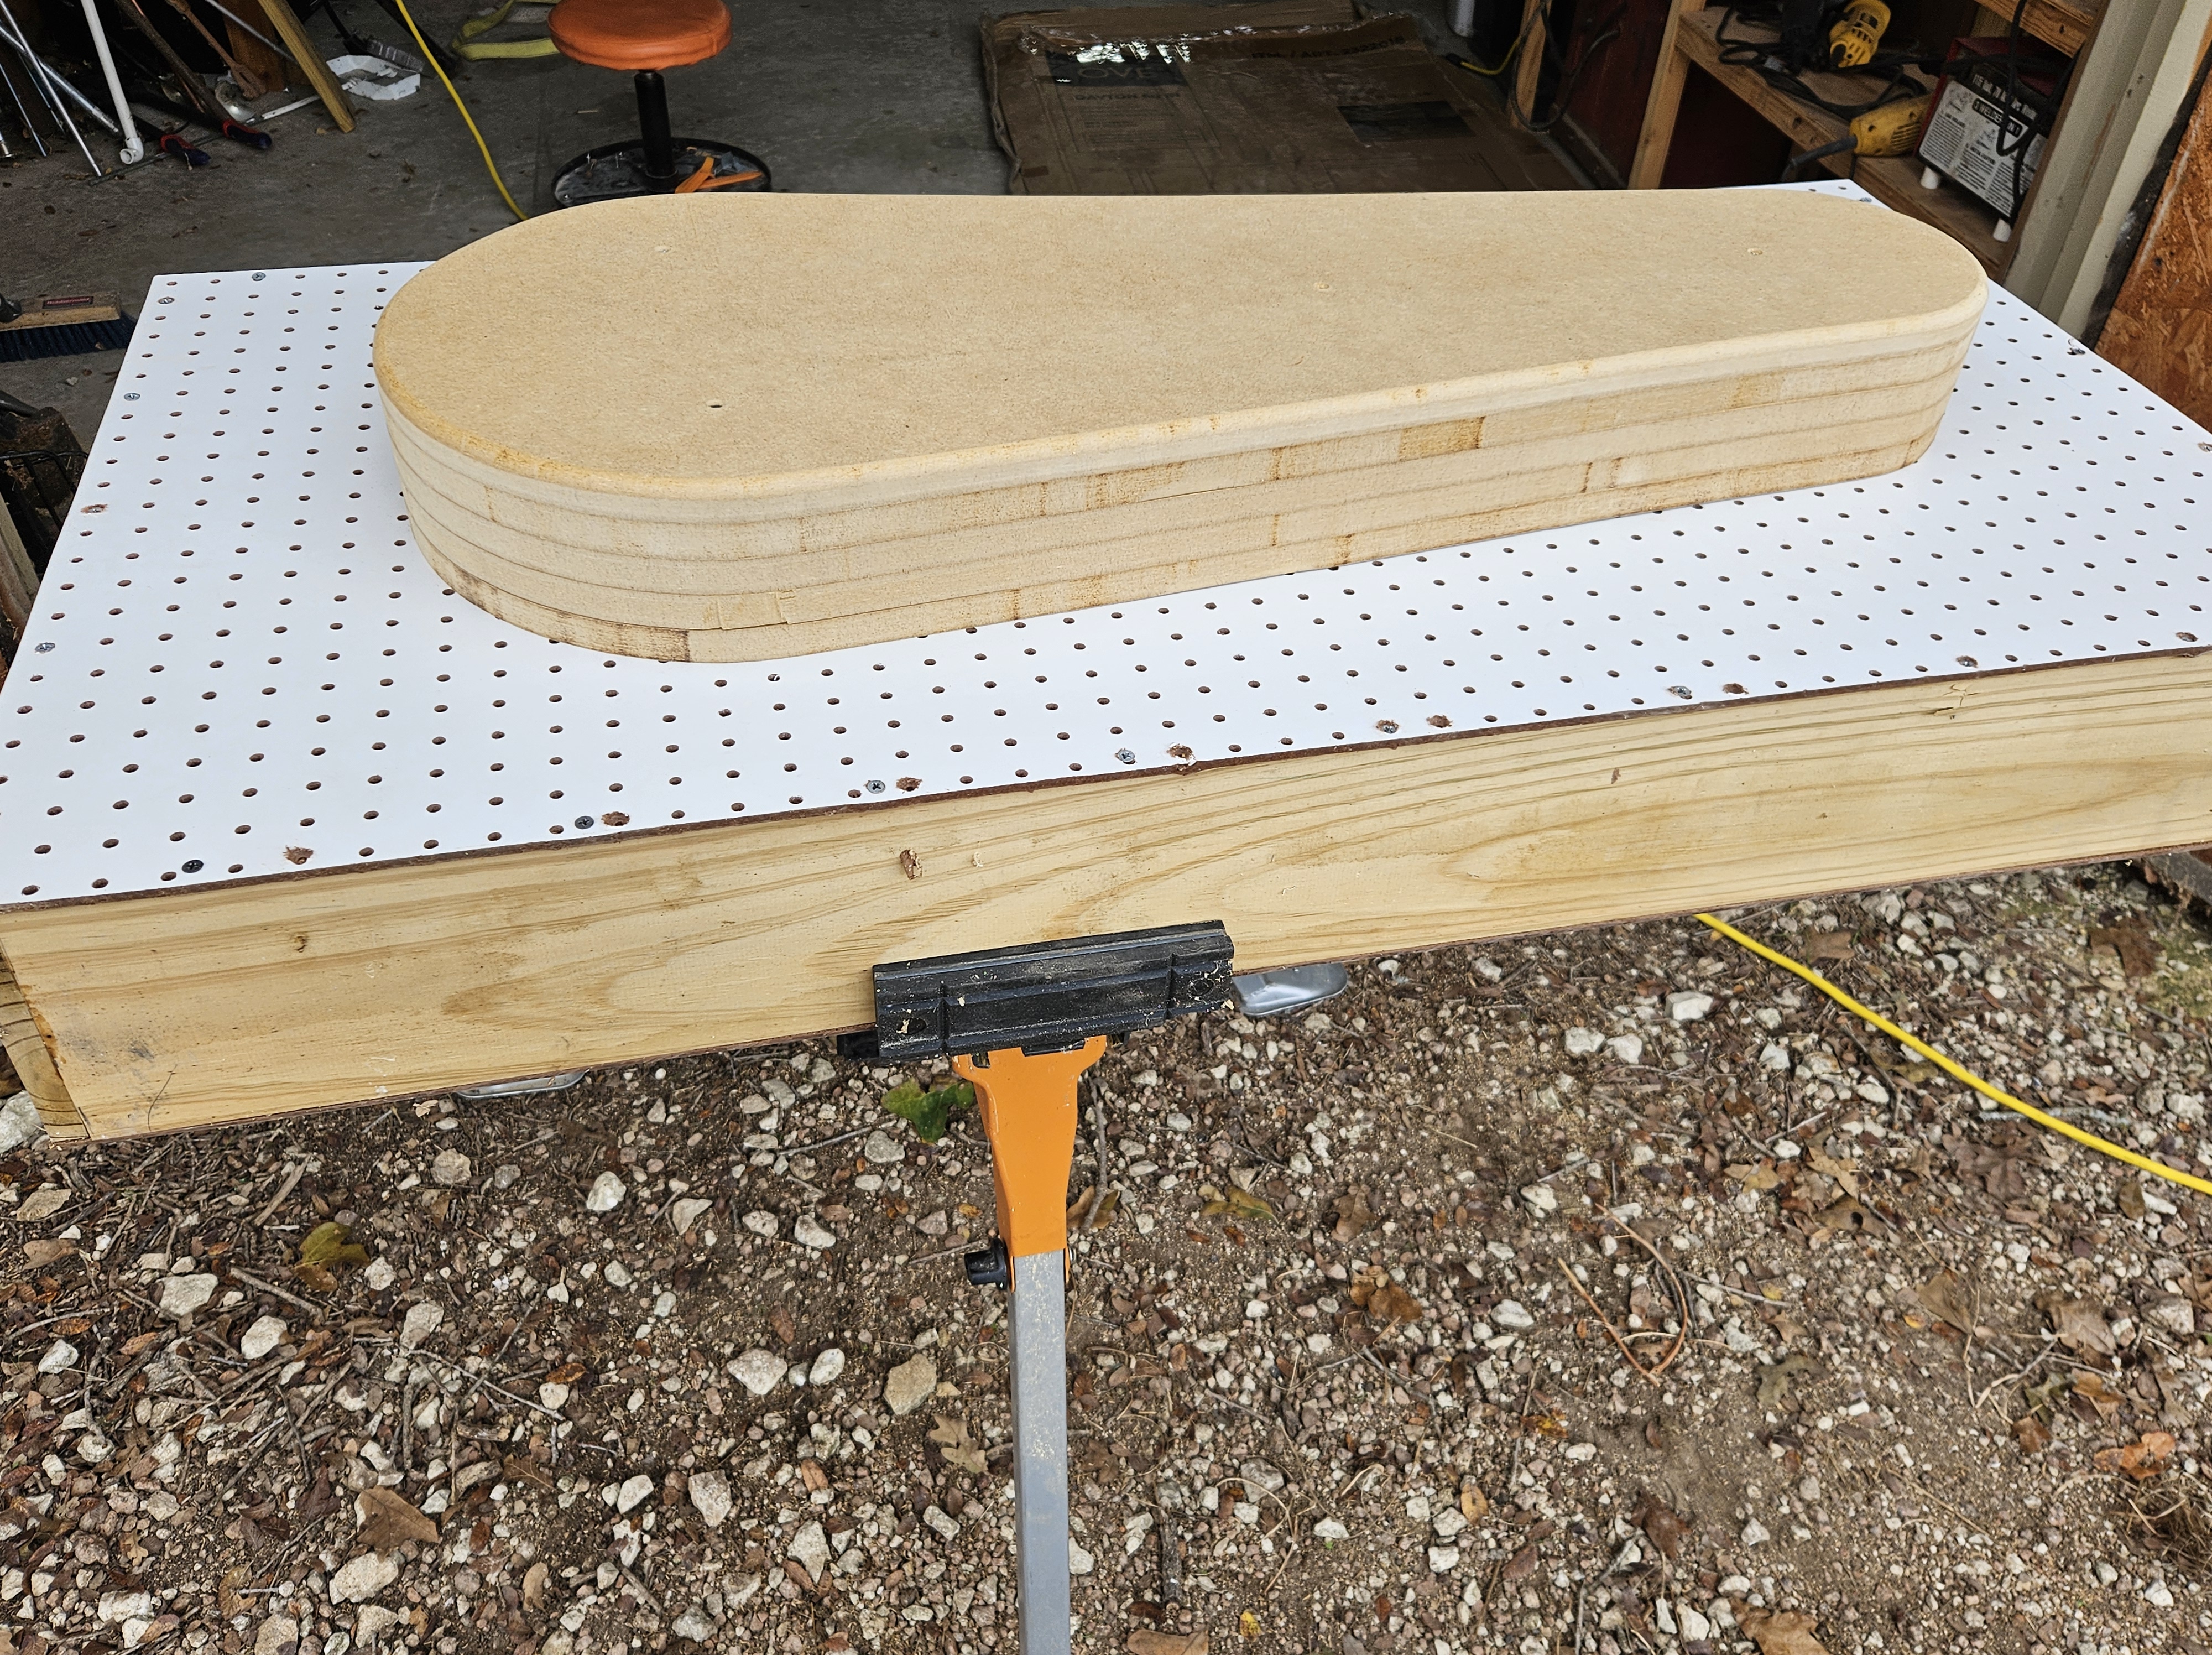
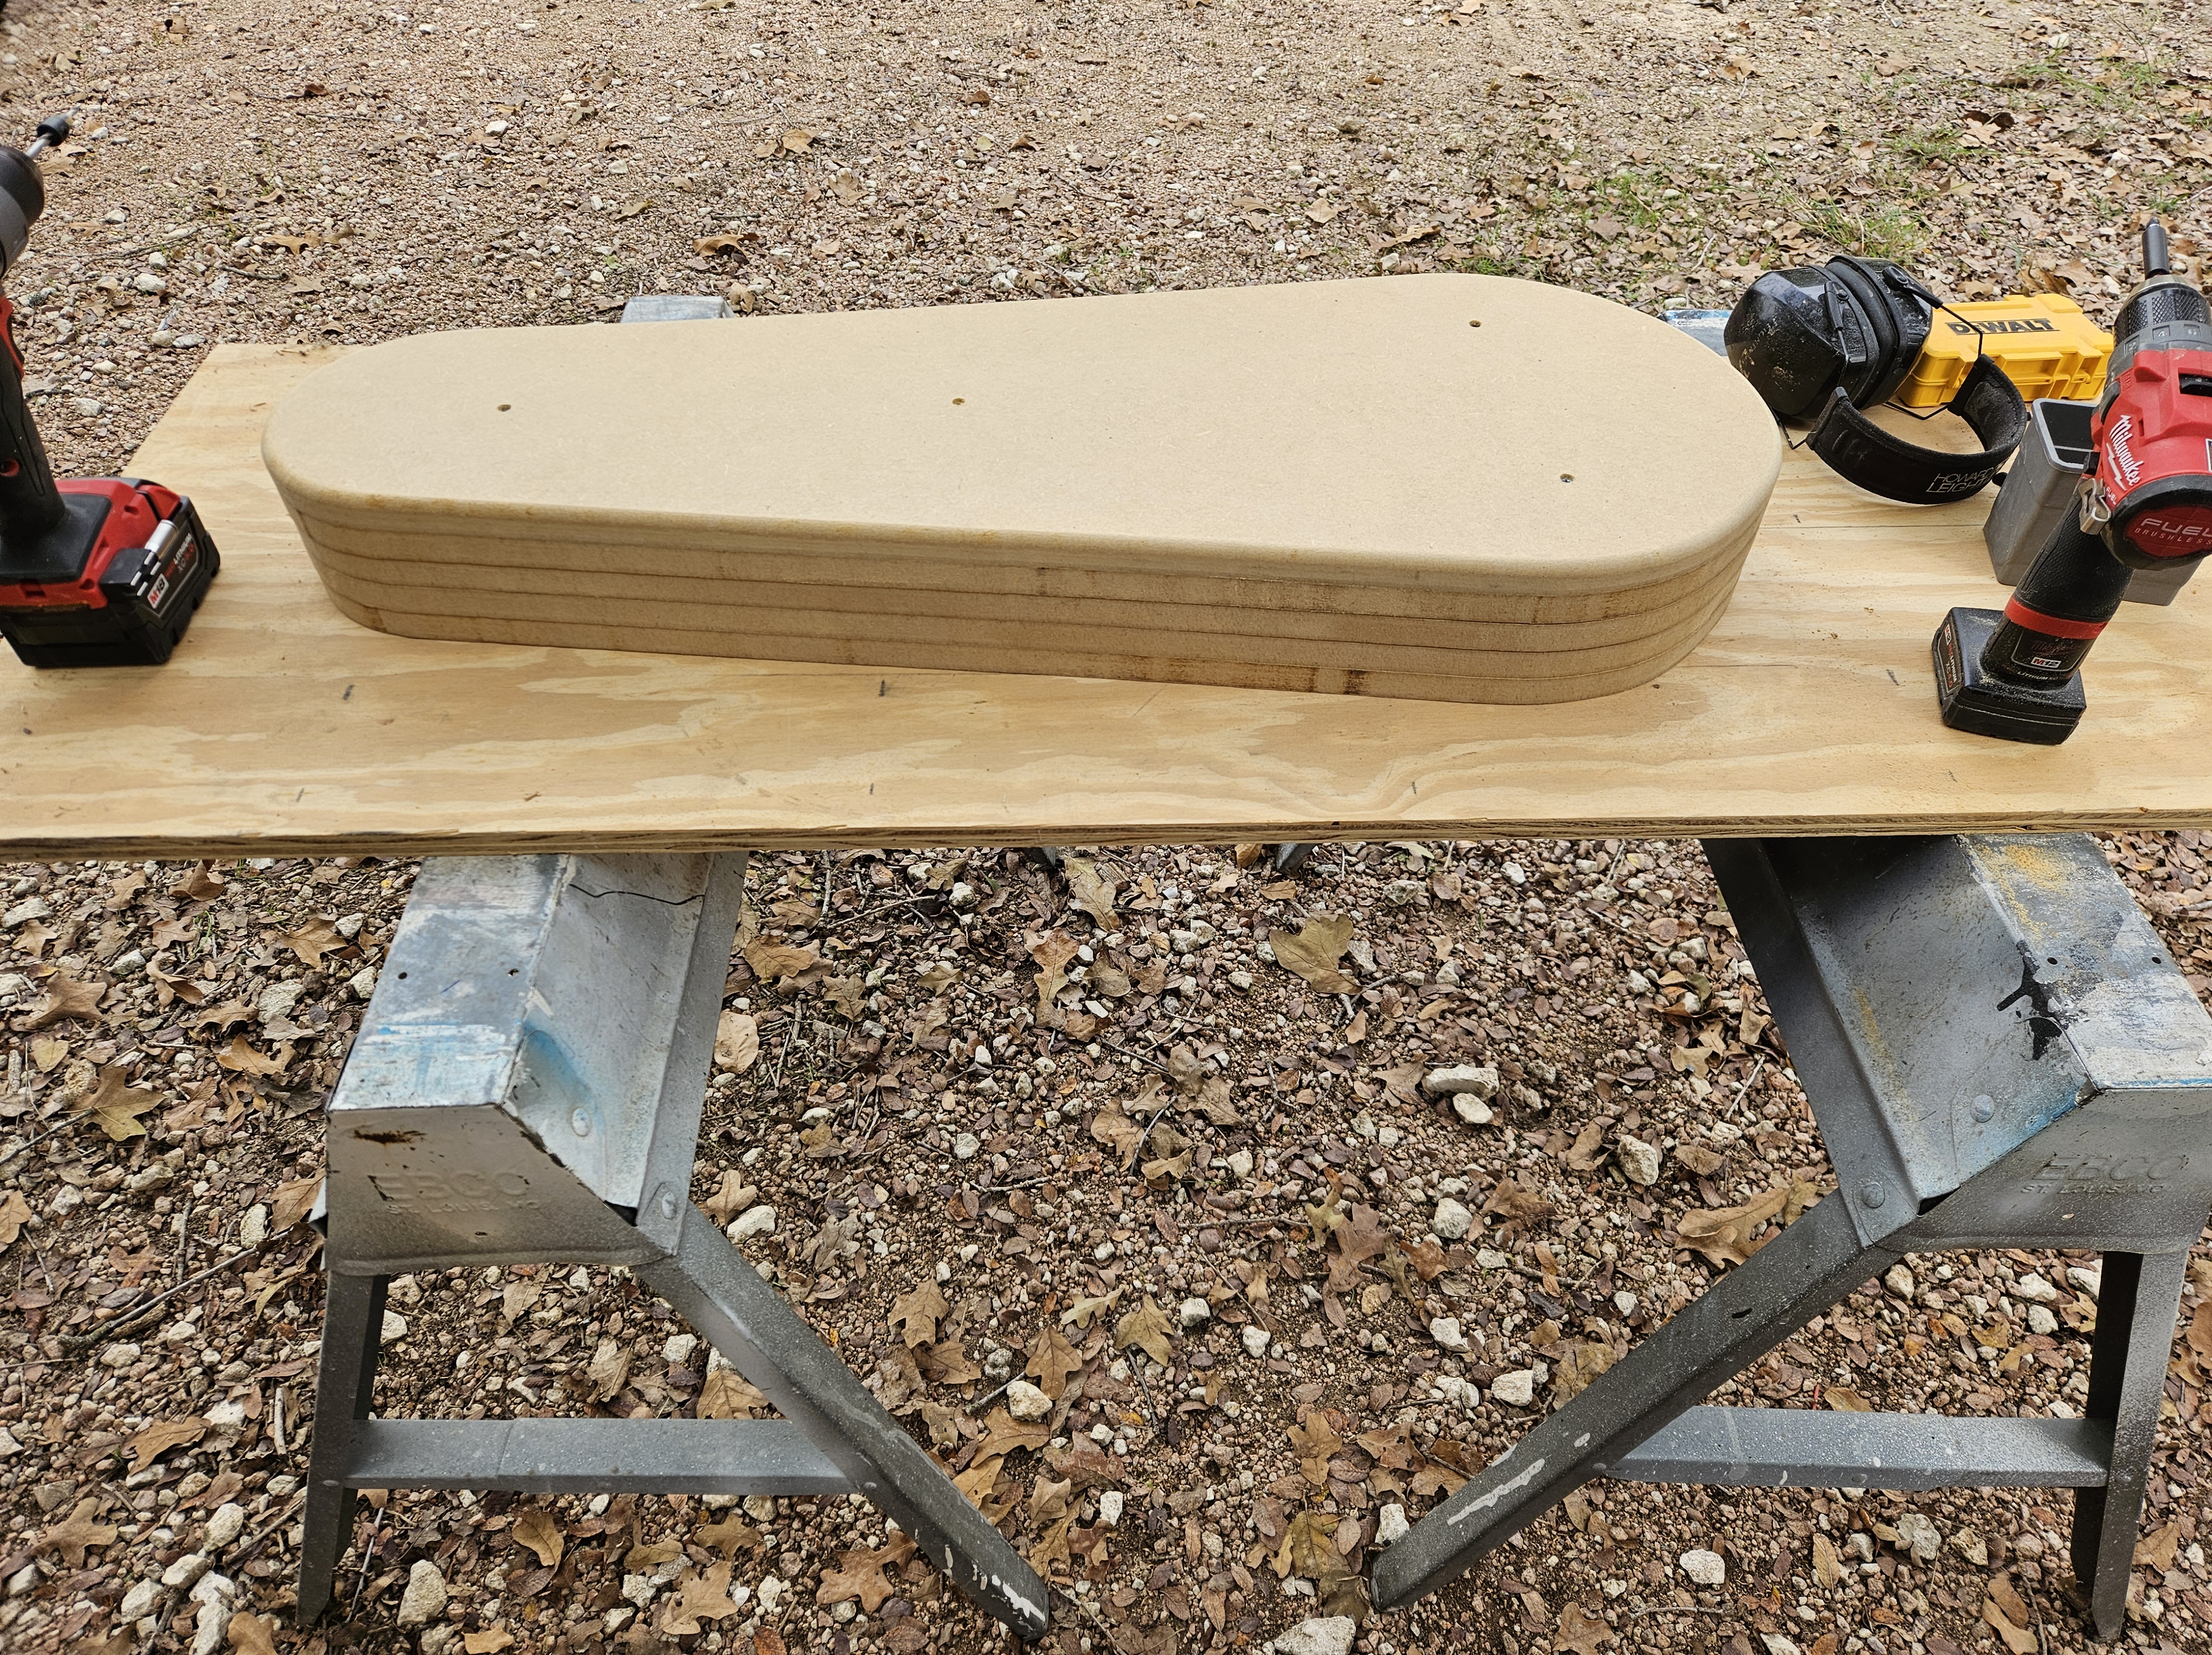
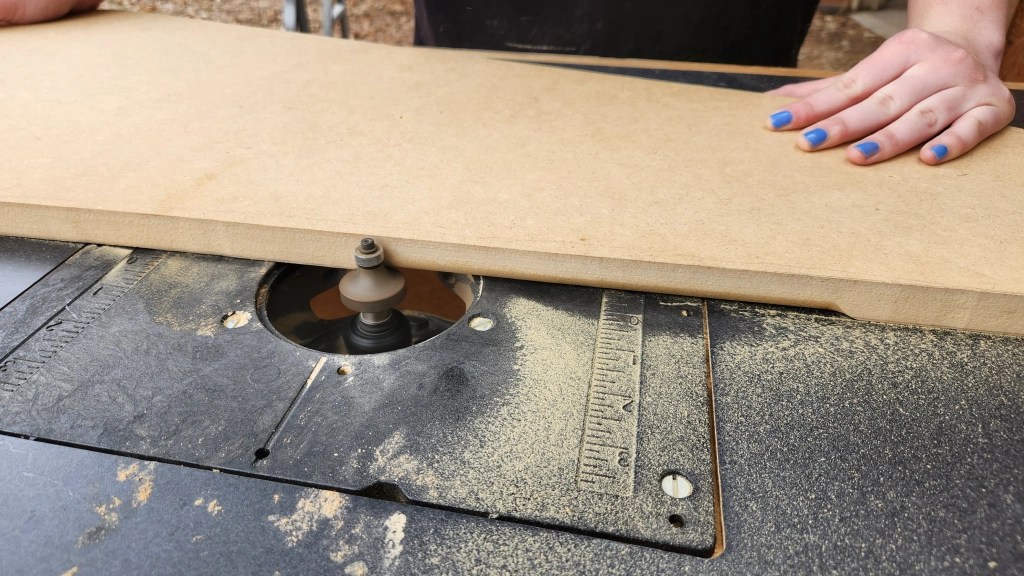
3. I designed two molds, an inner and outer mold, that allowed 2 inches of insulation in-between the inner and outer shells all around. I cut the shapes of the mold on MDF boards. For the top layer of the two molds, I used a router to make a rounded edge on the perimeter of the molds. After each piece was cut, I stacked and glued the pieces on top of each other to reach the depth needed.
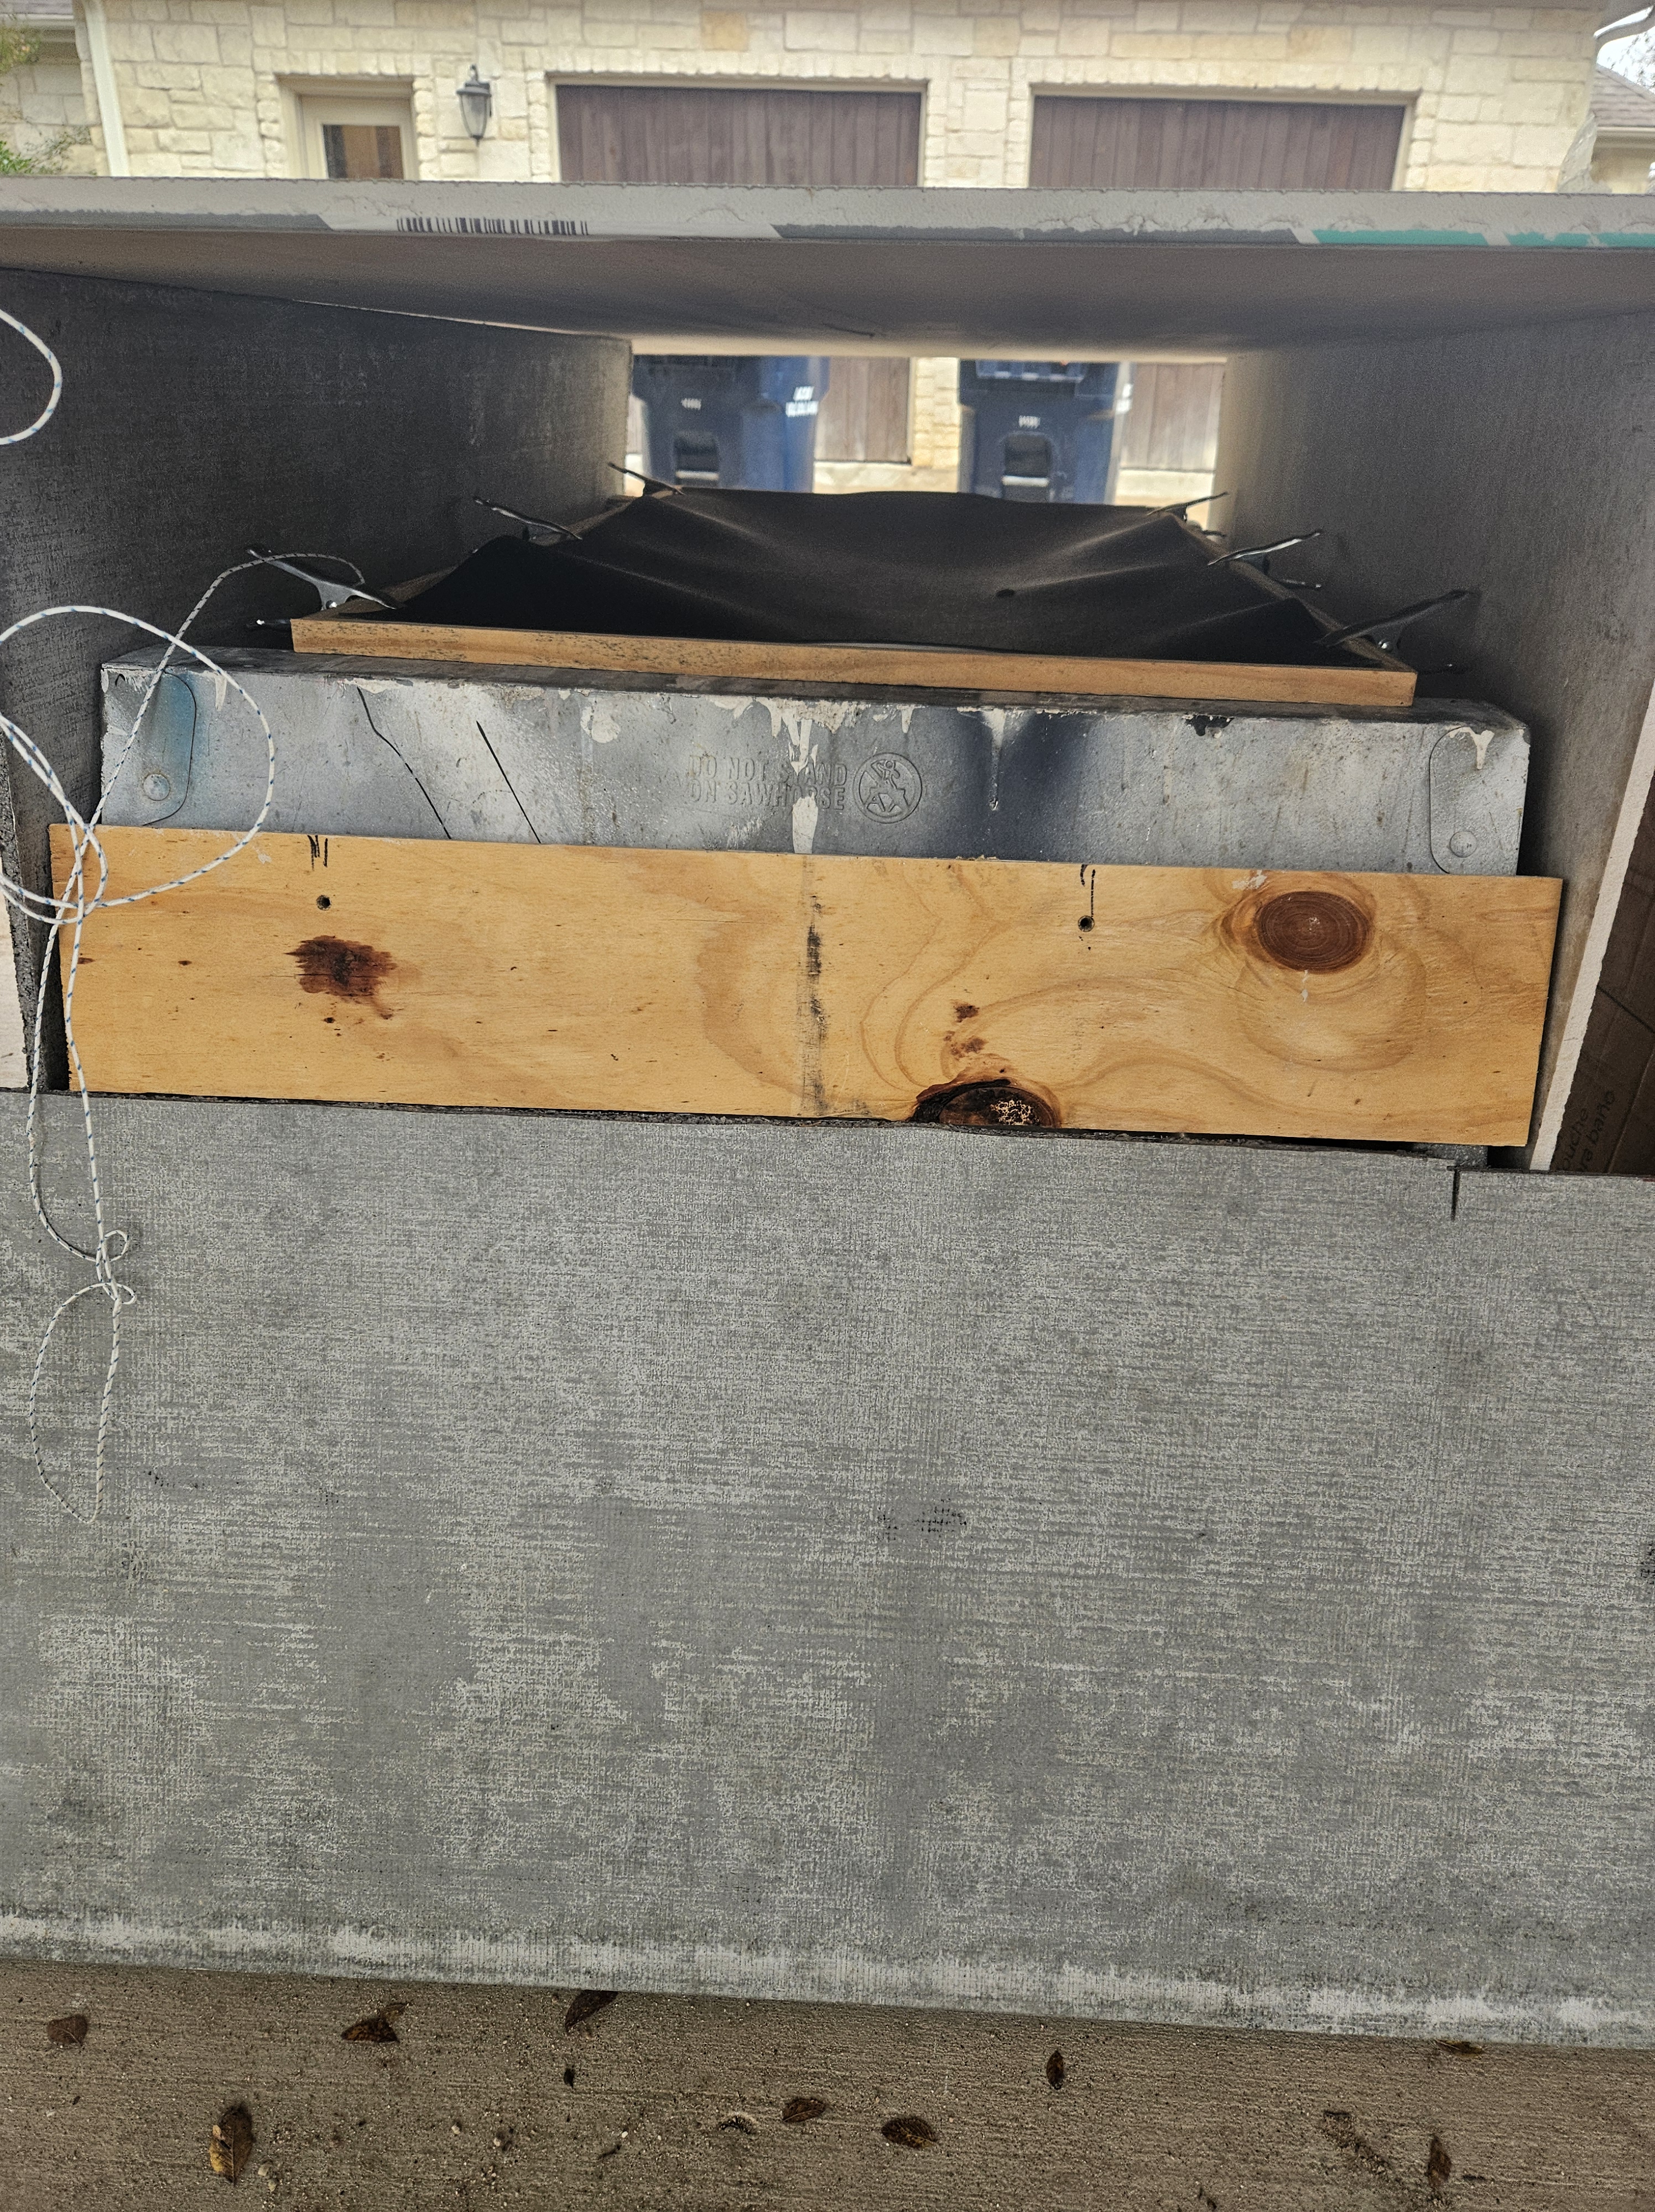
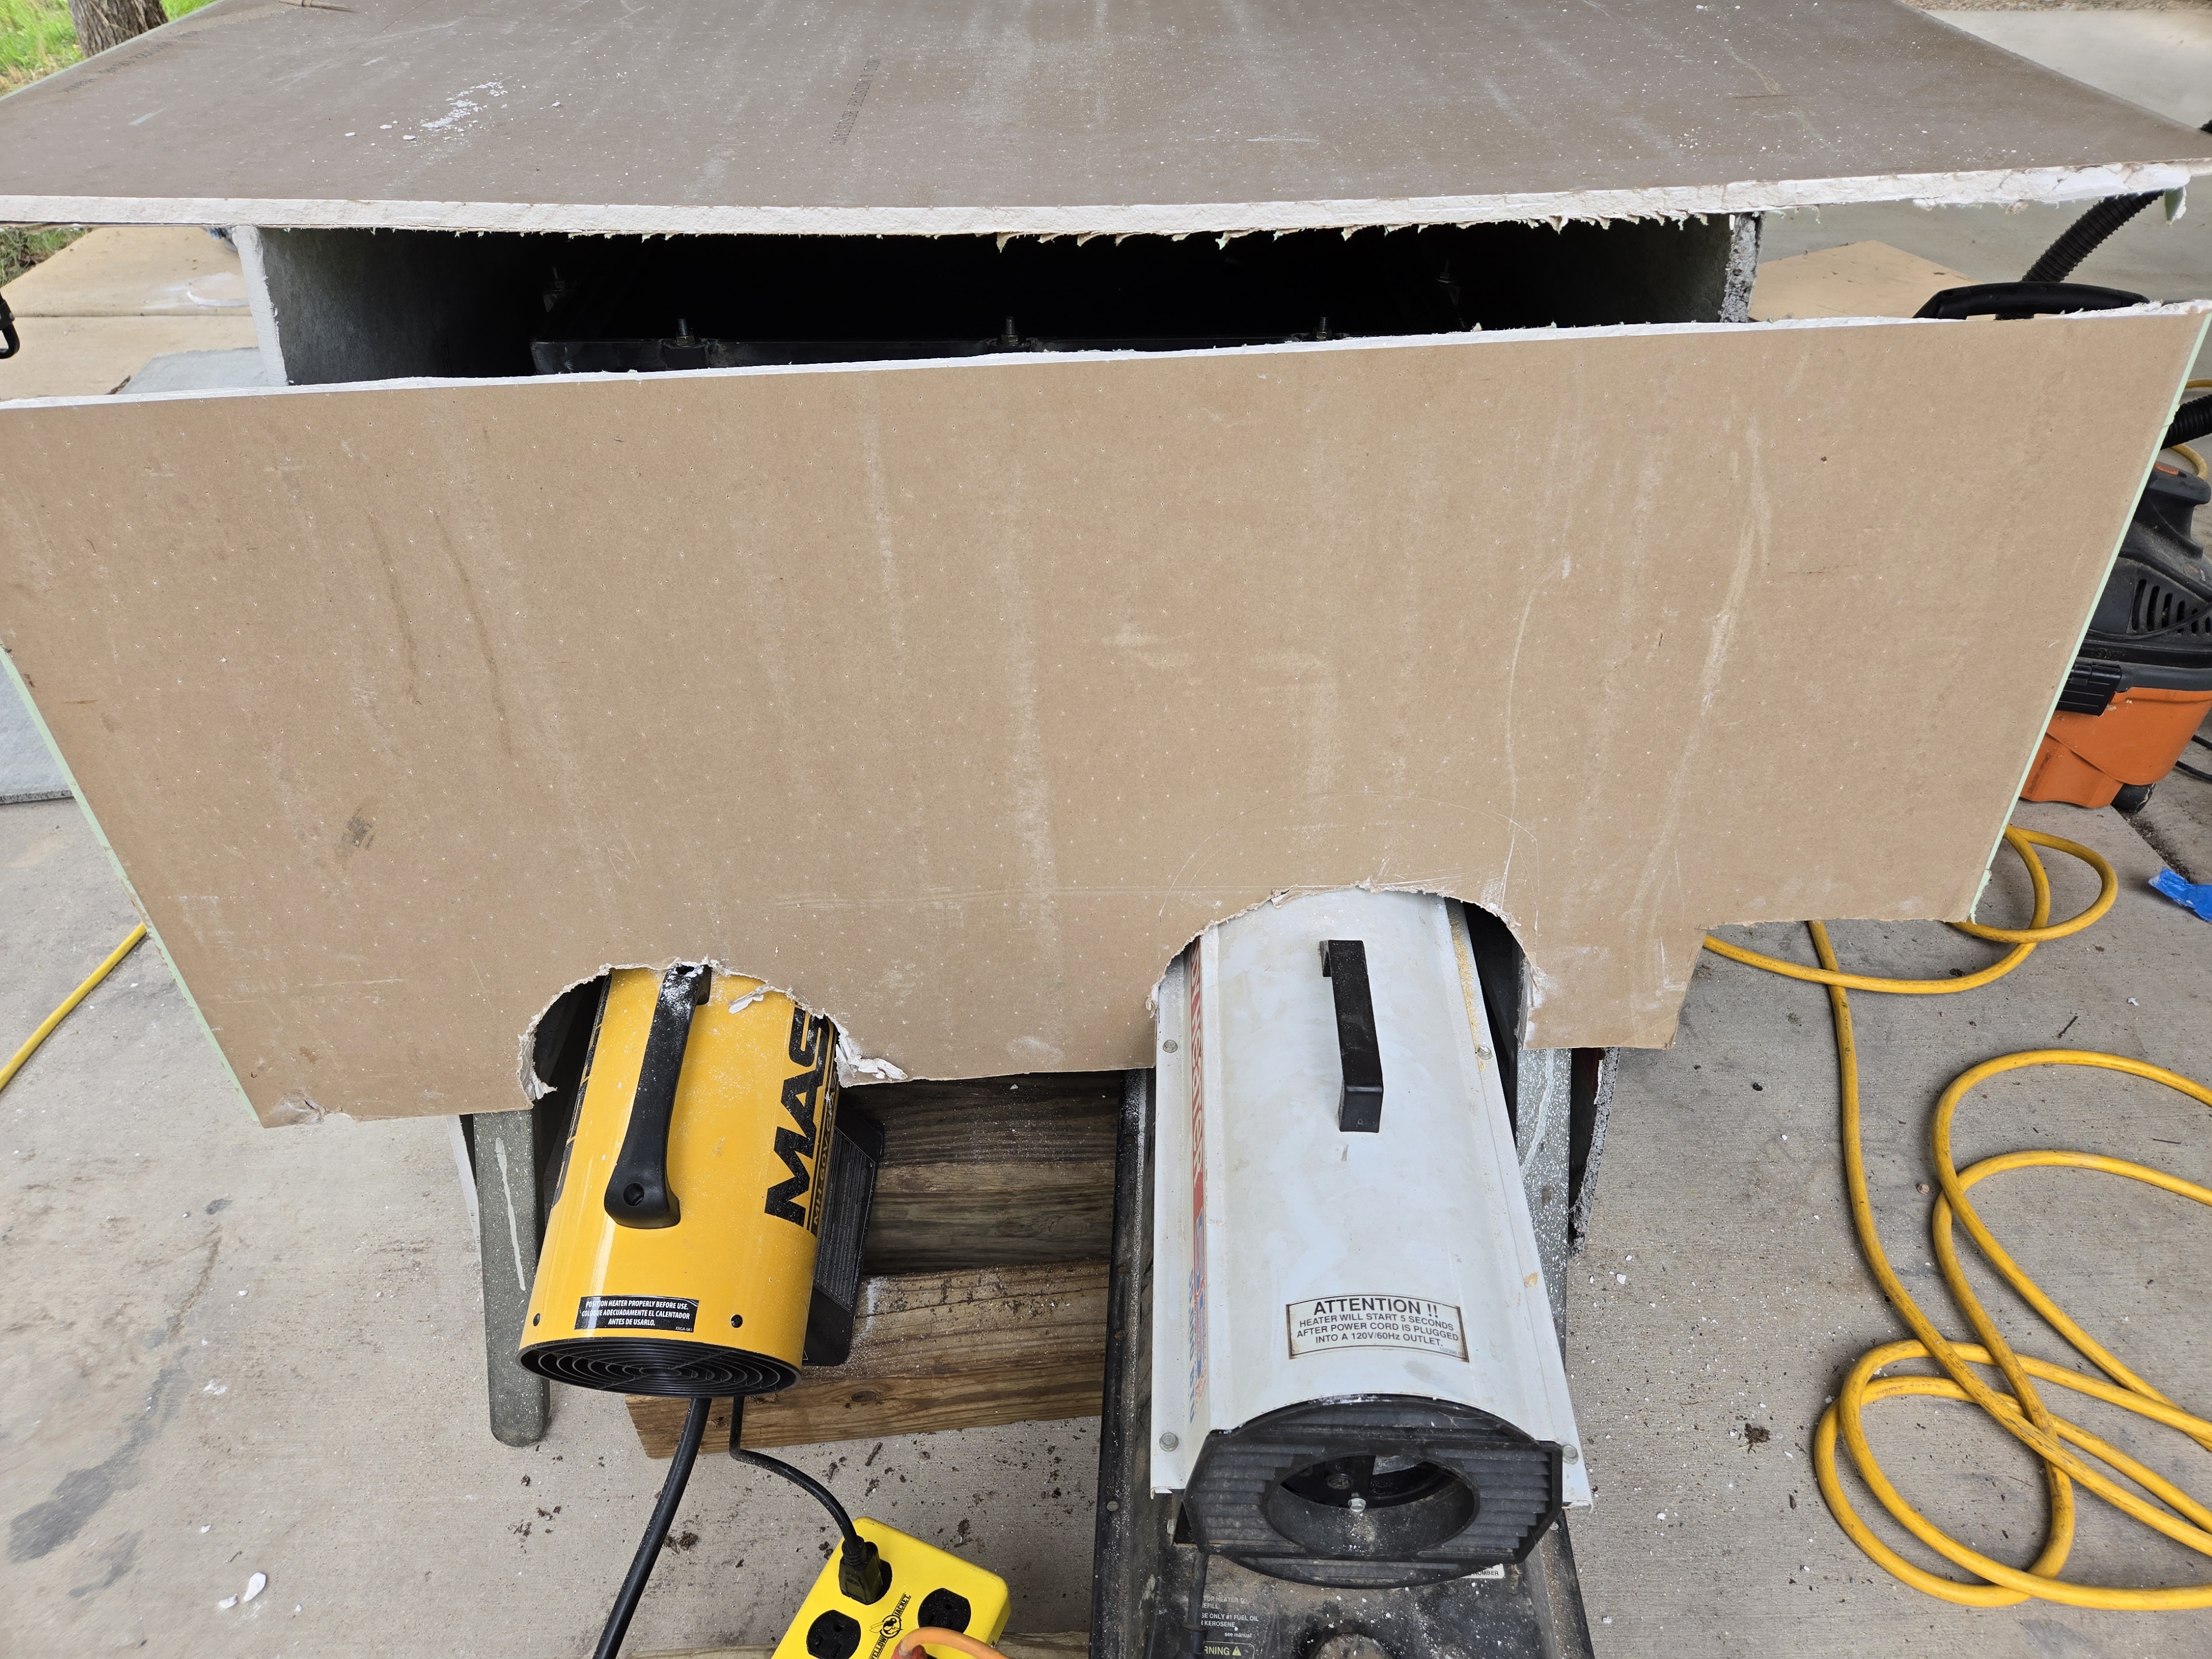
4. I constructed the oven by using concrete boards and heaters. I surrounded the metal sawhorses with concrete boards to create the exterior part of the oven. I placed heaters on two opposite sides underneath the sawhorses.

5. Once all the necessary parts were ready, I began the thermoforming process. I started by securing the plastic sheet onto a frame and placing it on two metal supports mounted on sawhorses. With the plastic properly positioned, I carefully adjusted the heaters, ensuring they were close enough to heat the plastic without melting it off the frame.
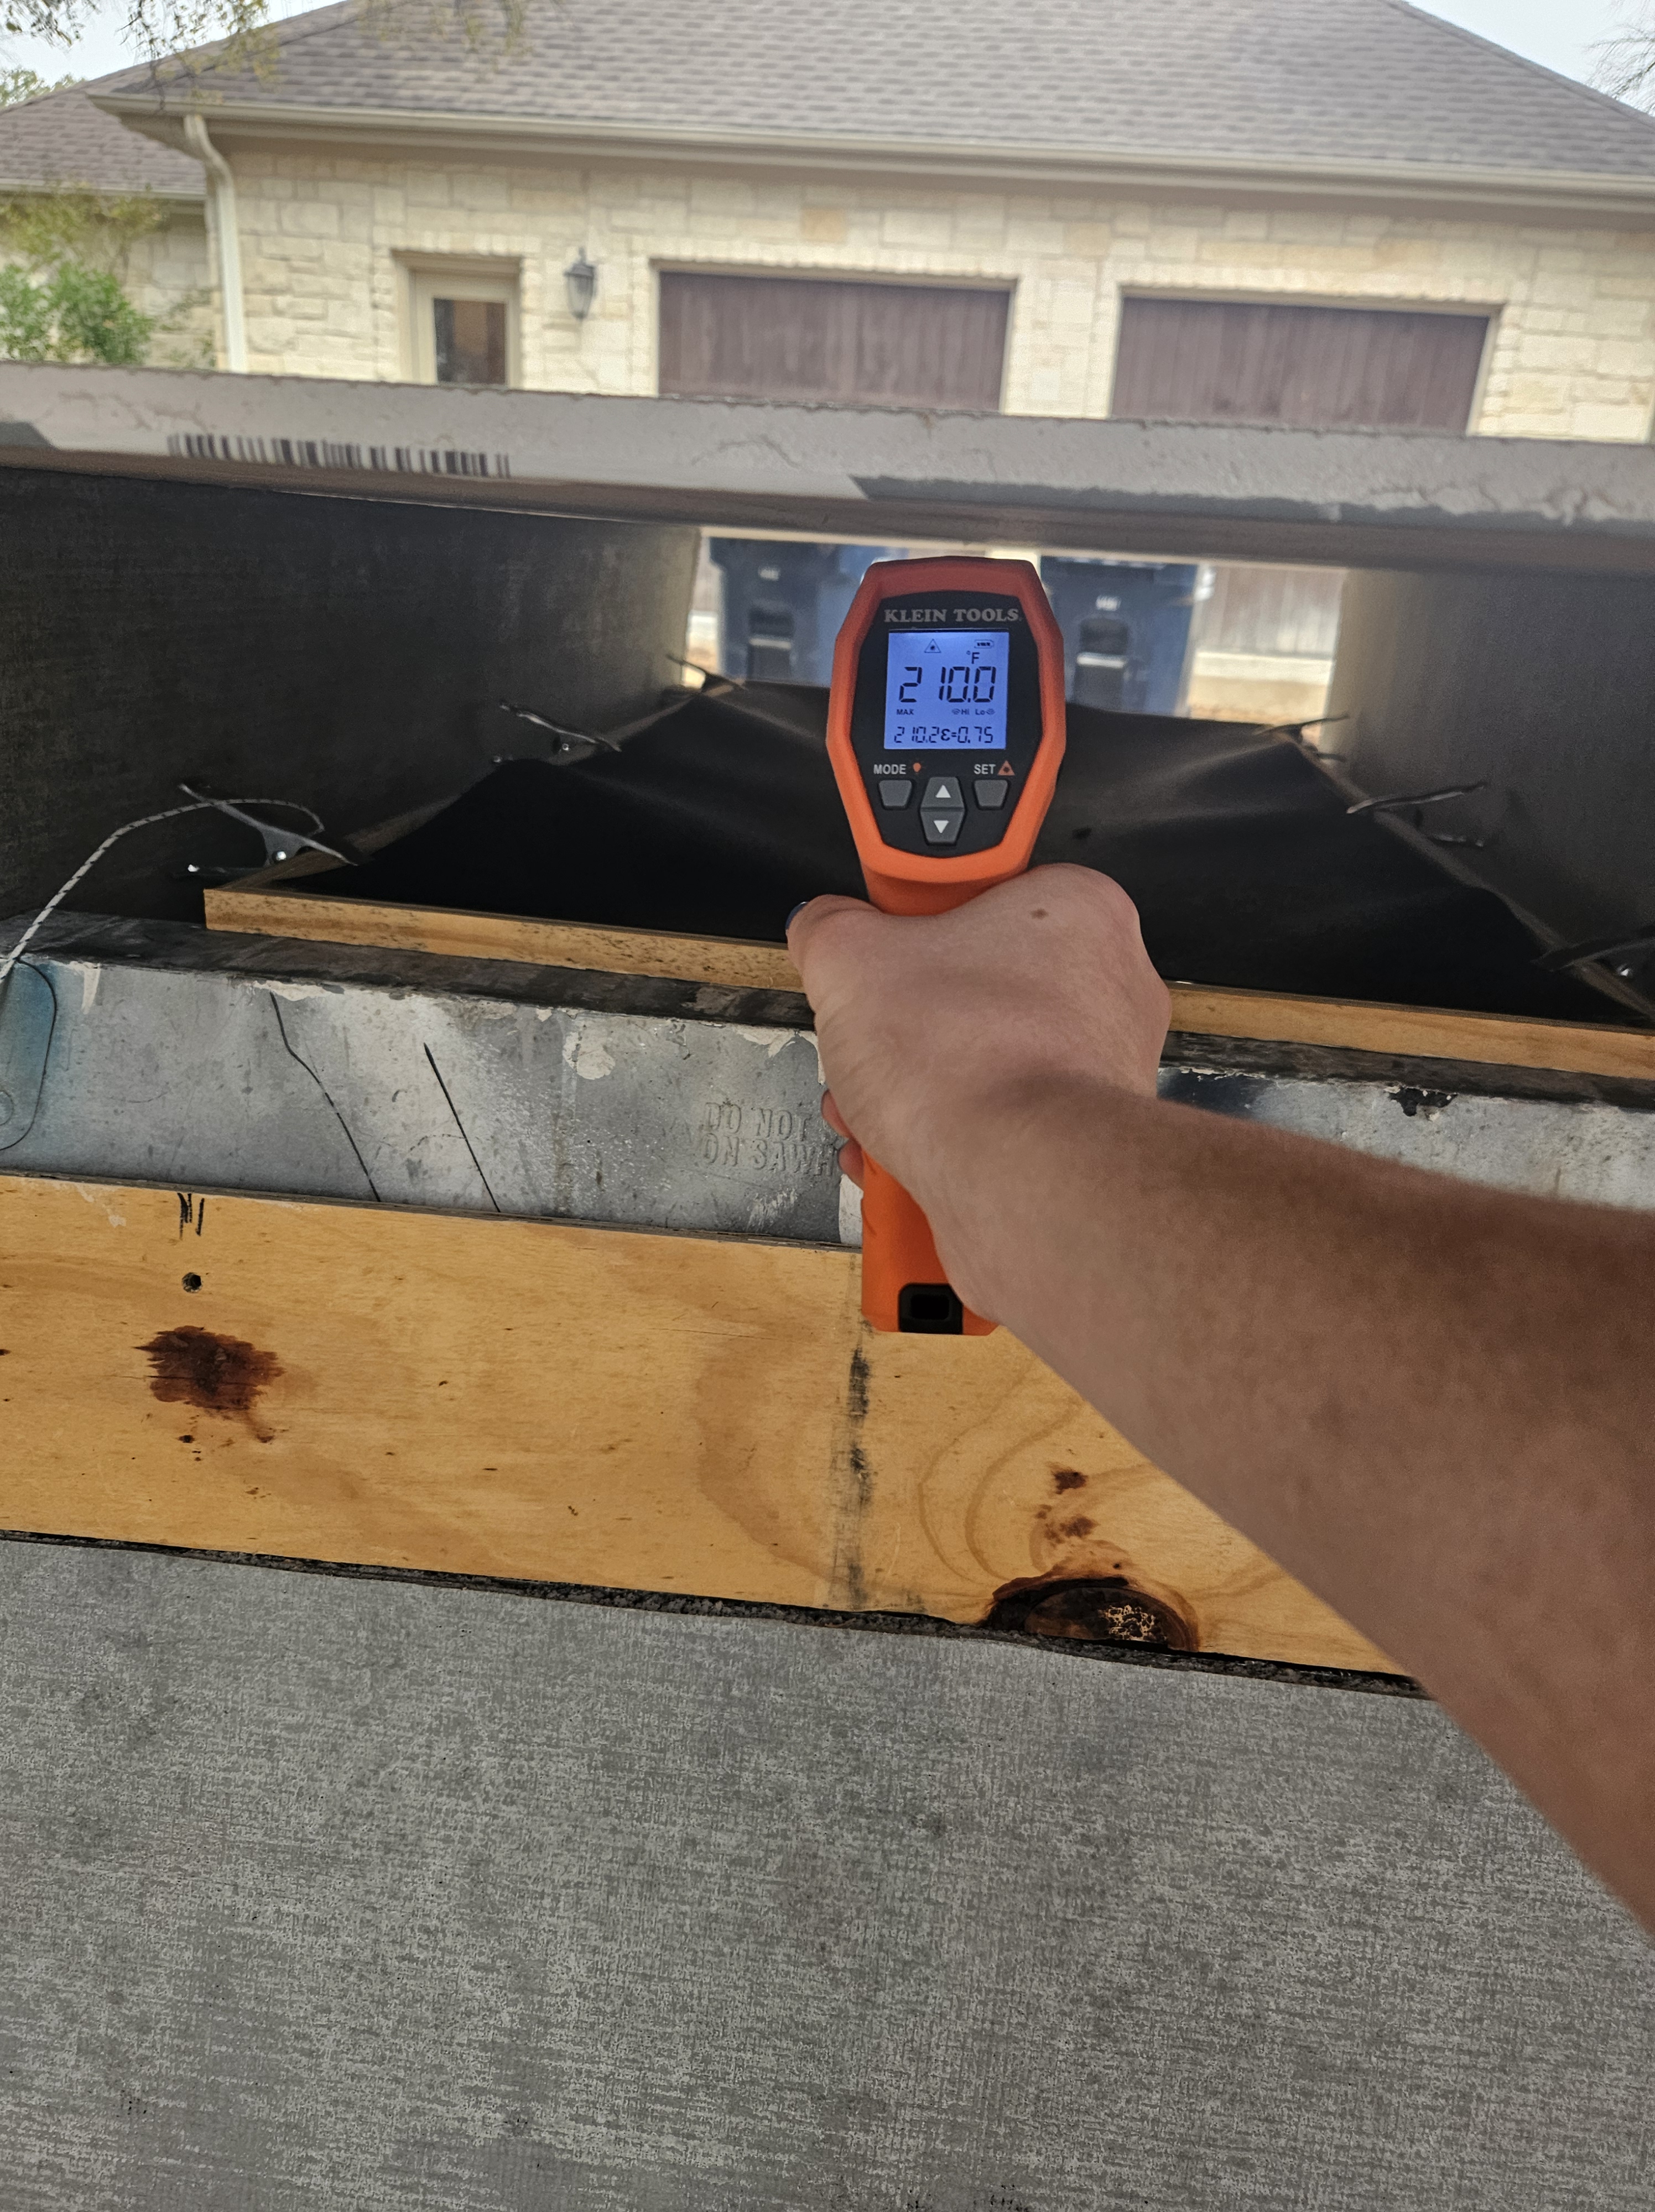
6. I waited for the plastic to heat up to a range of 260-300 degrees Fahrenheit. Once it reached the ideal temperature, I quickly transferred the frame onto the vacuum box with the vacuums running. As I pressed the frame down, the vacuum pulled the softened plastic tightly over the mold, shaping it to the design.
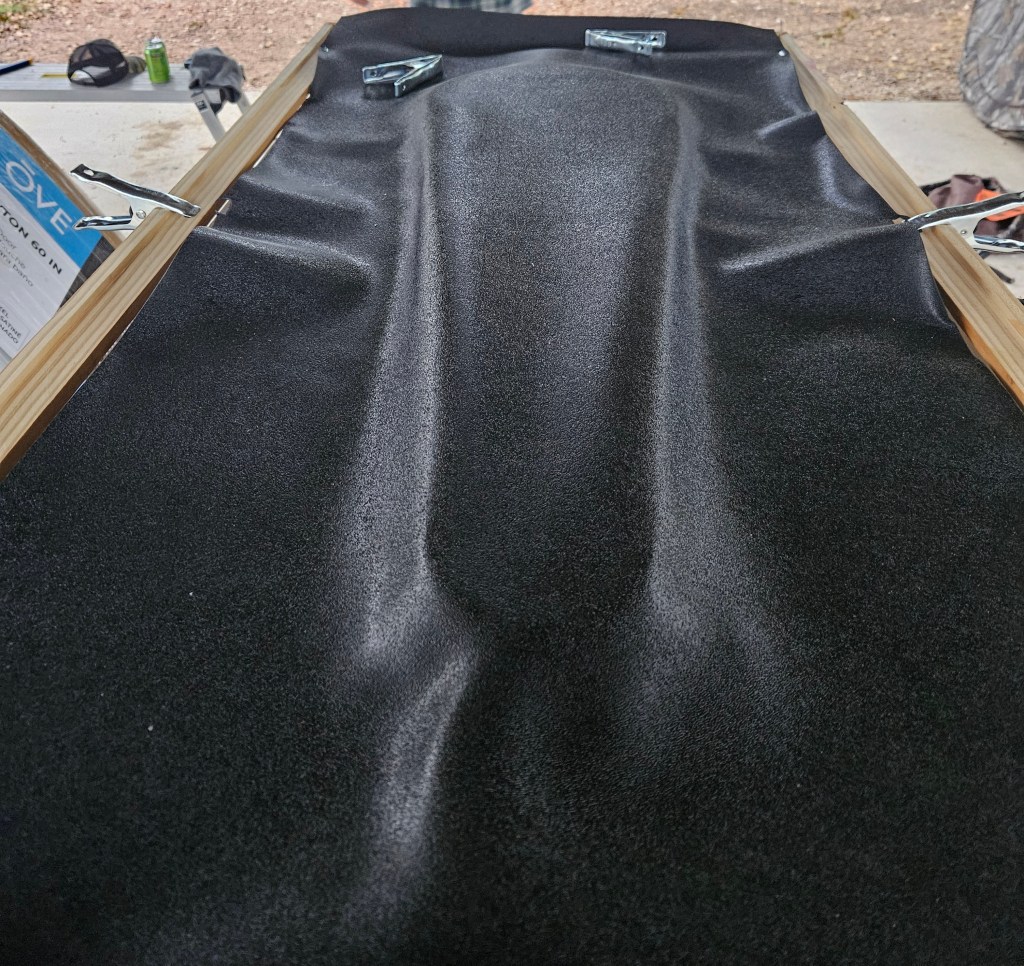
7. After 3 minutes, I used heat guns to help heat up the areas of plastic that did not fully form.
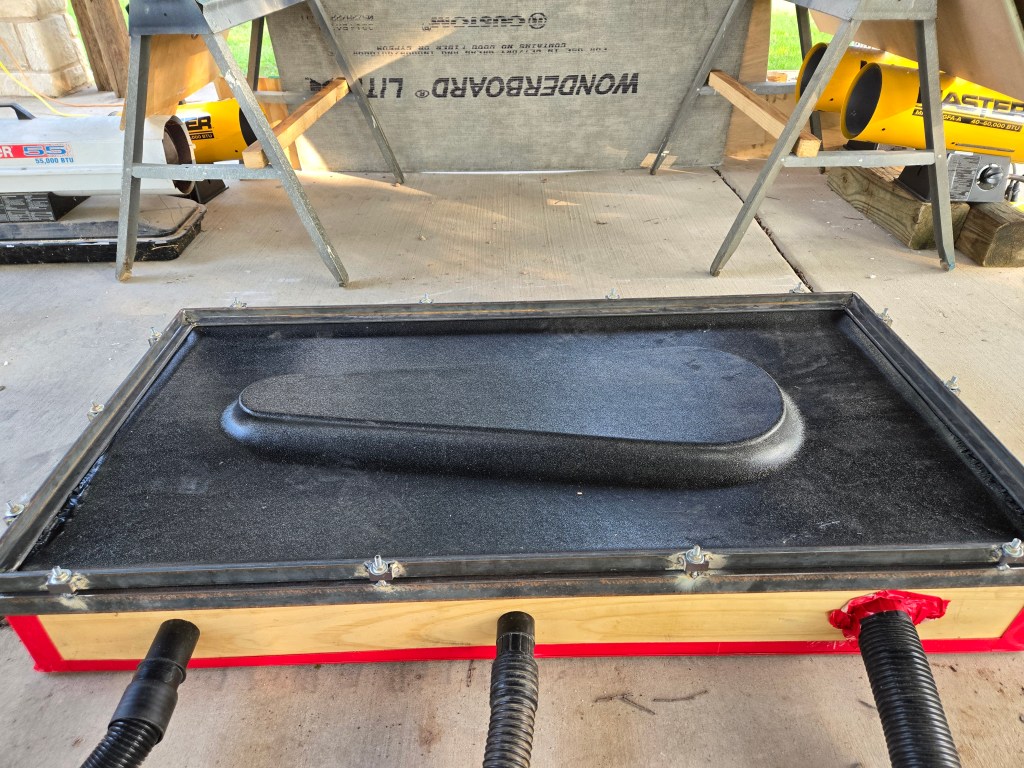
8. Once the plastic was fully formed and cooled, I took the plastic off of the mold and frame.
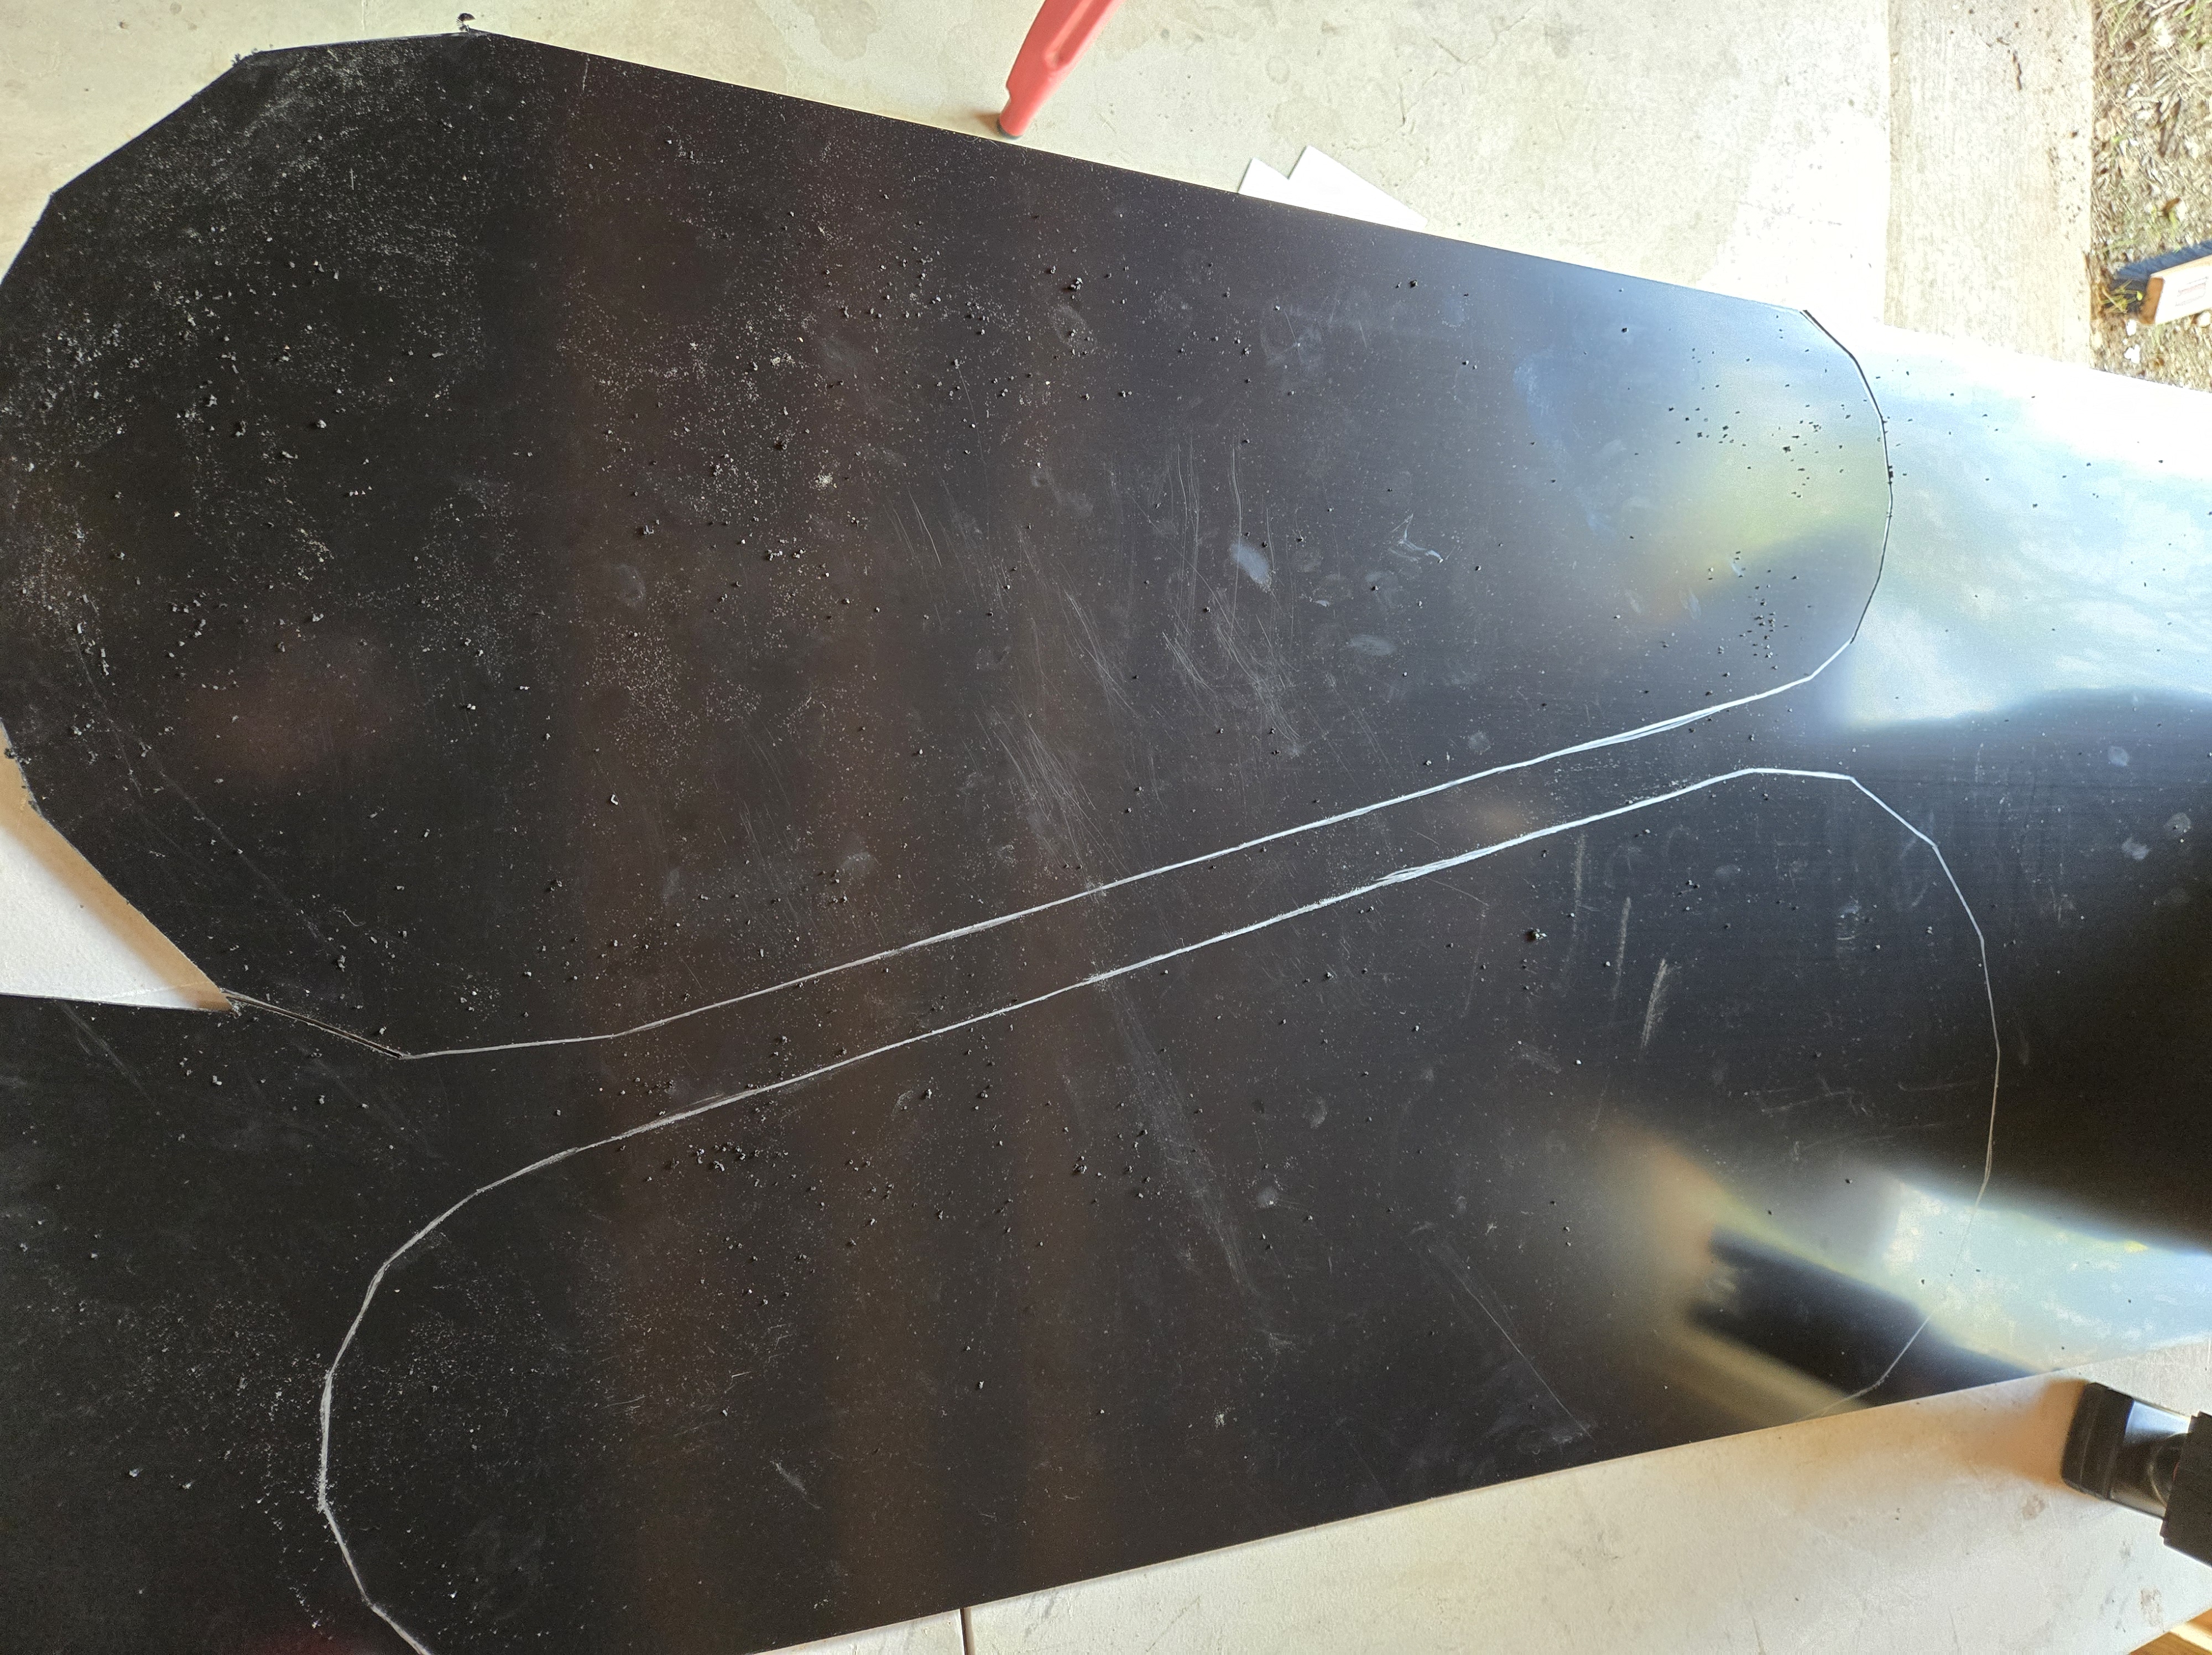
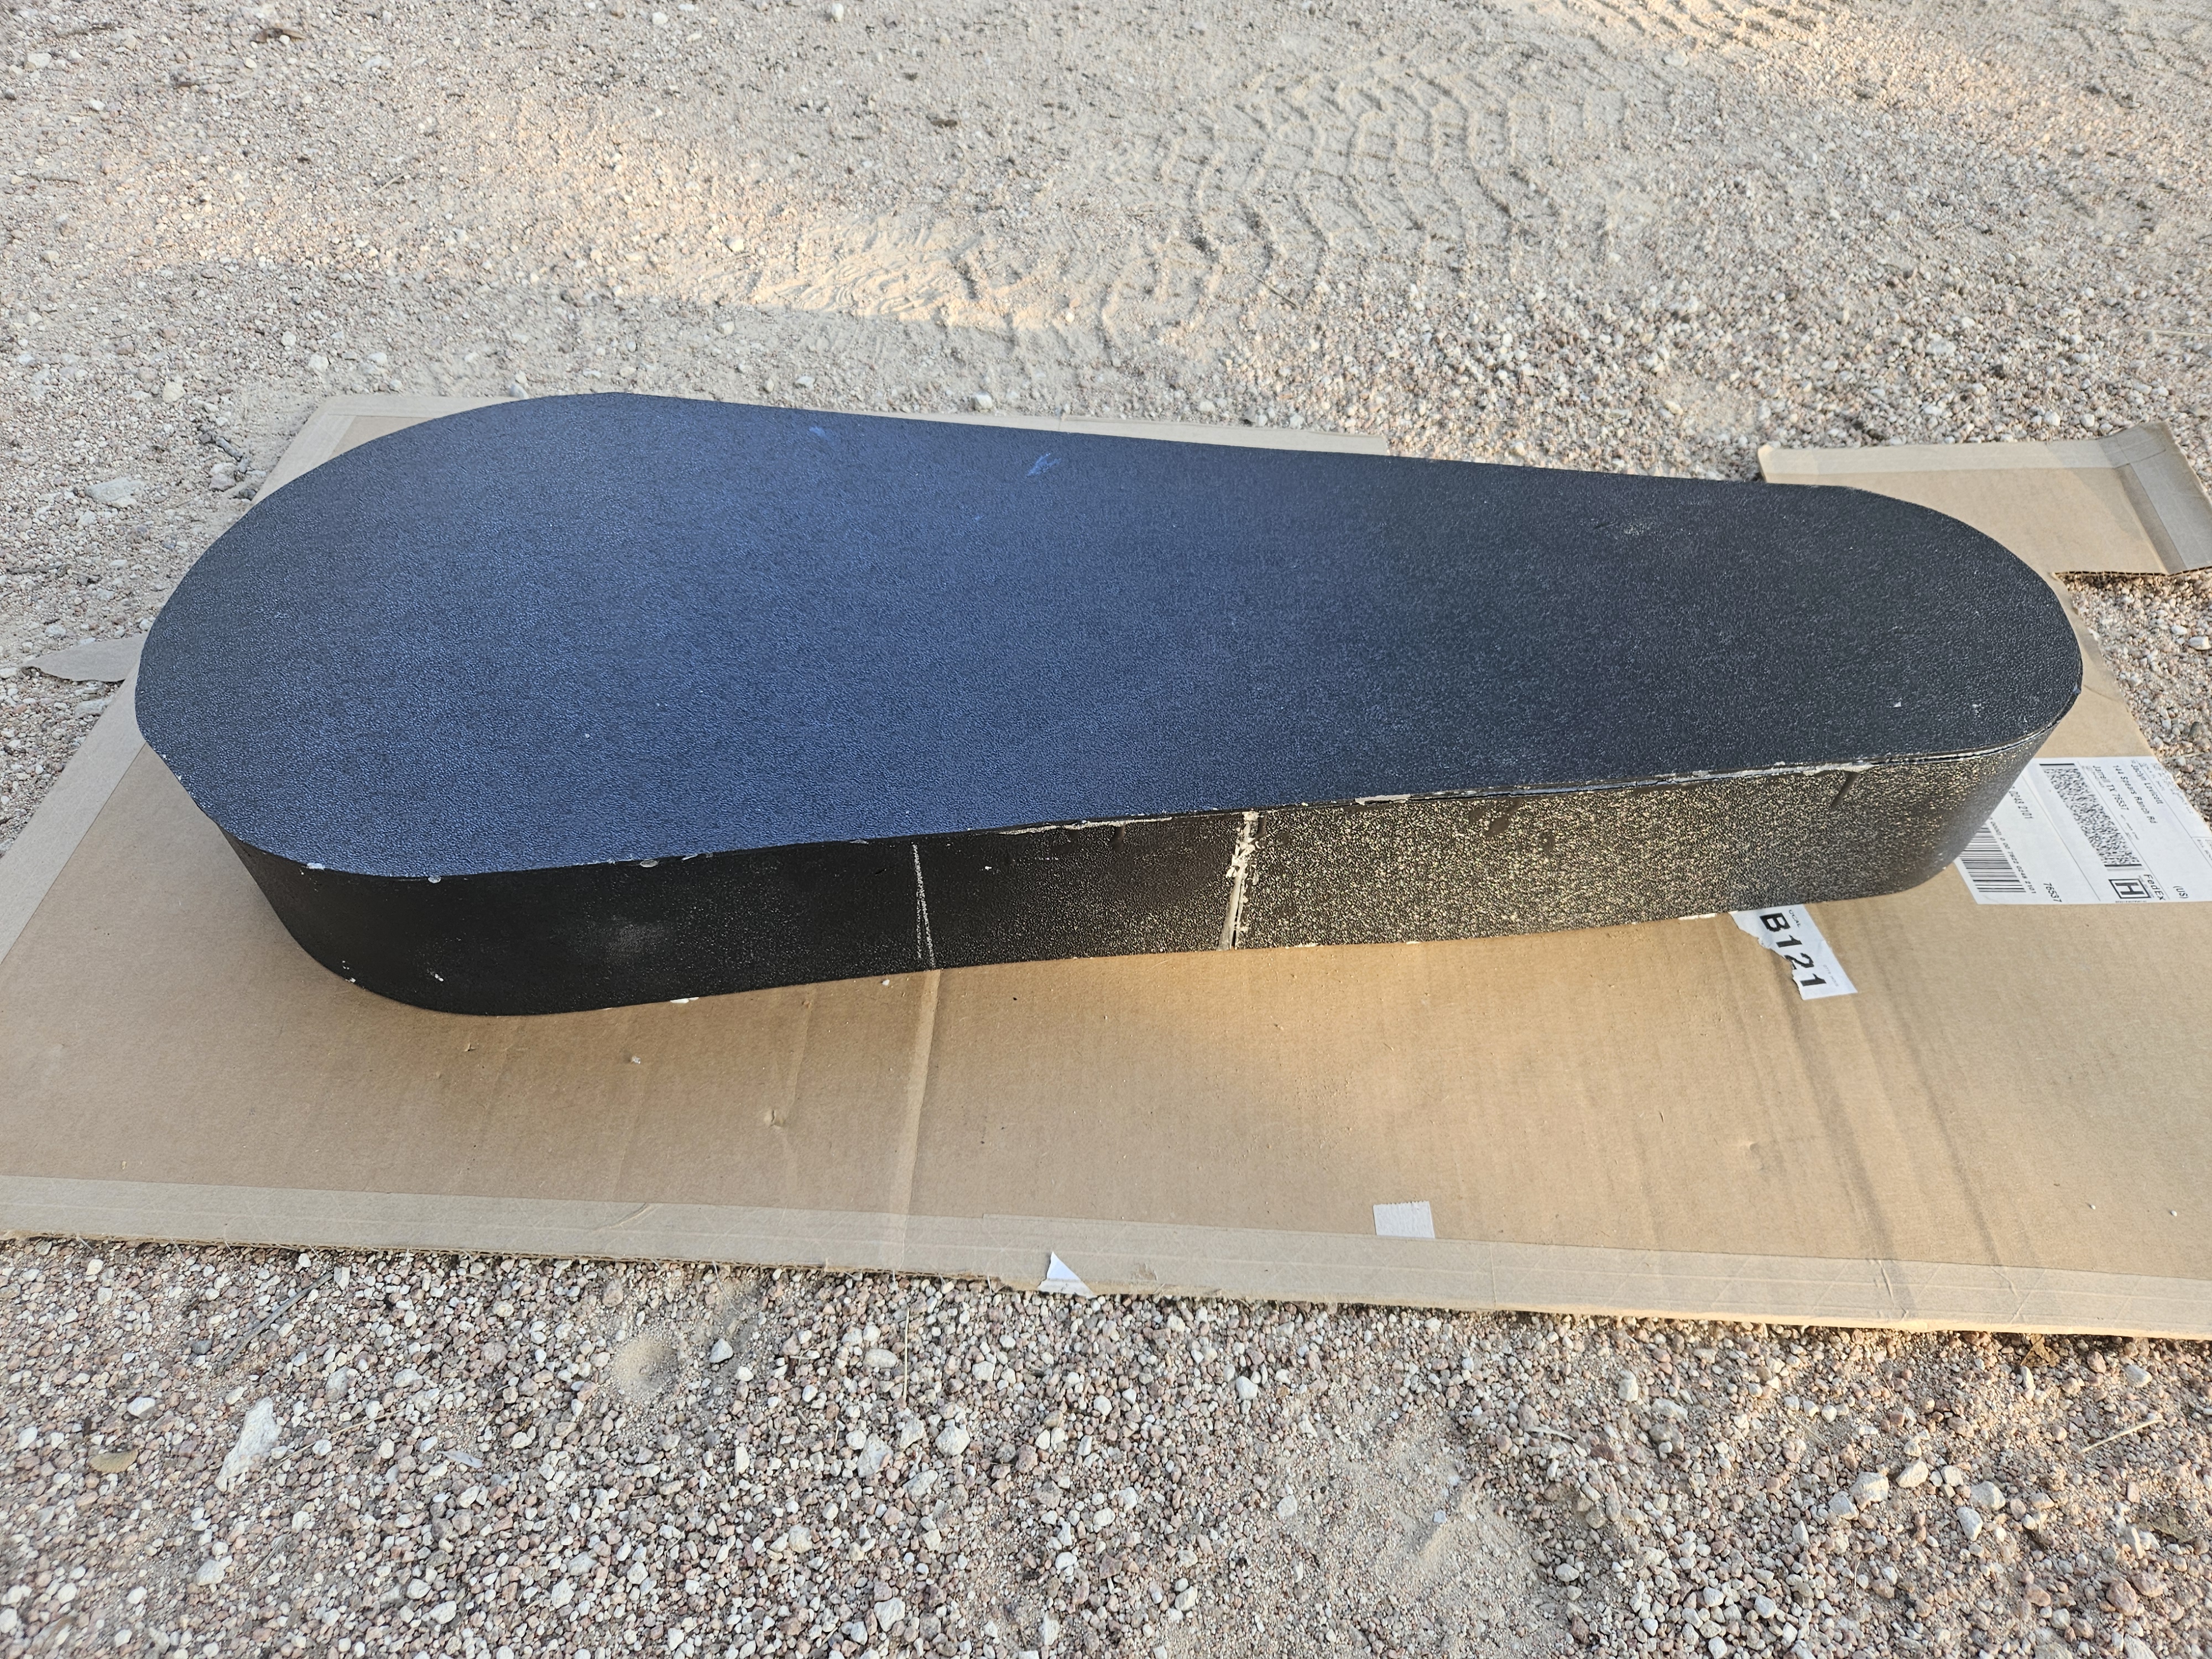
9. Then I used a cutter to cut out the inner shell of the case and removed excess plastic.
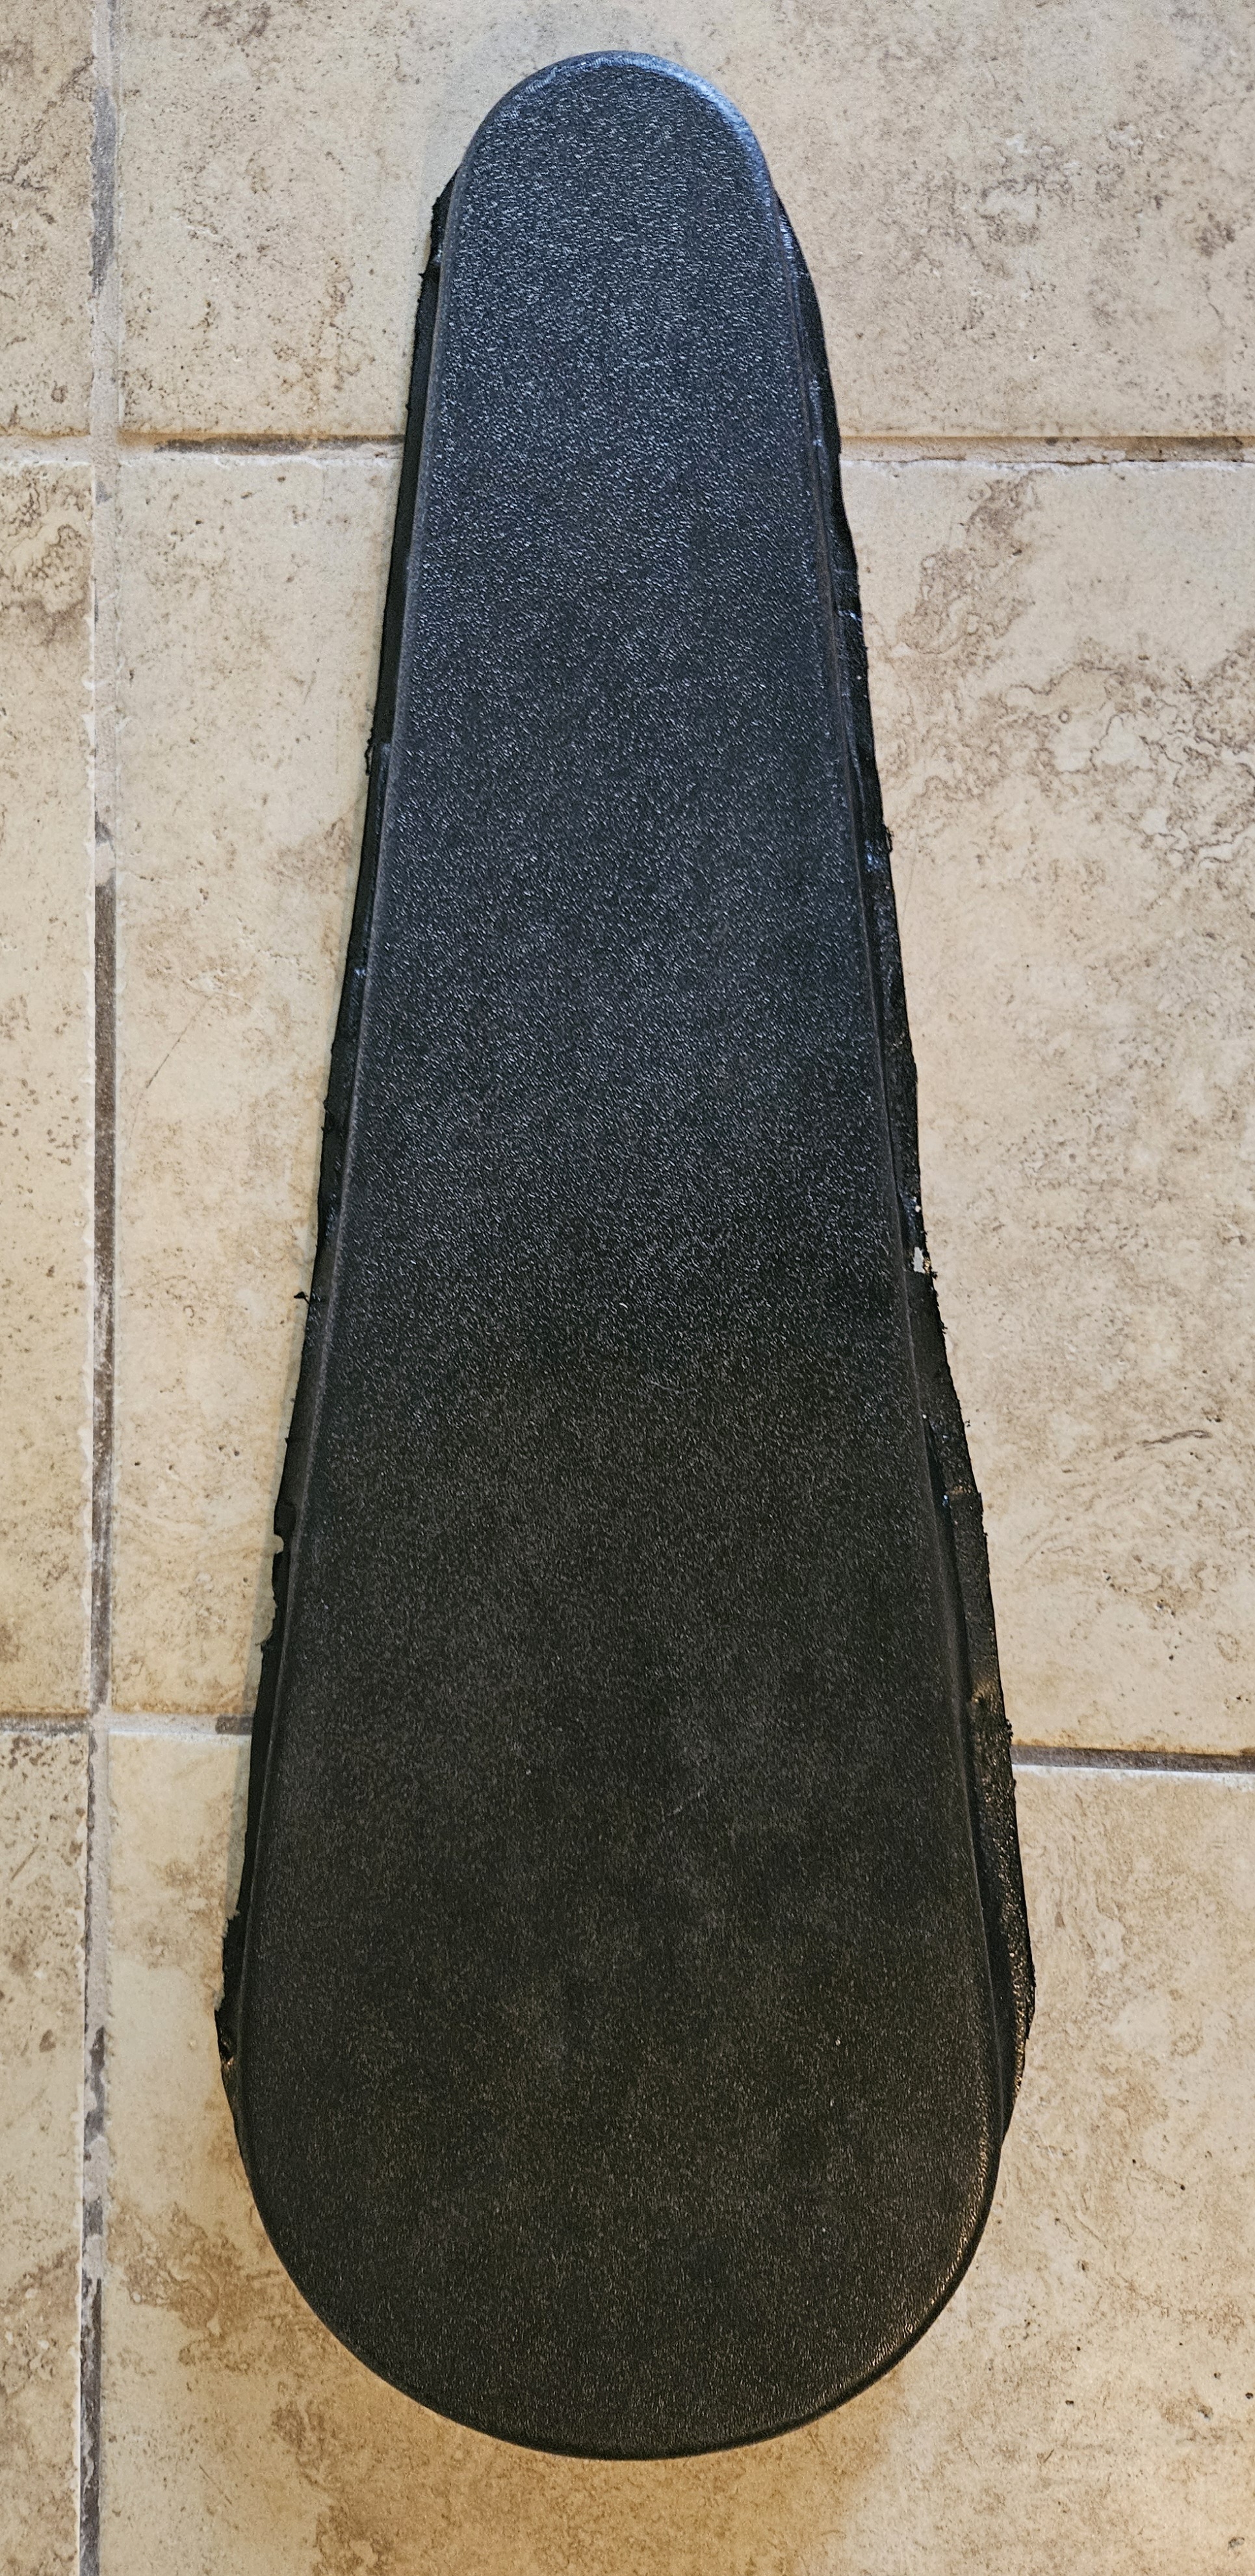
10. The inner shell case I created unfortunately had some flaws, there was holes that formed from the heat gun and the case did not take full shape so I decided to update and improve some of the parts used for thermoforming.
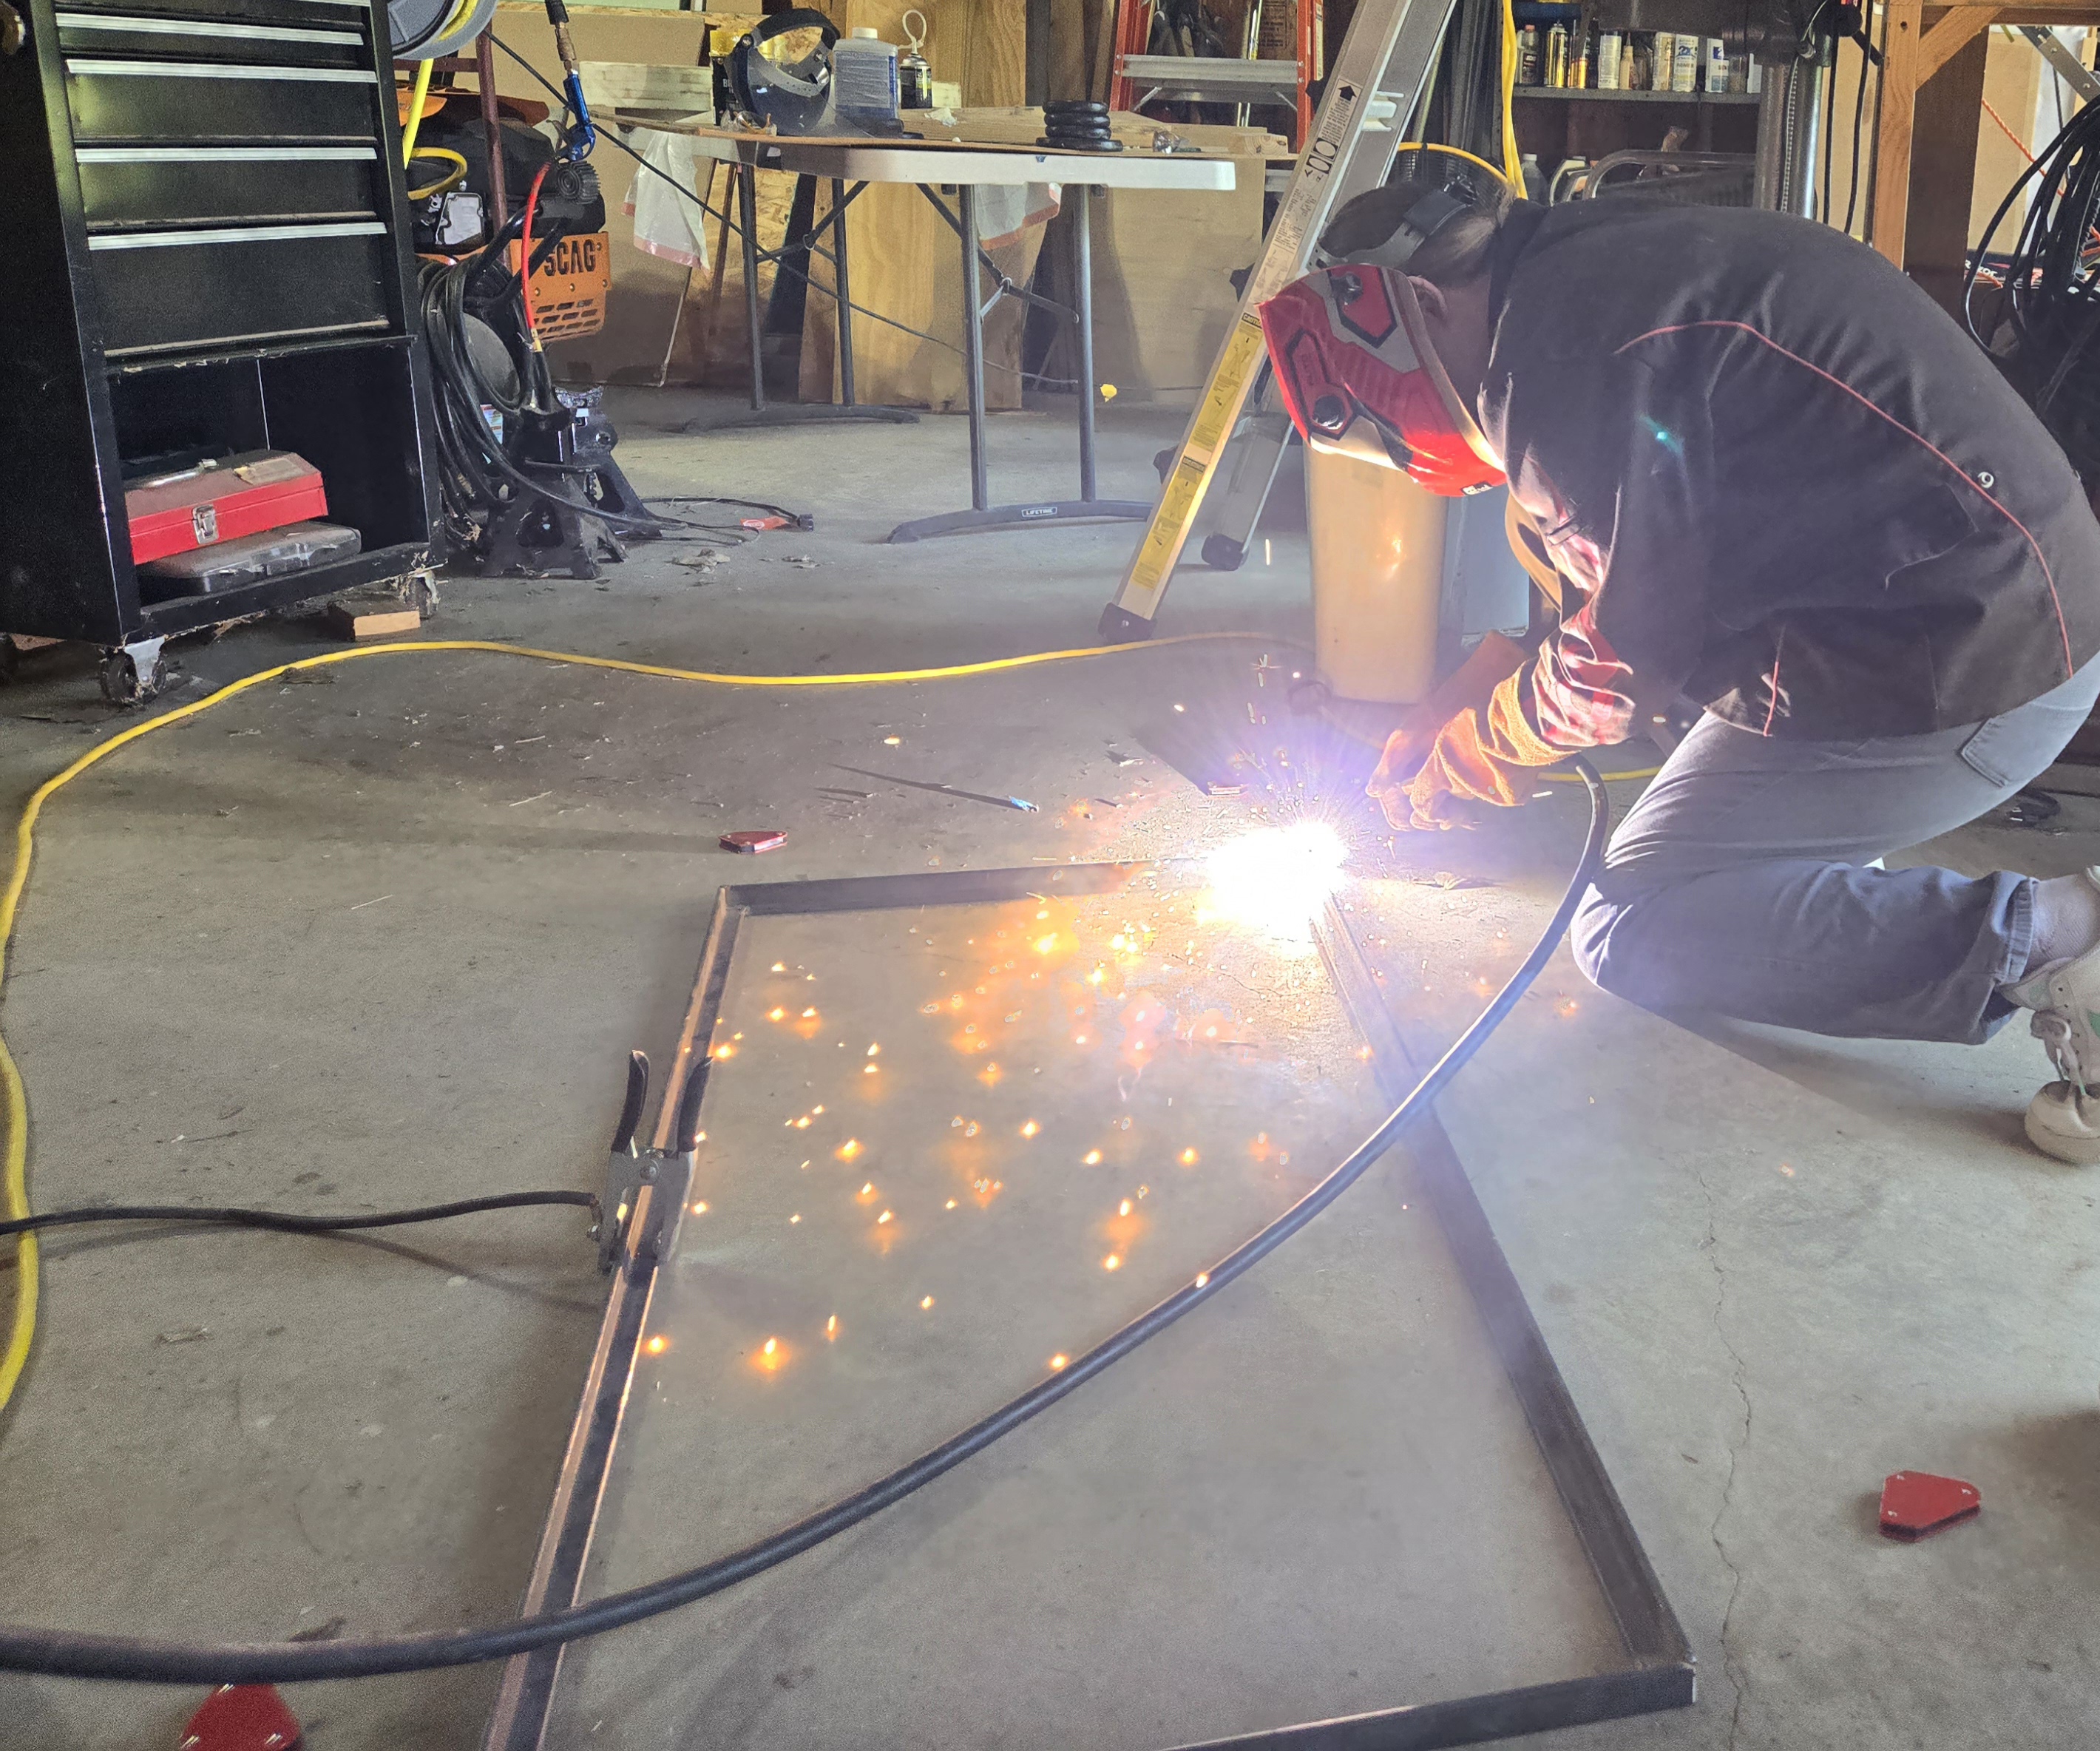
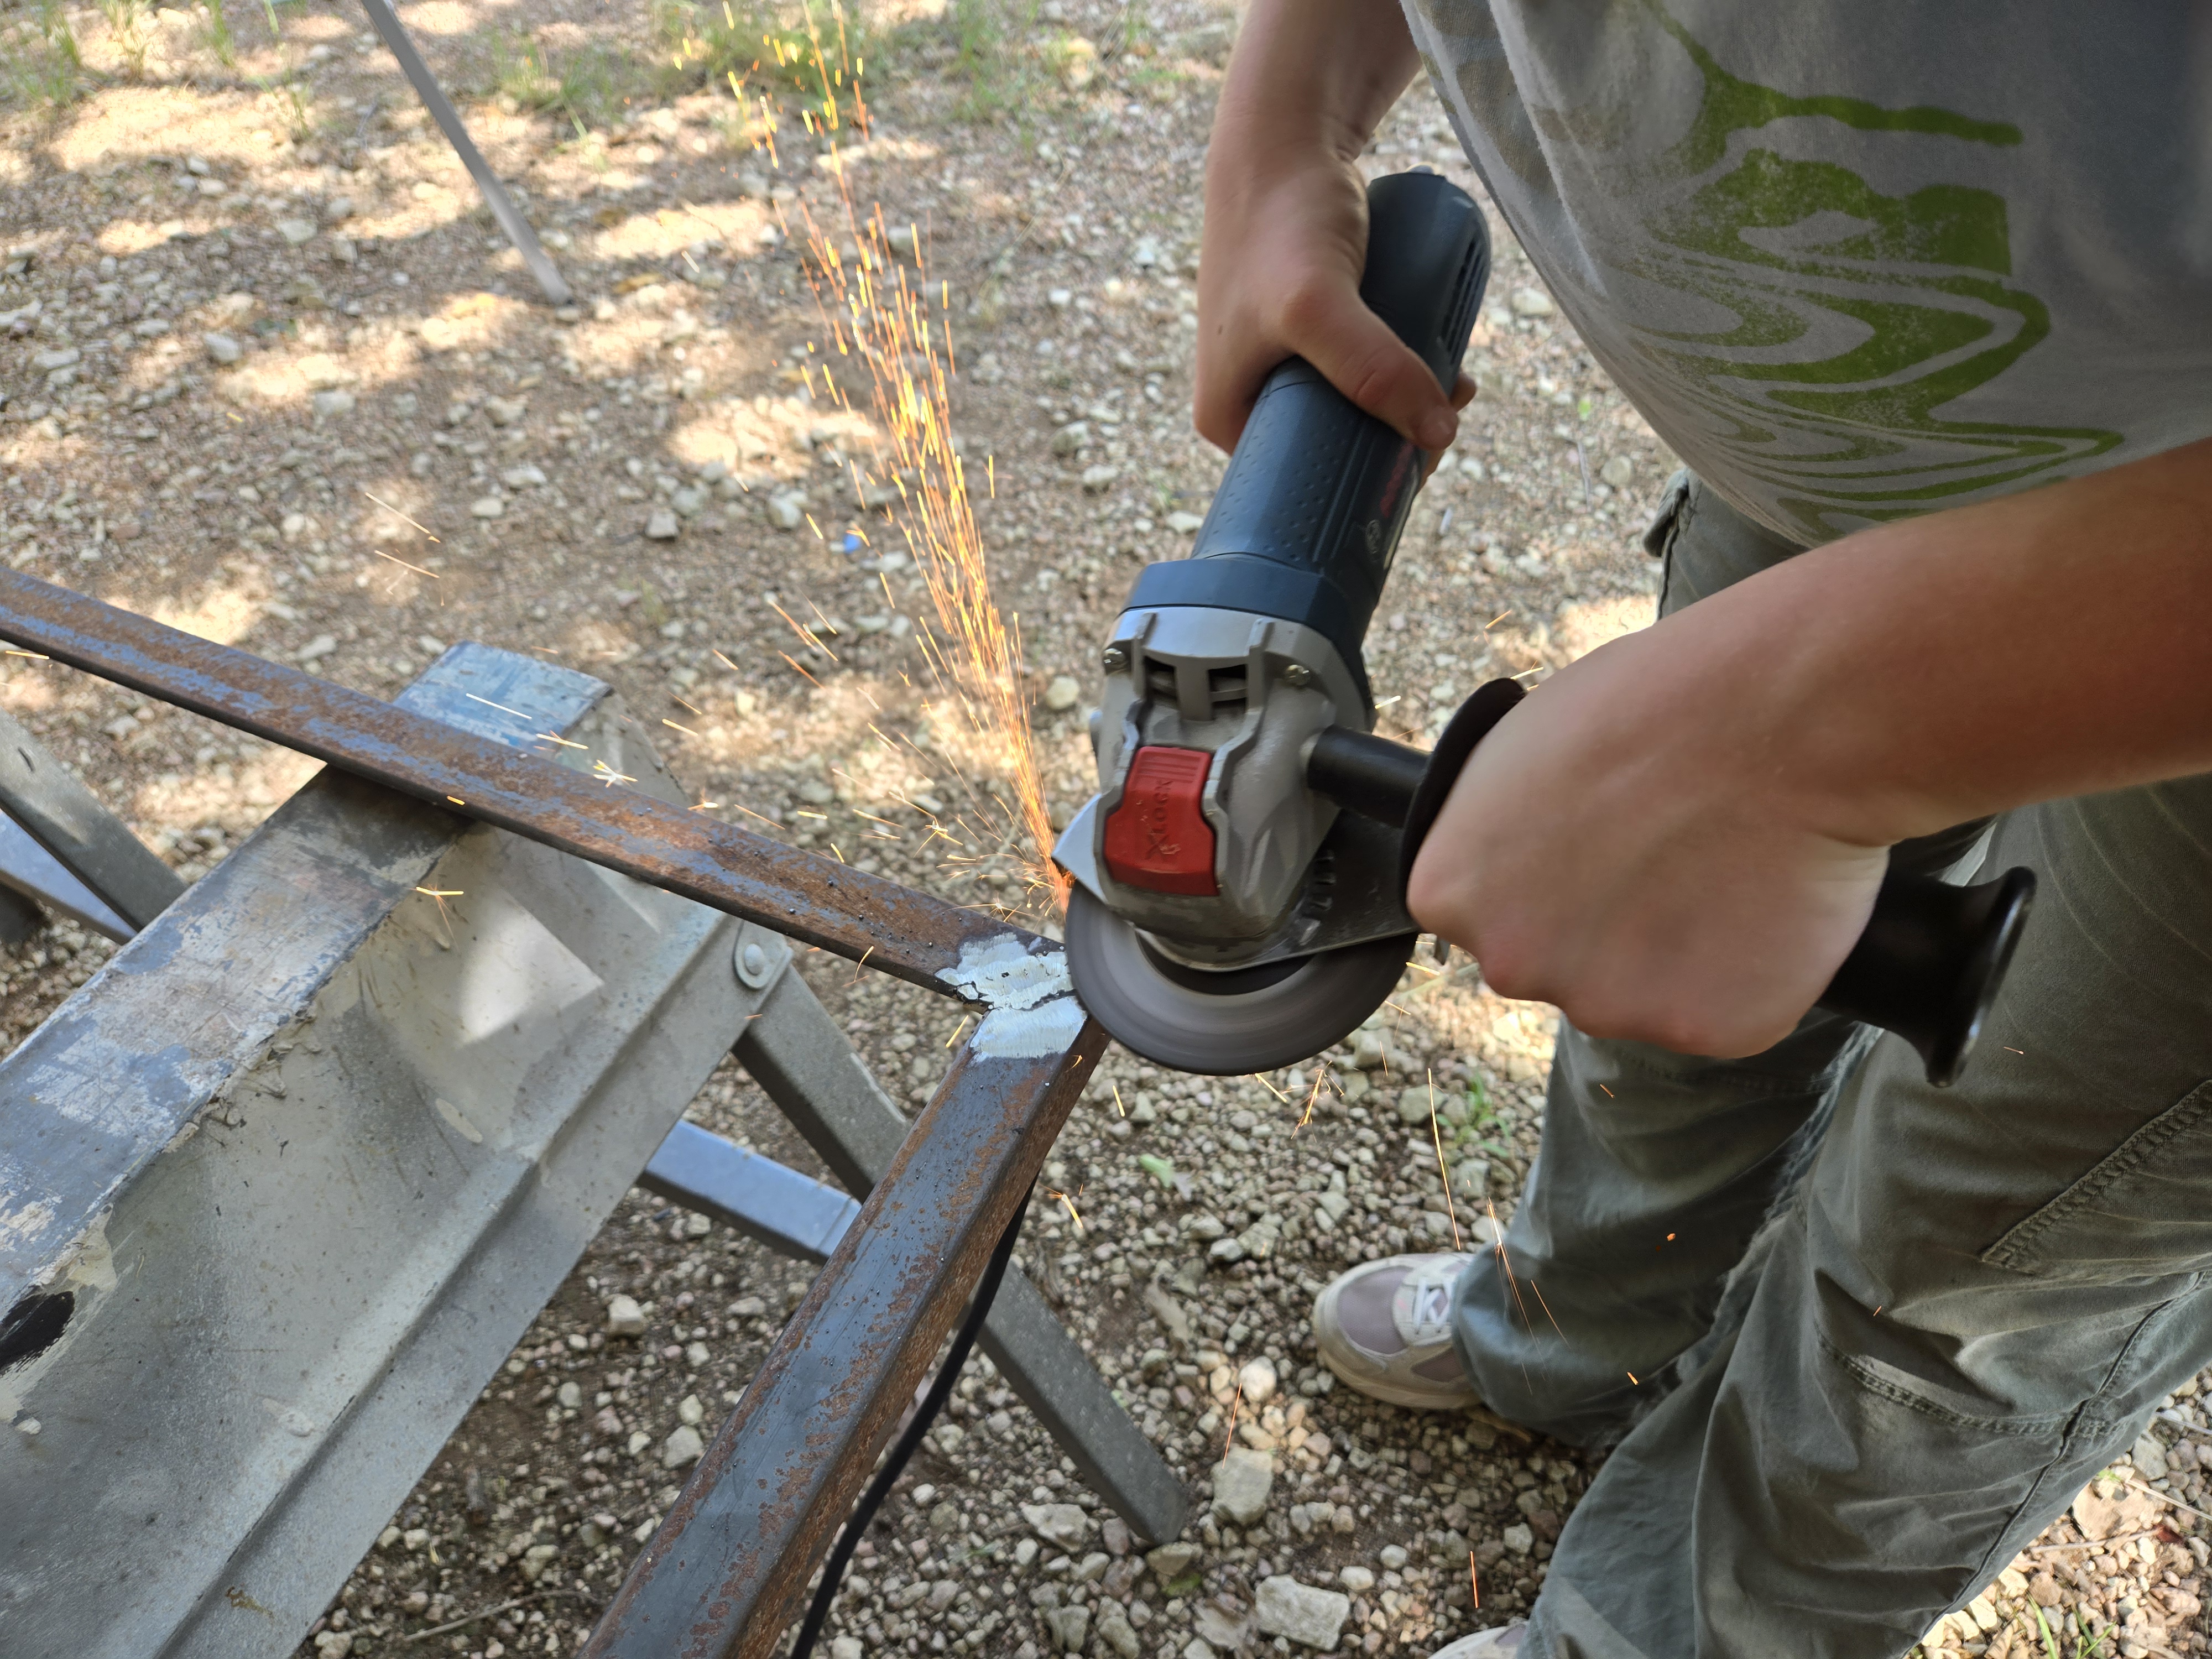
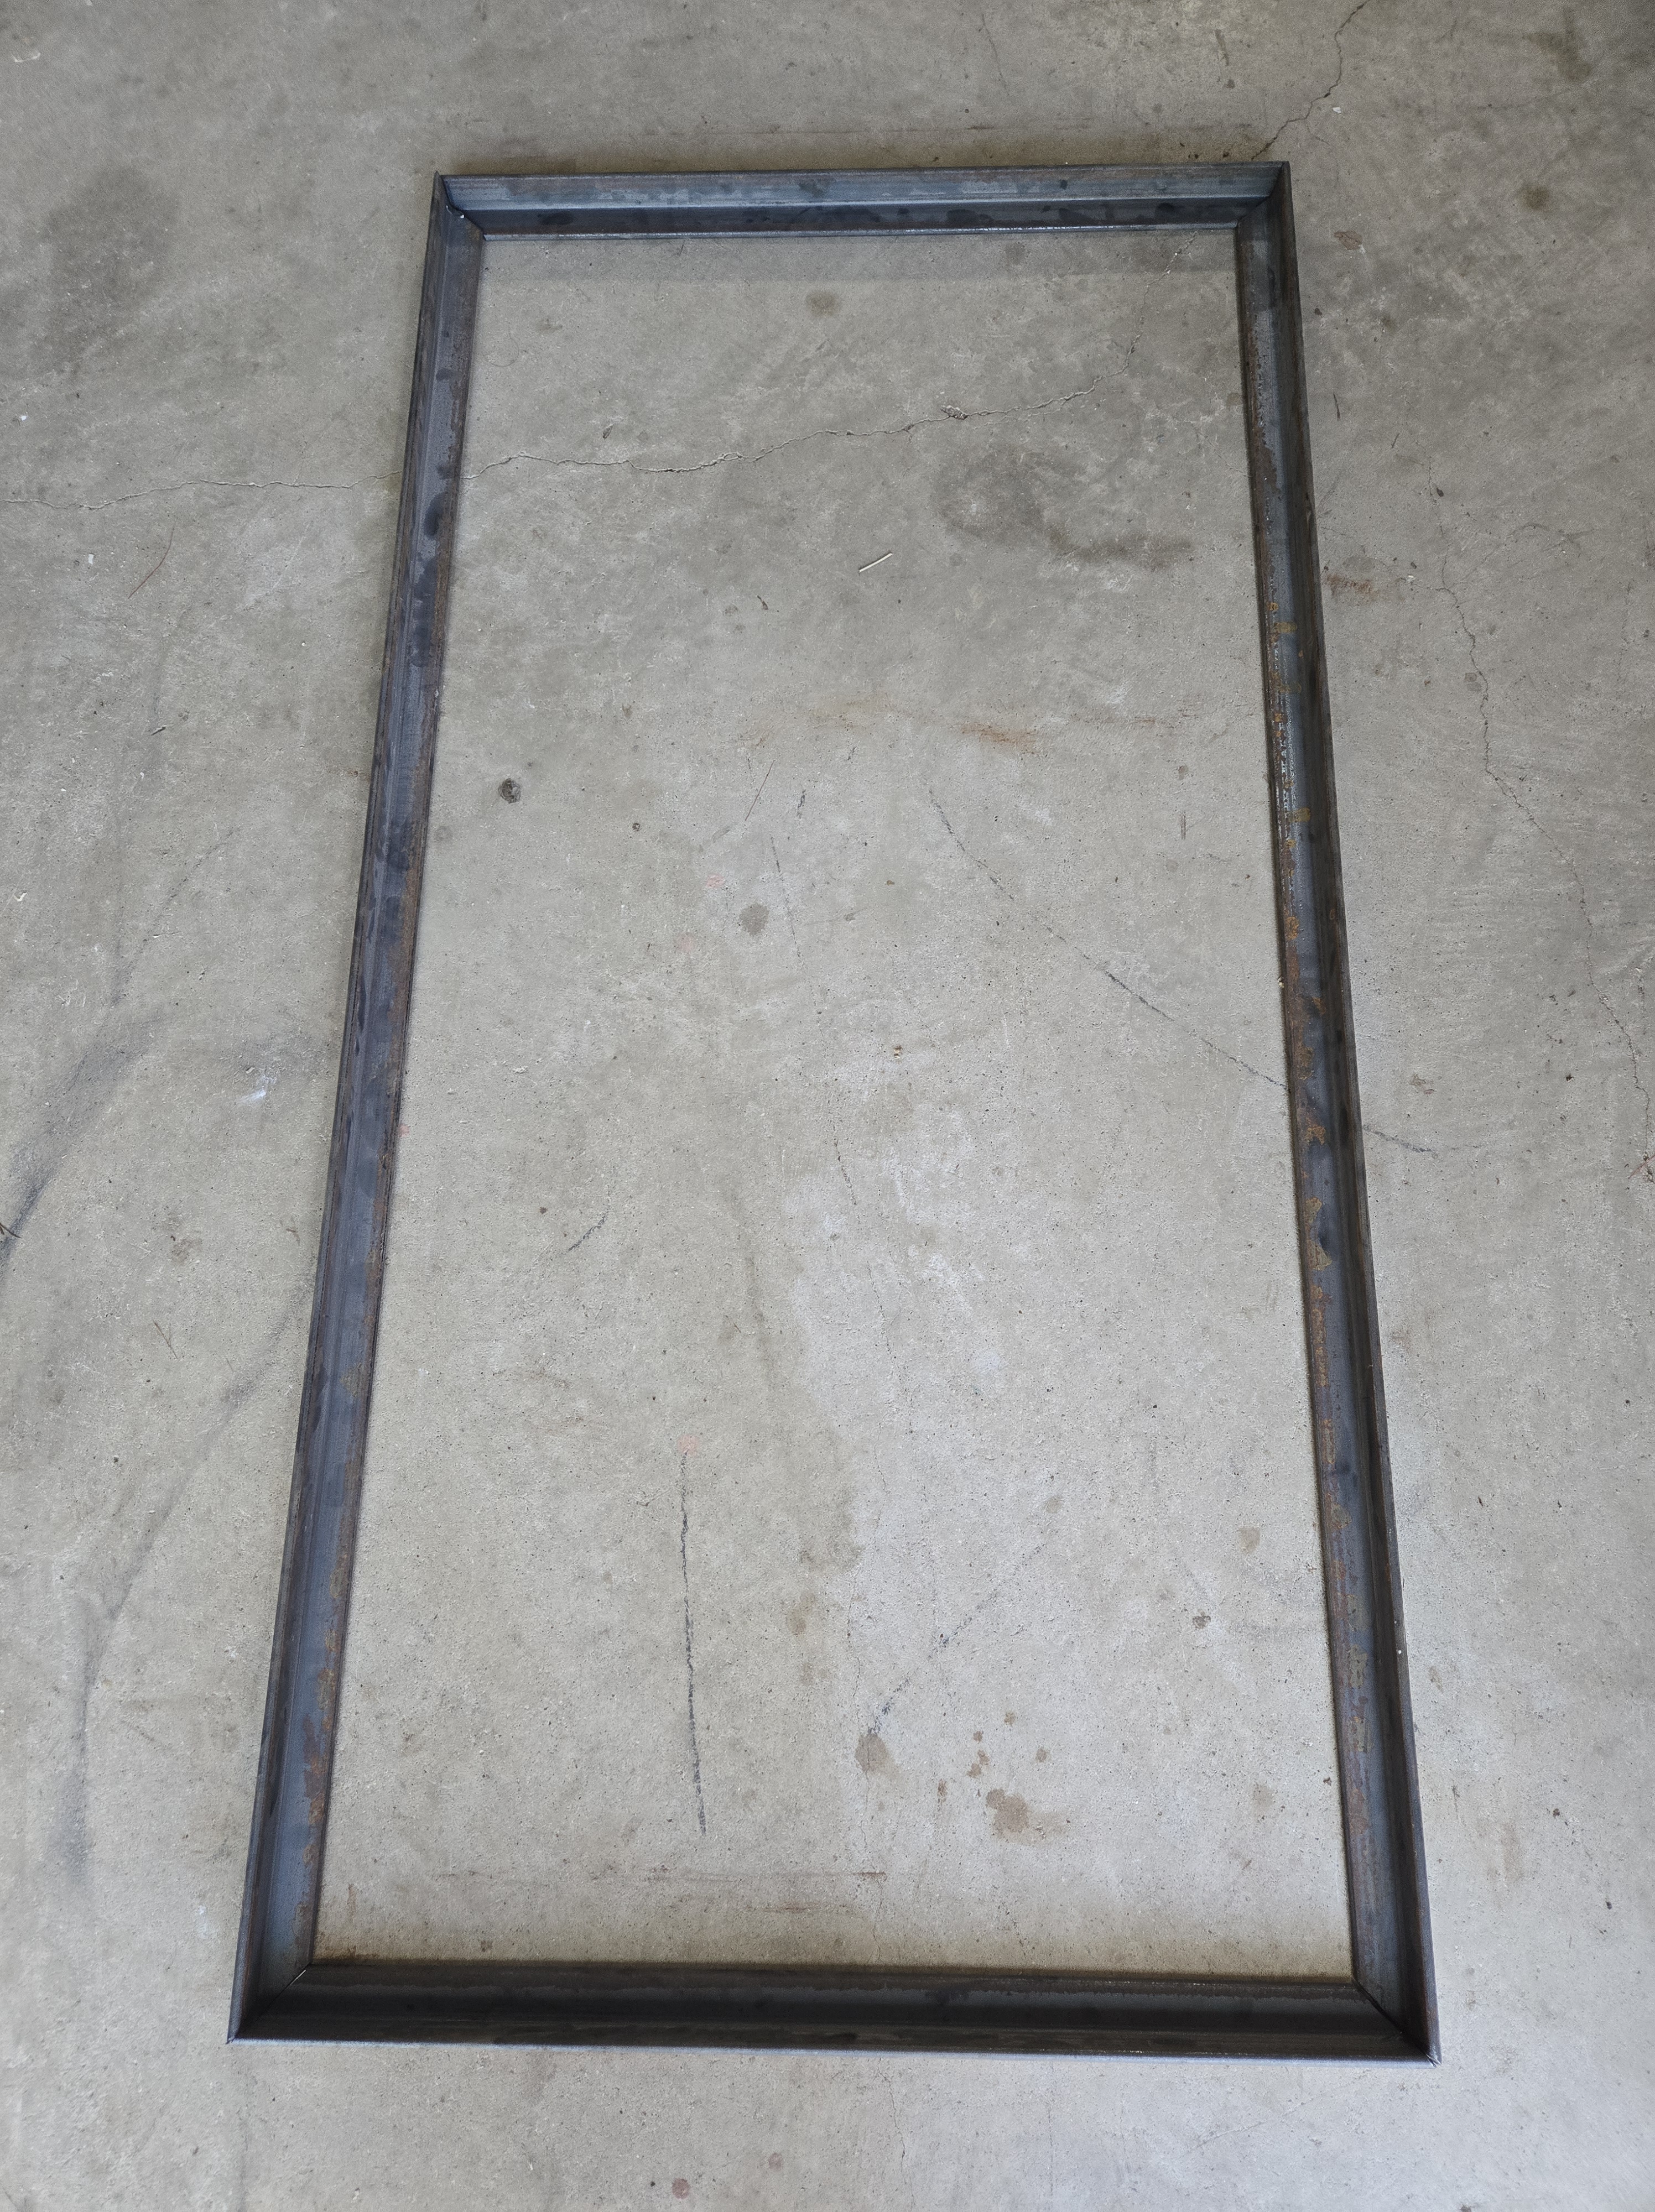
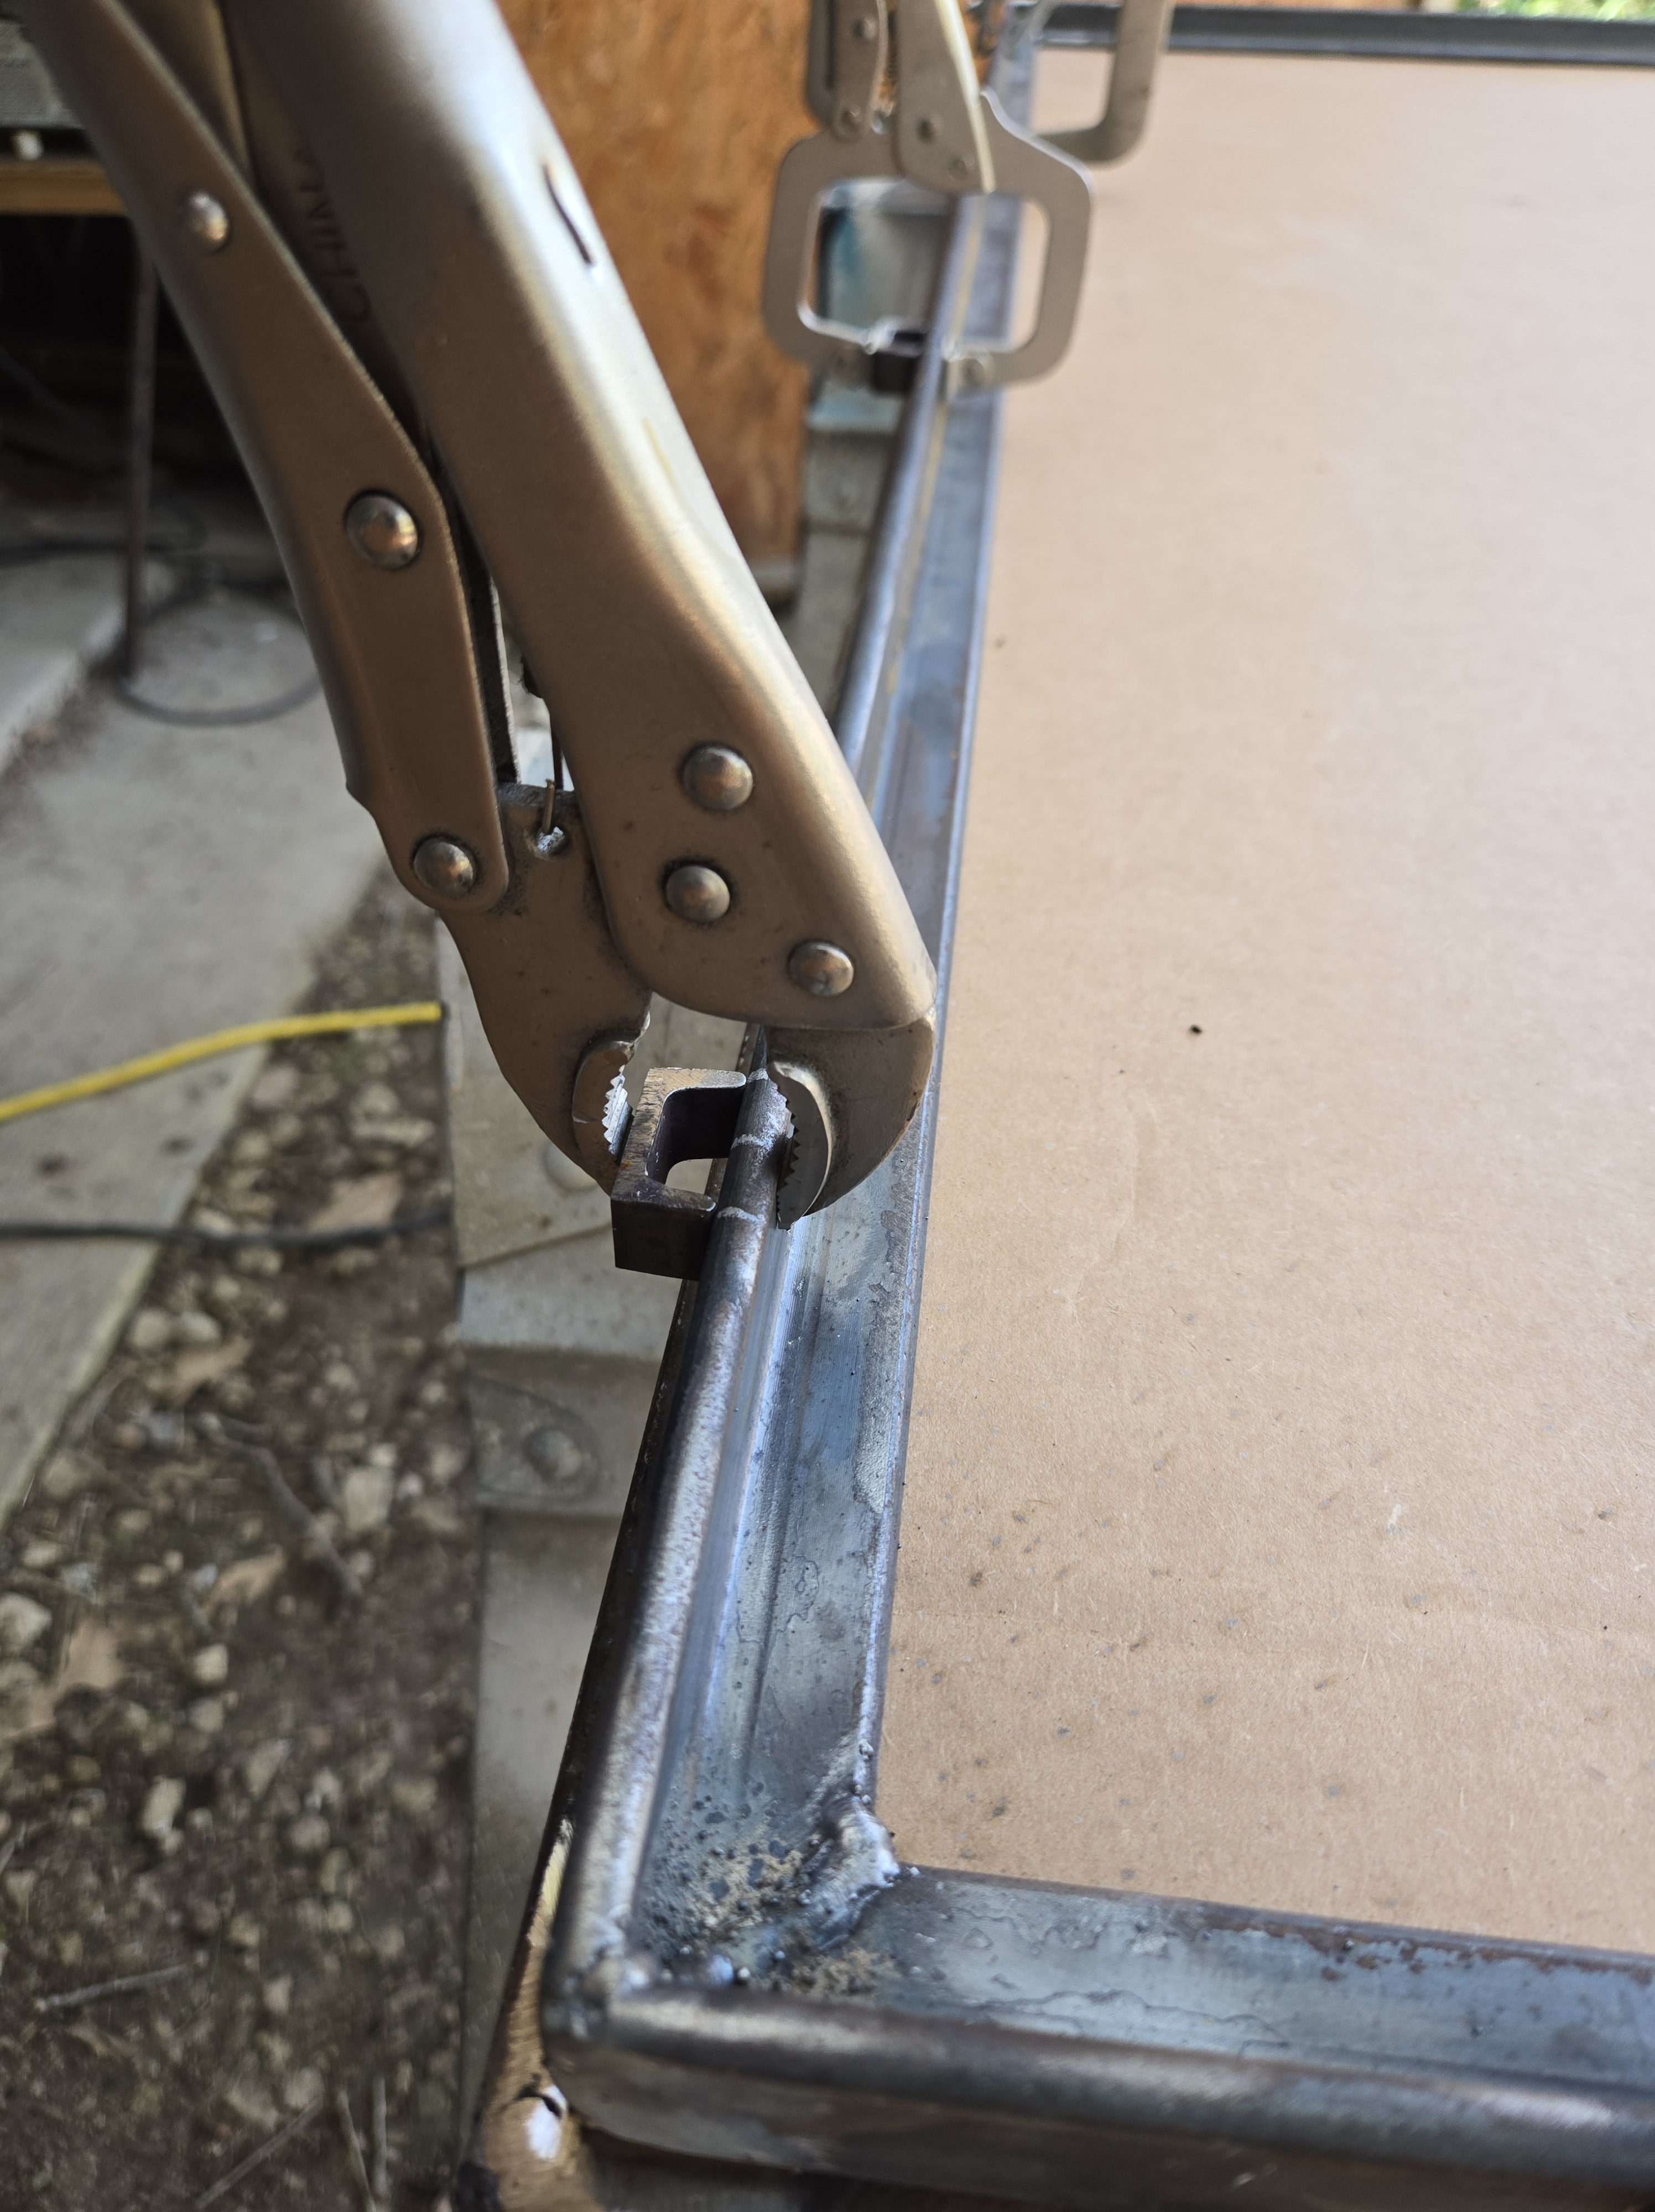
11. First, I decided to make a metal frame that would hold the plastic better, the clamps did not give full support around the whole frame, which caused the plastic to tear when being heated. I designed the frame to have two metal frames that tightly screw together to hold the plastic providing even pressure everywhere.
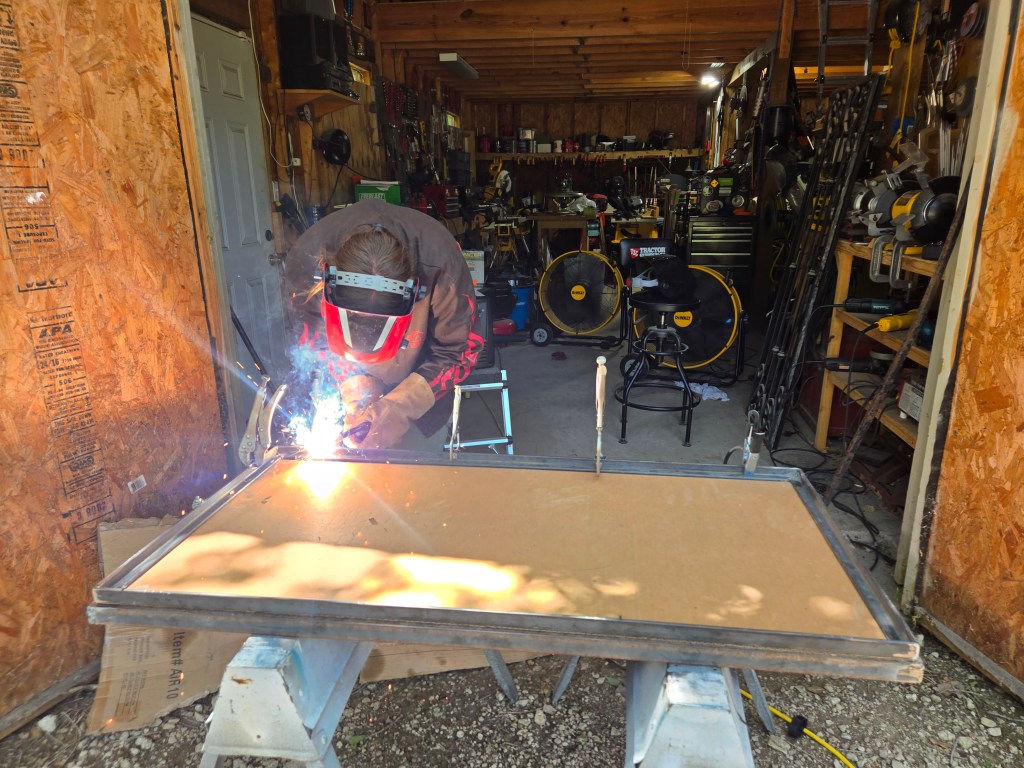
12. I first cut out 4 metal pieces for each of the two frames. Once the pieces were cut, I welded them together to form the frames with strong bonds.
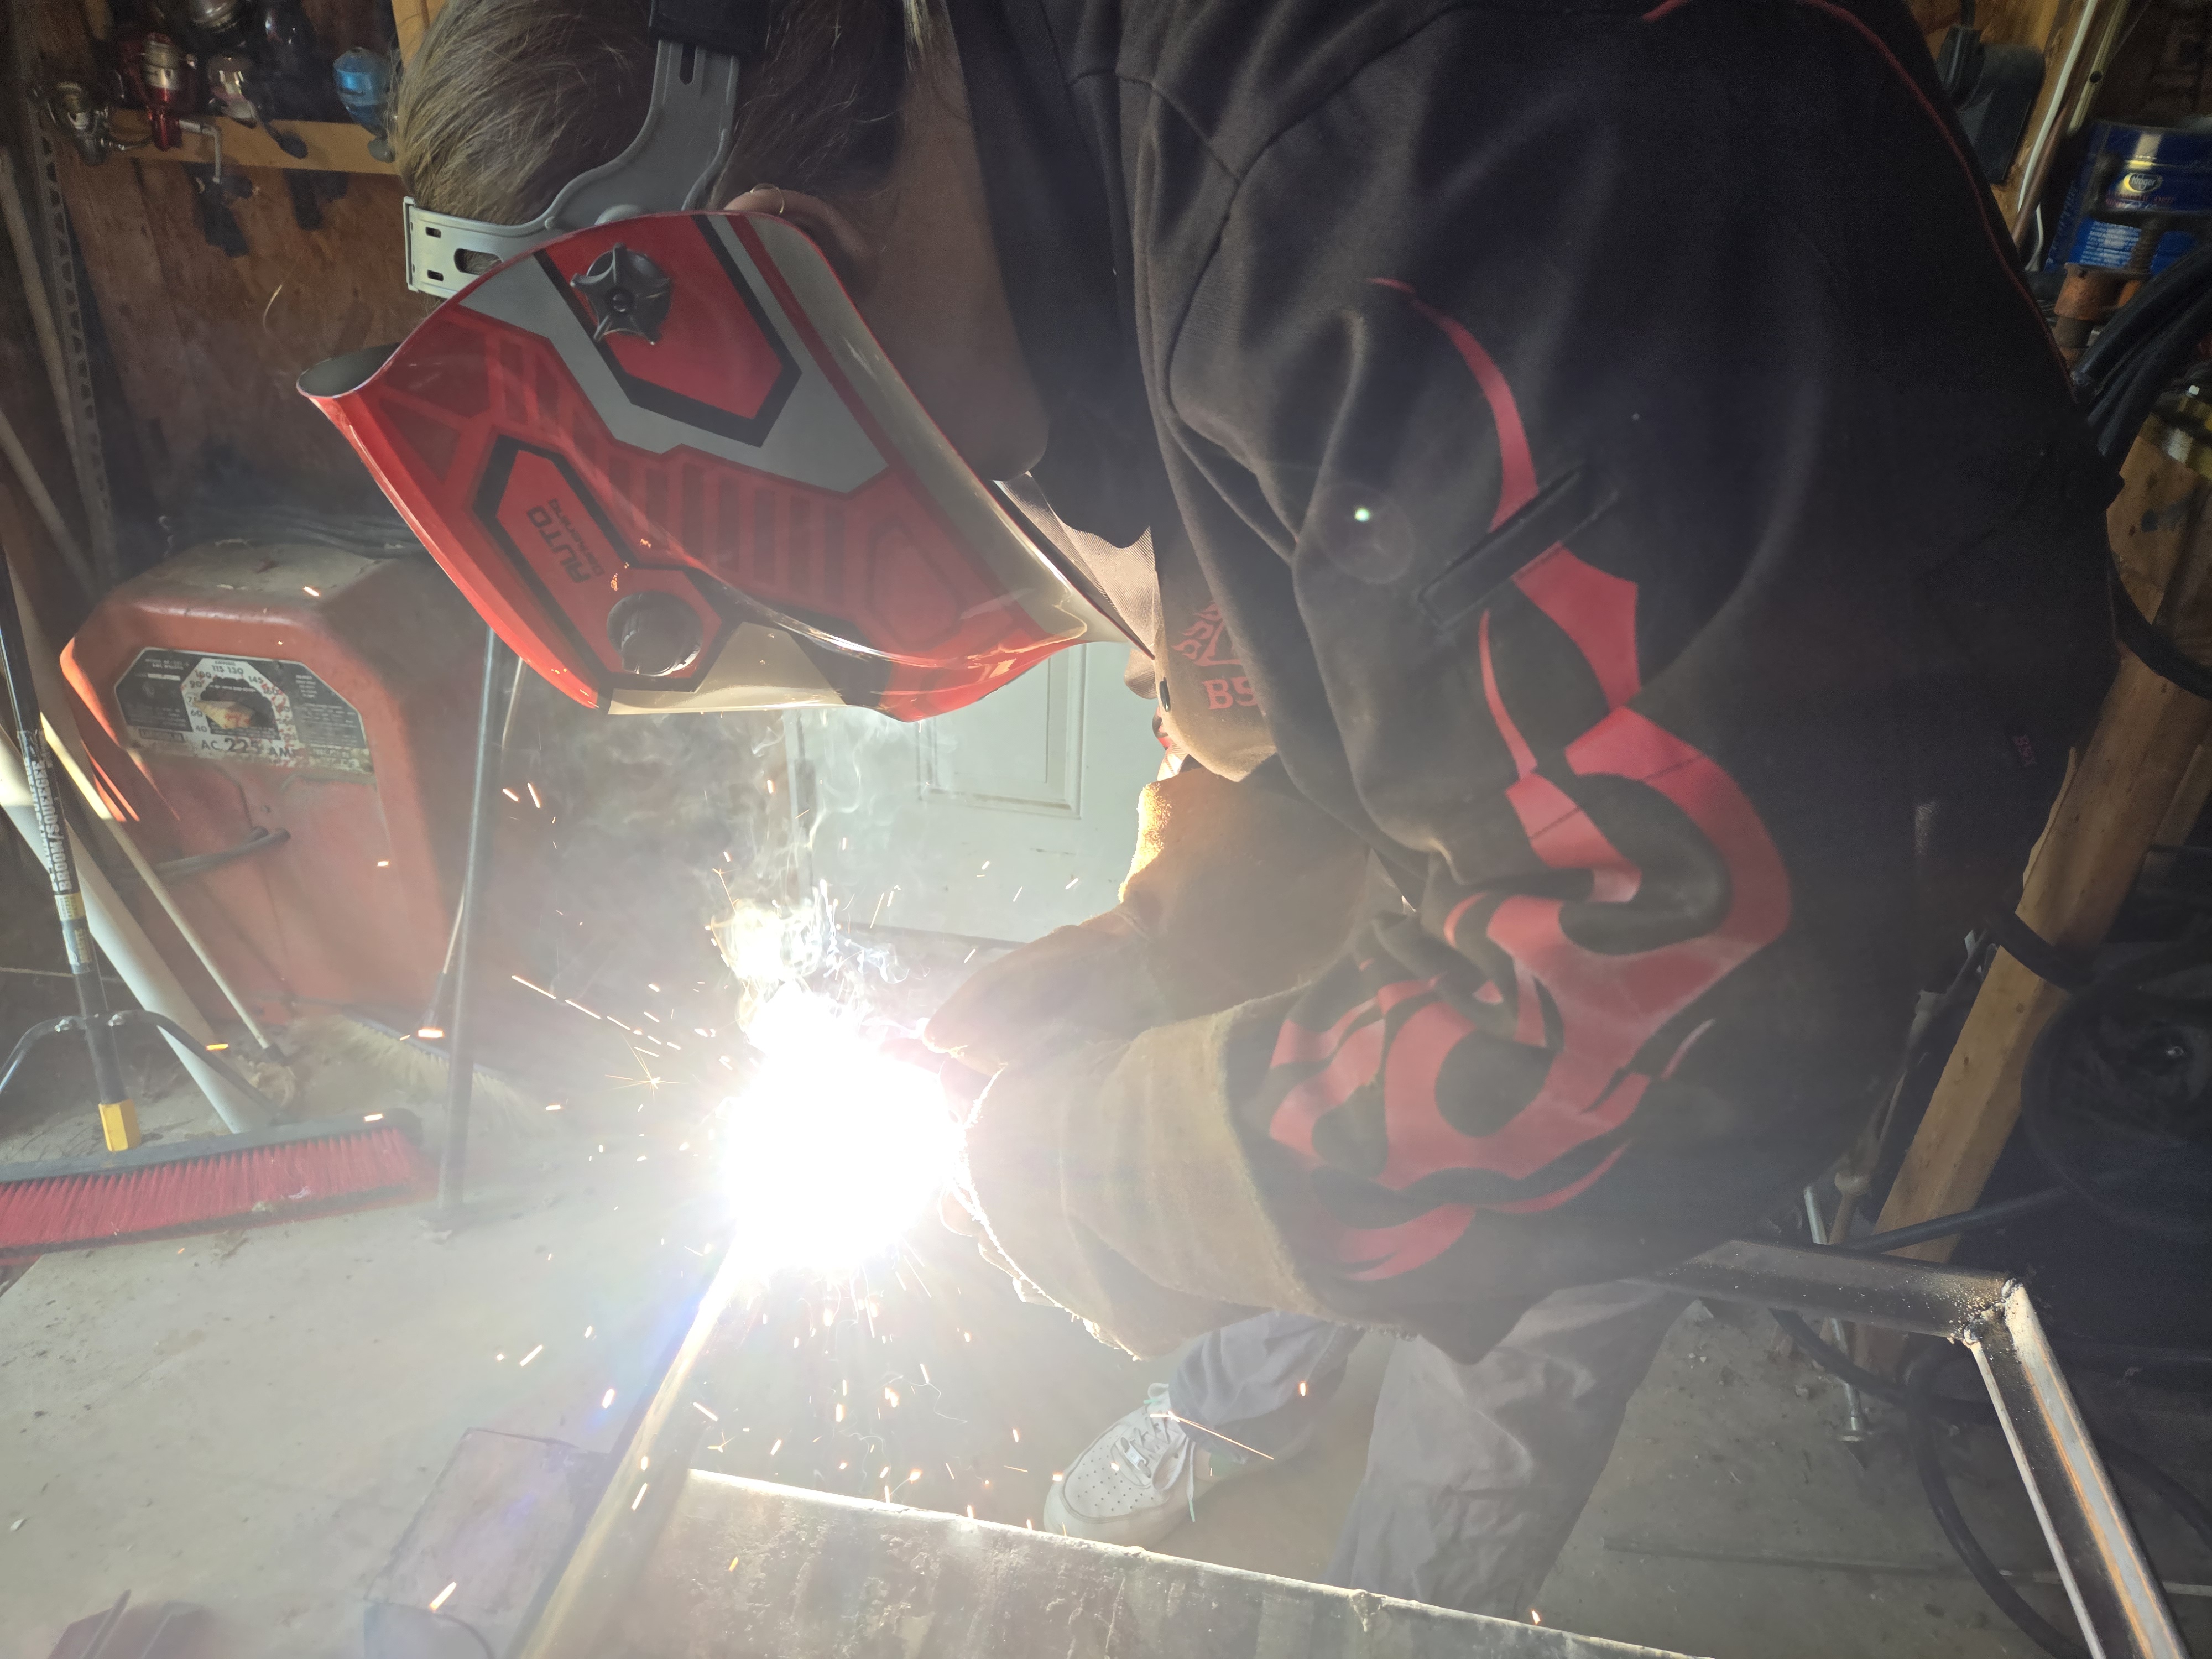
13. After the two frames were built, I cut pieces of a threaded rod and welded them onto the first frame, evenly spaced apart.
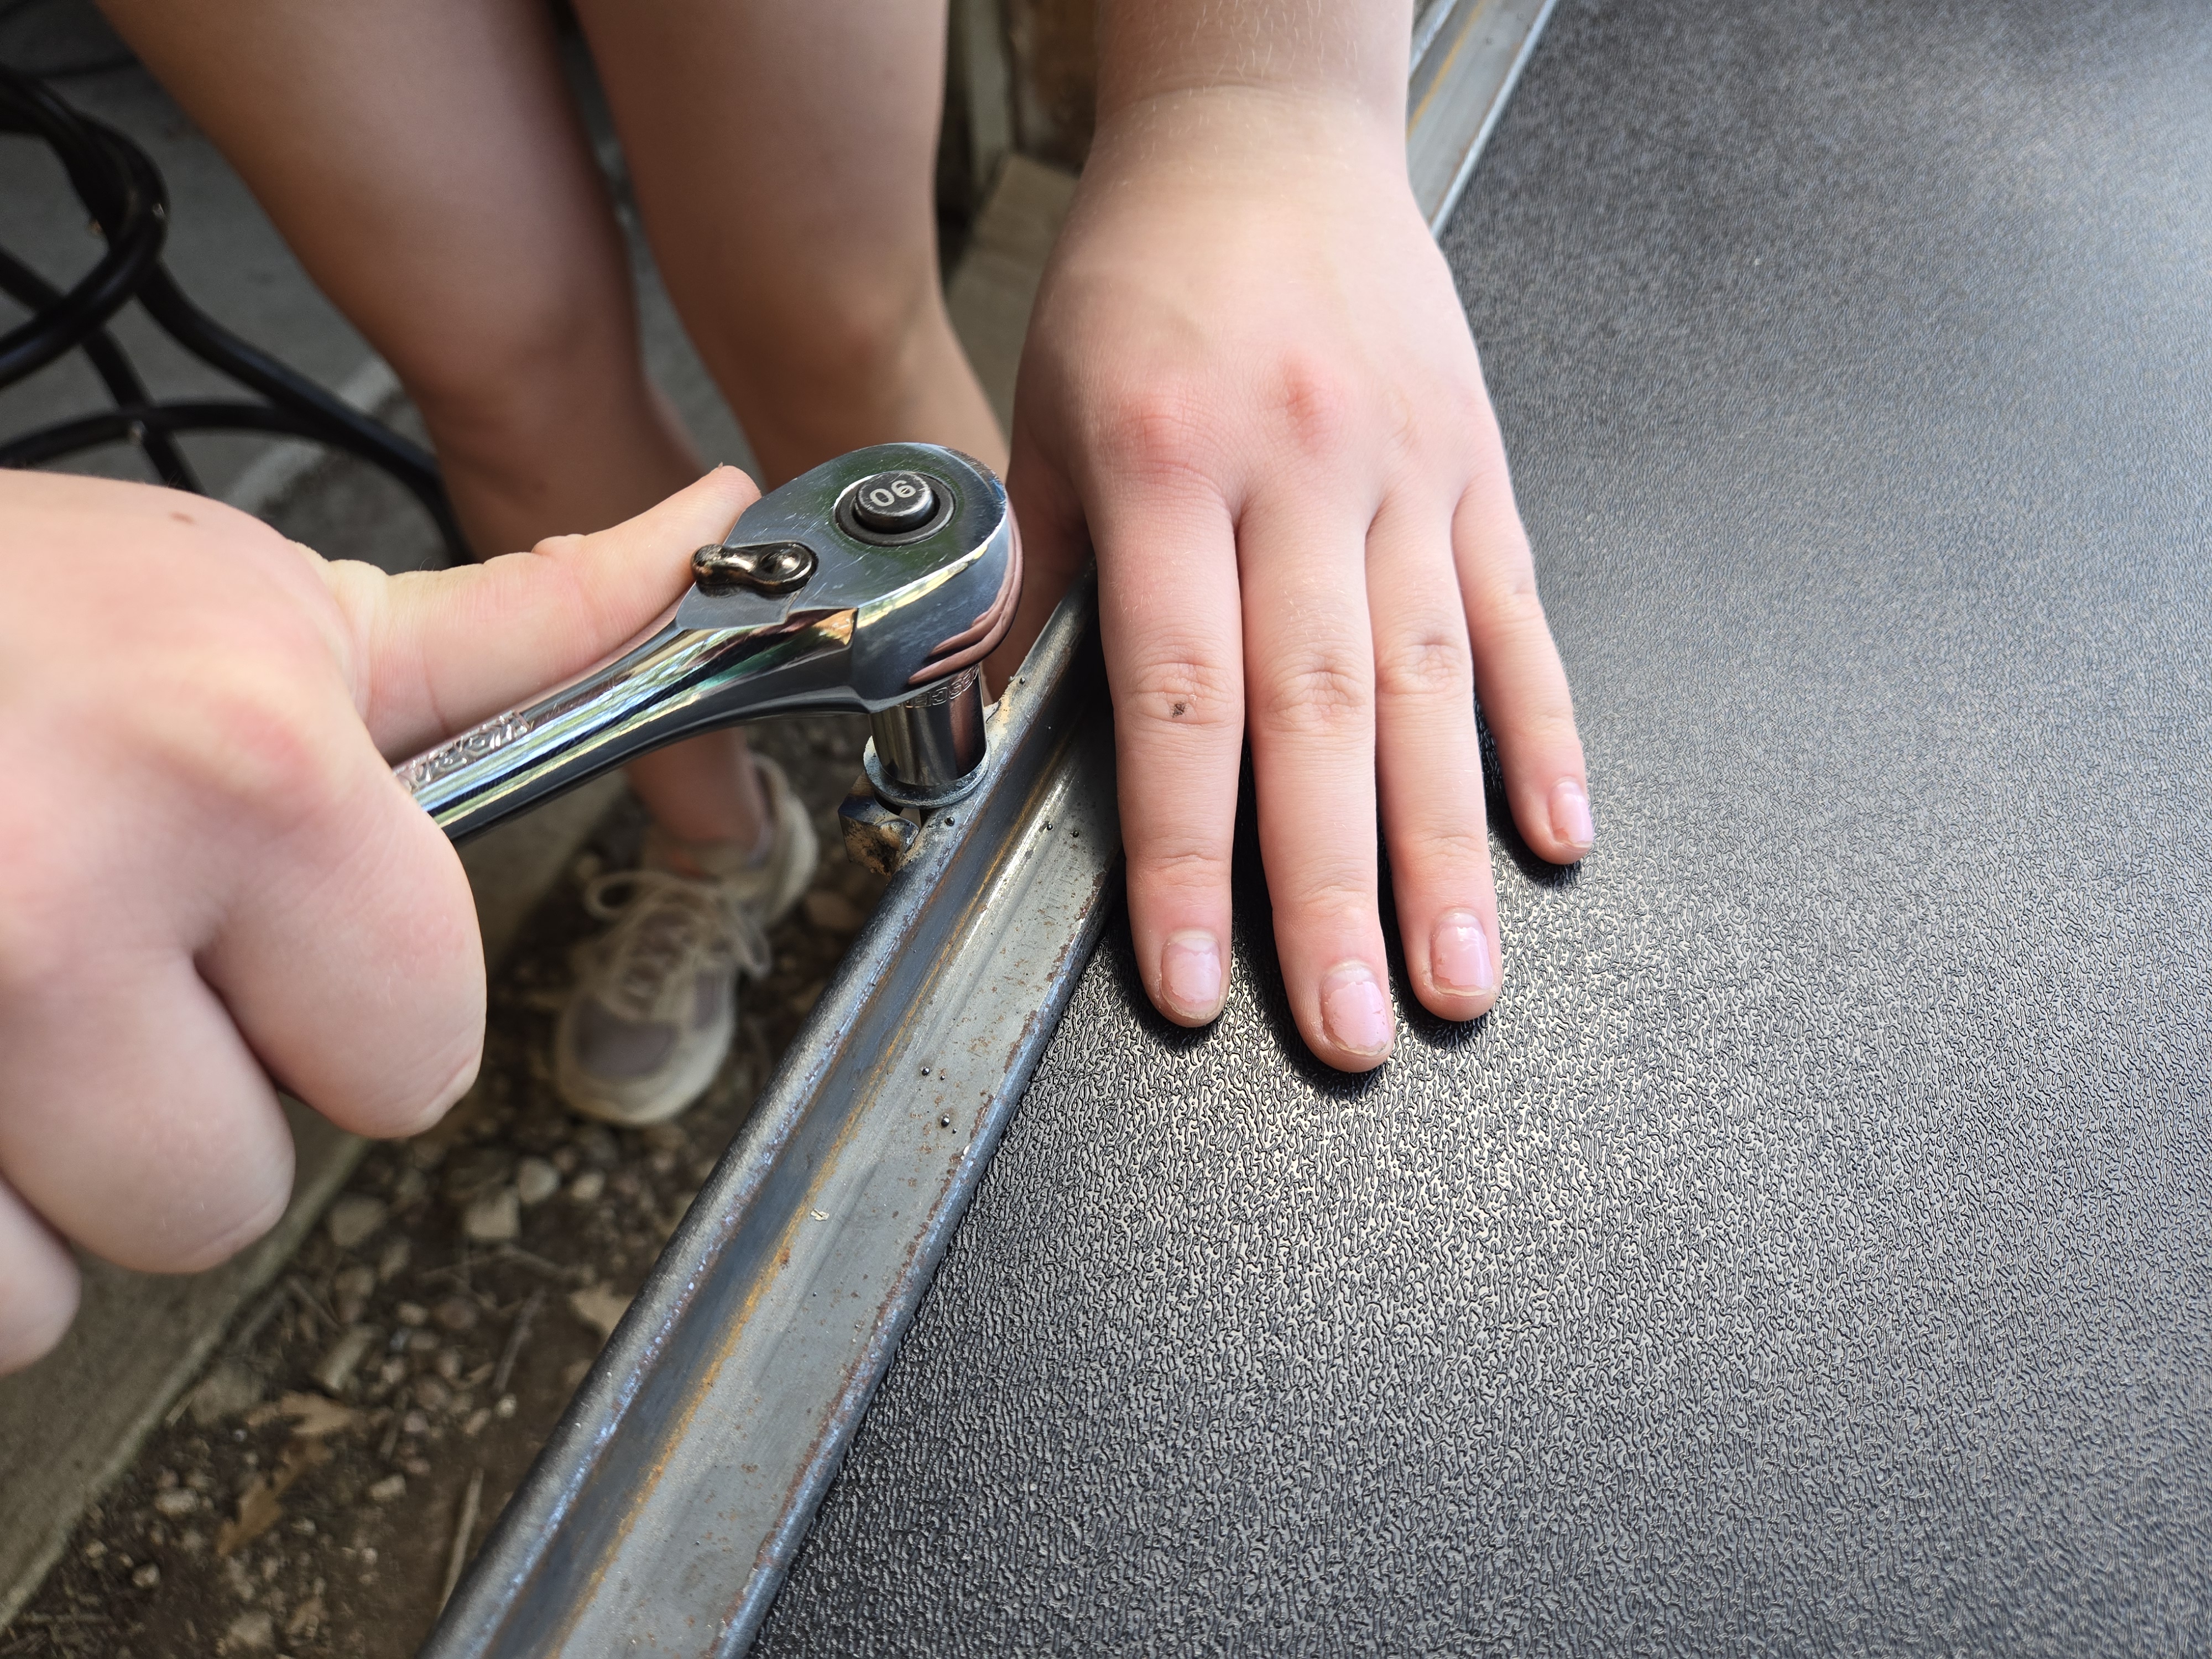
14. For the second frame, I made U shaped supports that the threaded rod pieces would slide through when the plastic is clamped between the two frames.
15. When both frames were completed, I put the plastic sheet in-between them and used bolts to screw the two frames tightly together.
16. Another improvement I made was adding three vacuum holes on the side of the box, rather than just one, to create a stronger seal when the plastic is pulled down by the air. This adjustment enhanced the overall effectiveness of the vacuum process.
17. After implementing these adjustments, I began a second round of the thermoforming process, ensuring all four heaters were consistently on to bring the plastic to the needed temperature. Once the plastic reached around 290 degrees, I immediately transferred the plastic to the vacuum and pressed it onto the mold. With the improved setup, I successfully thermoformed two inner shell cases.
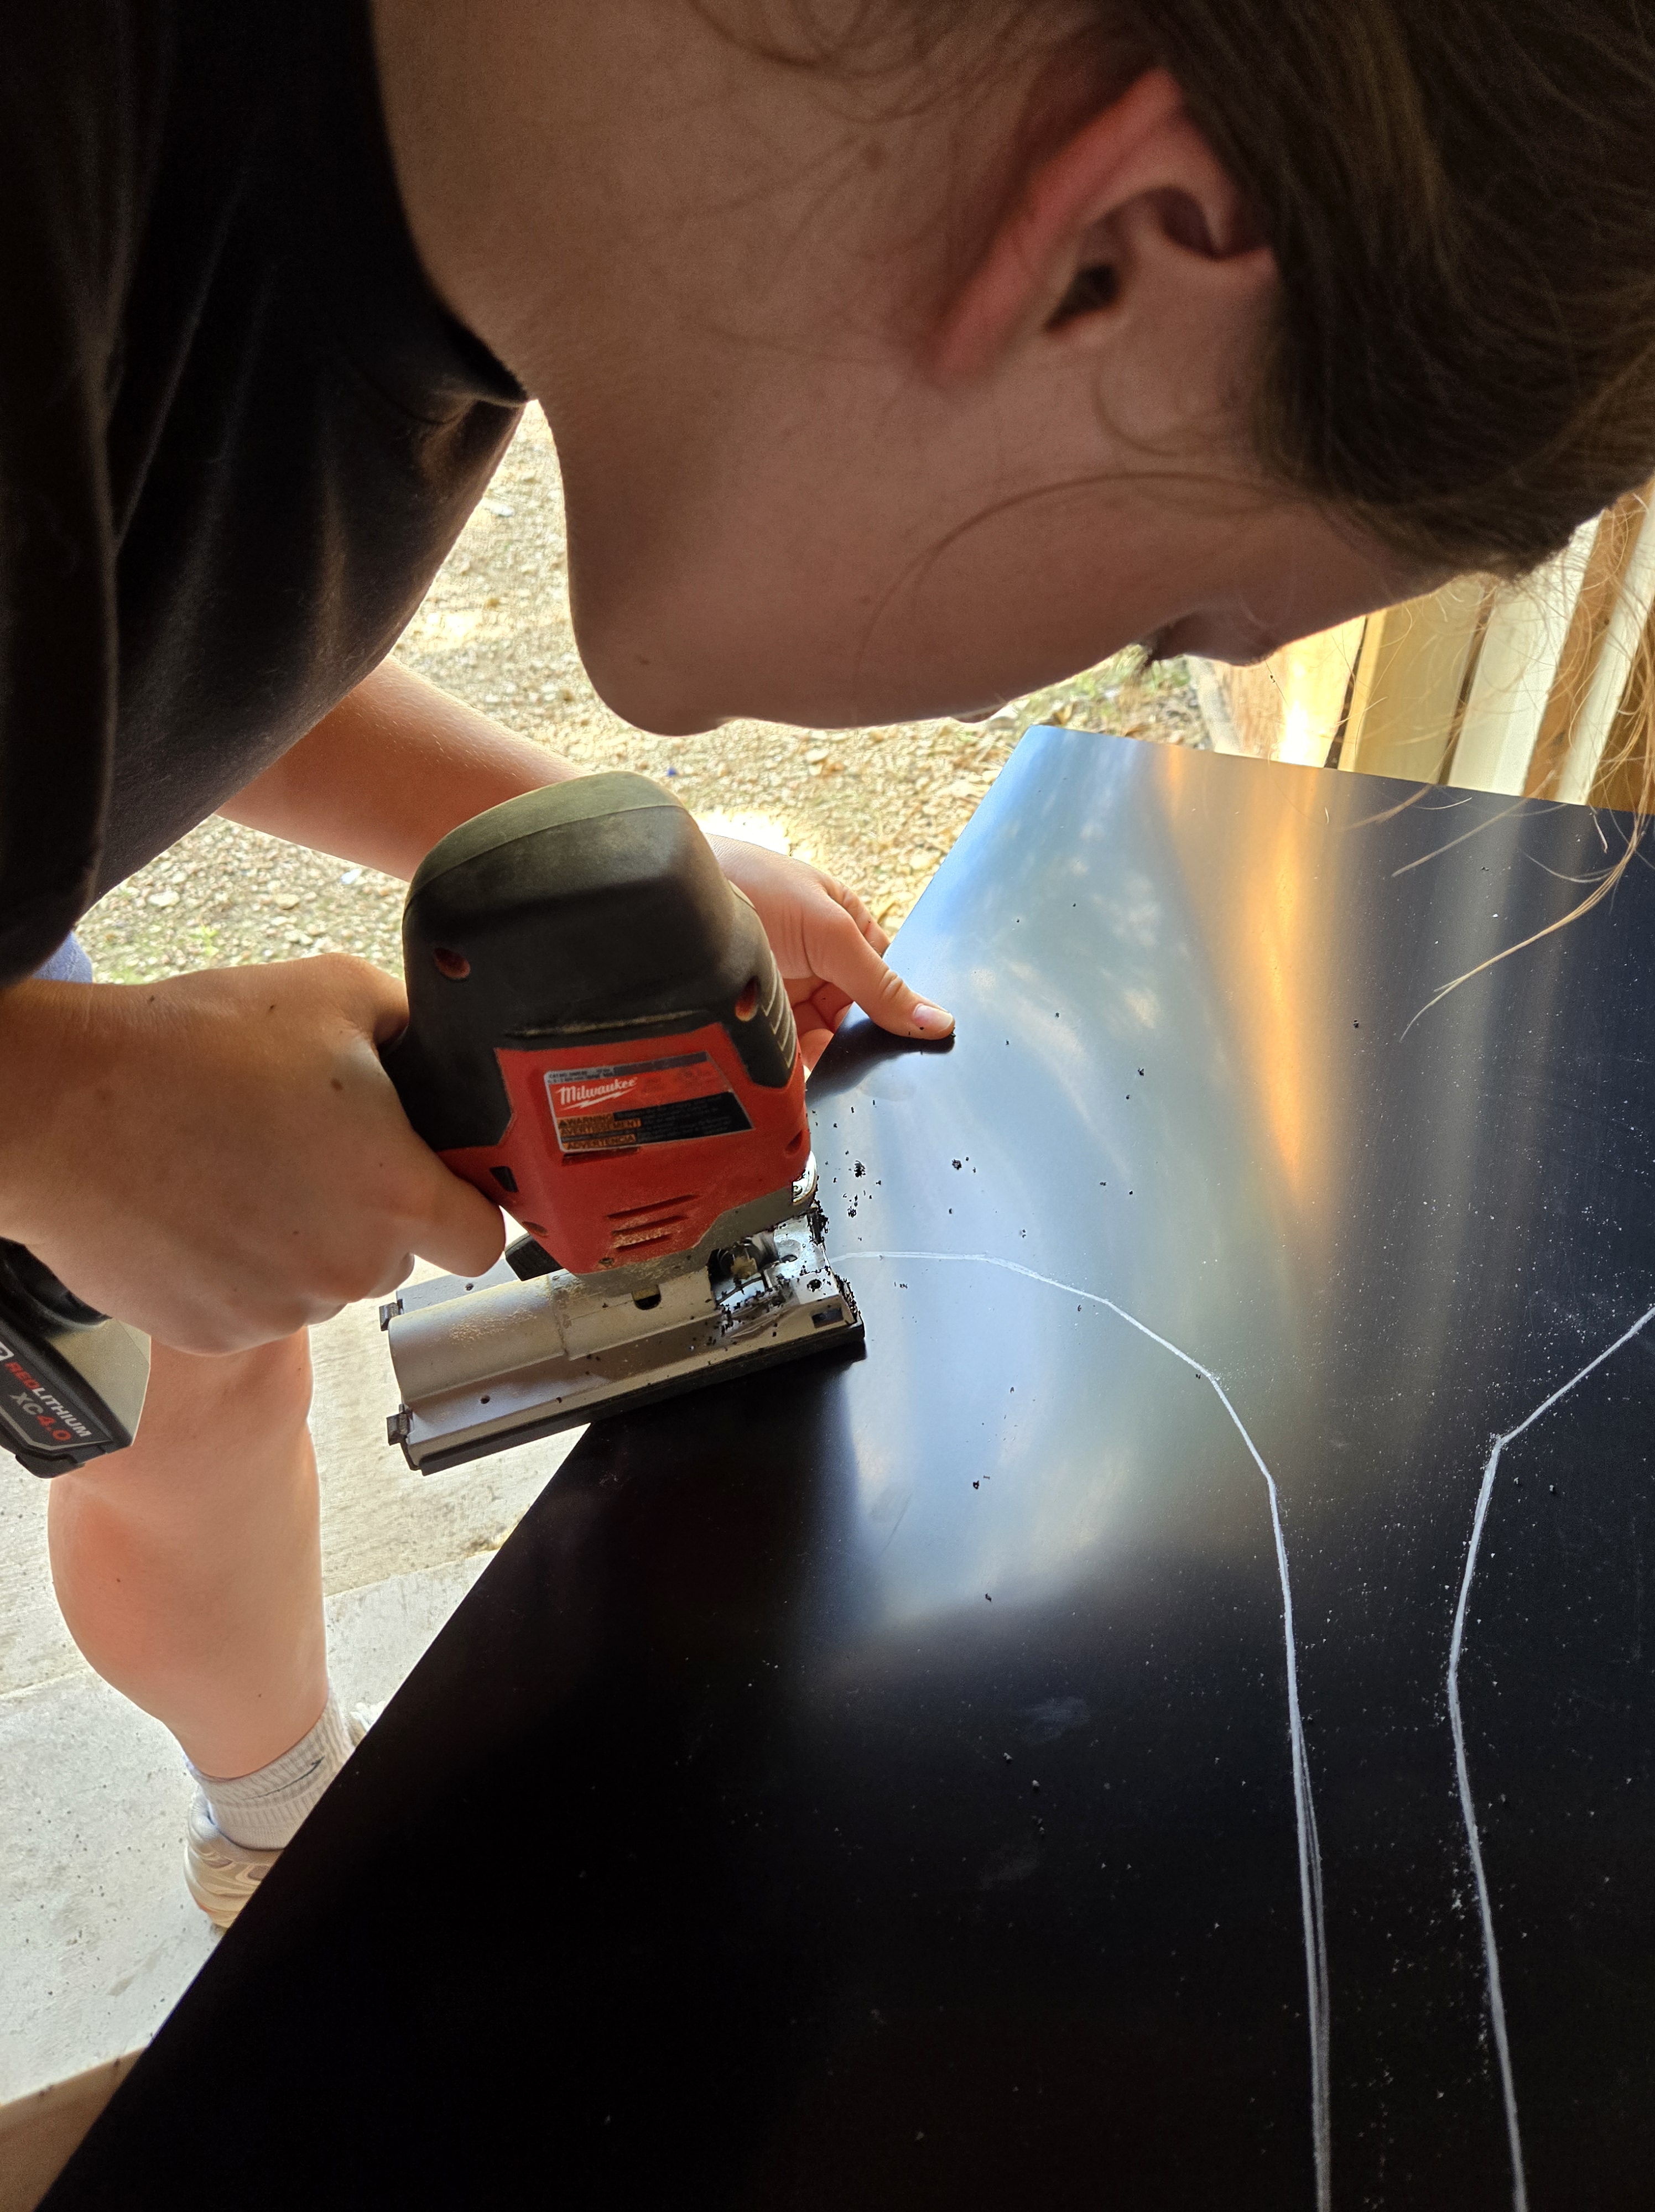
18. I cut the two inner shell cases with a cutter.
19. For the two outer shells I manually built them due to the thermoforming process being difficult to complete with bigger molds.
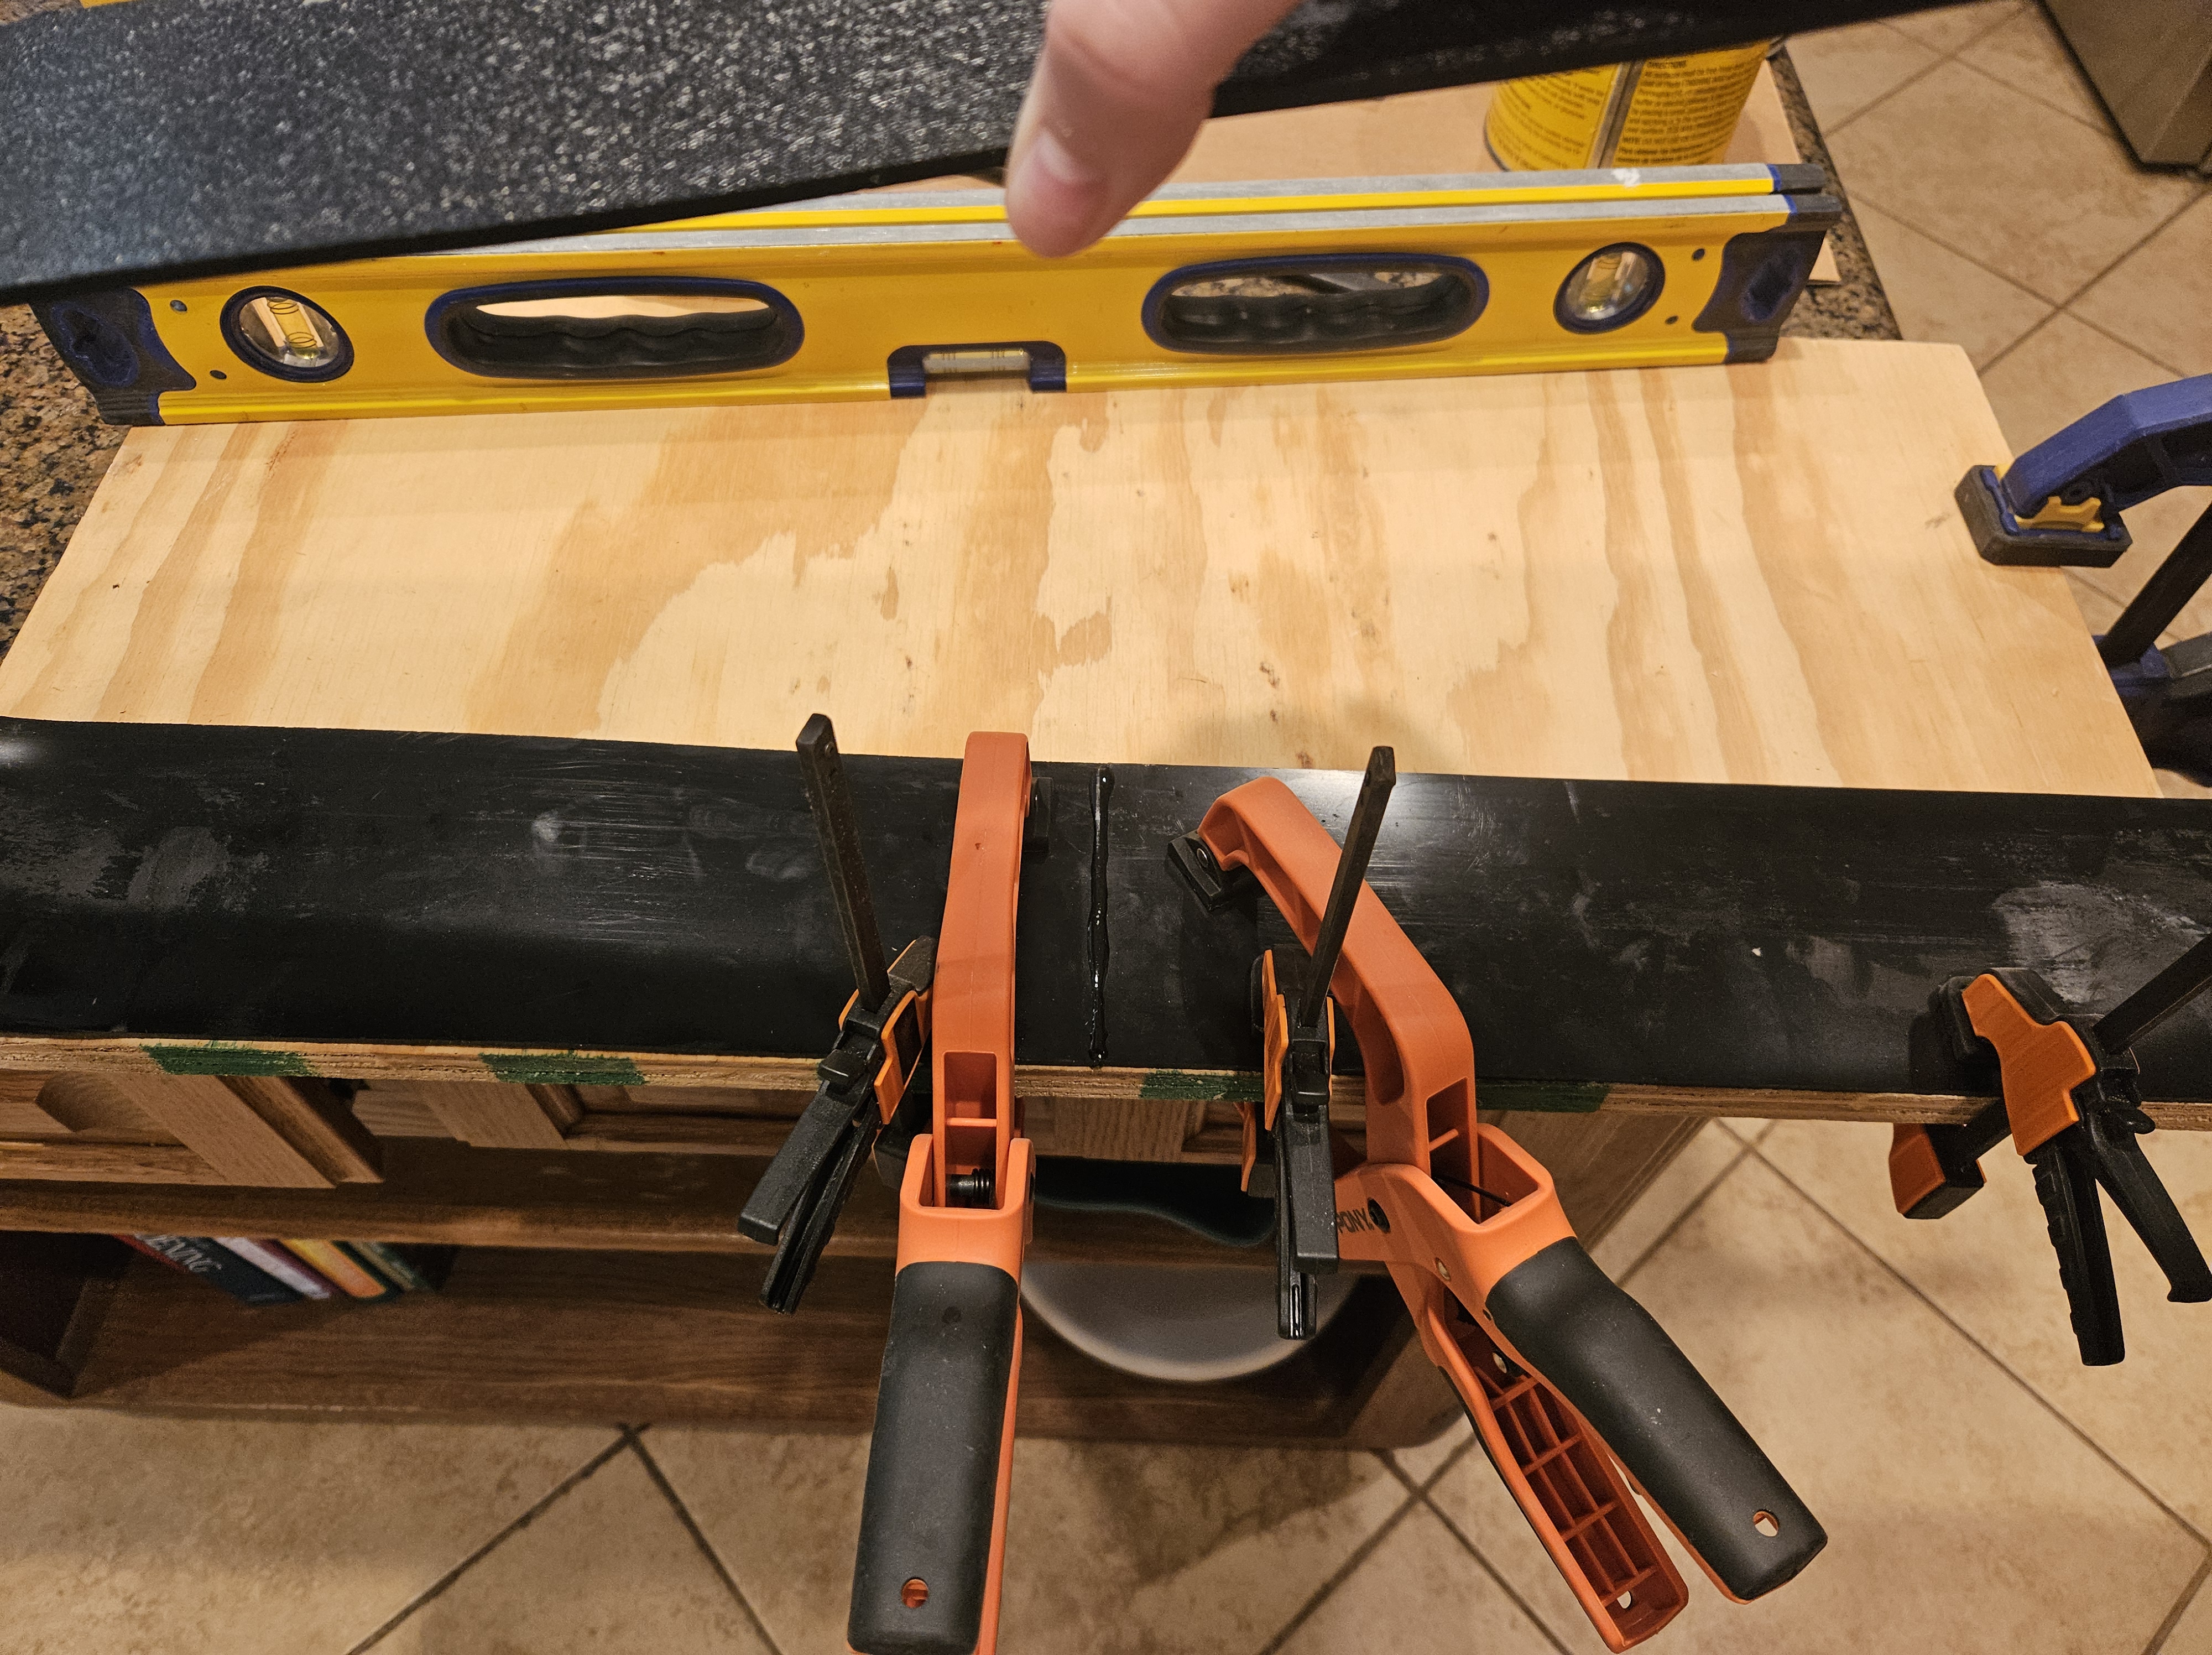
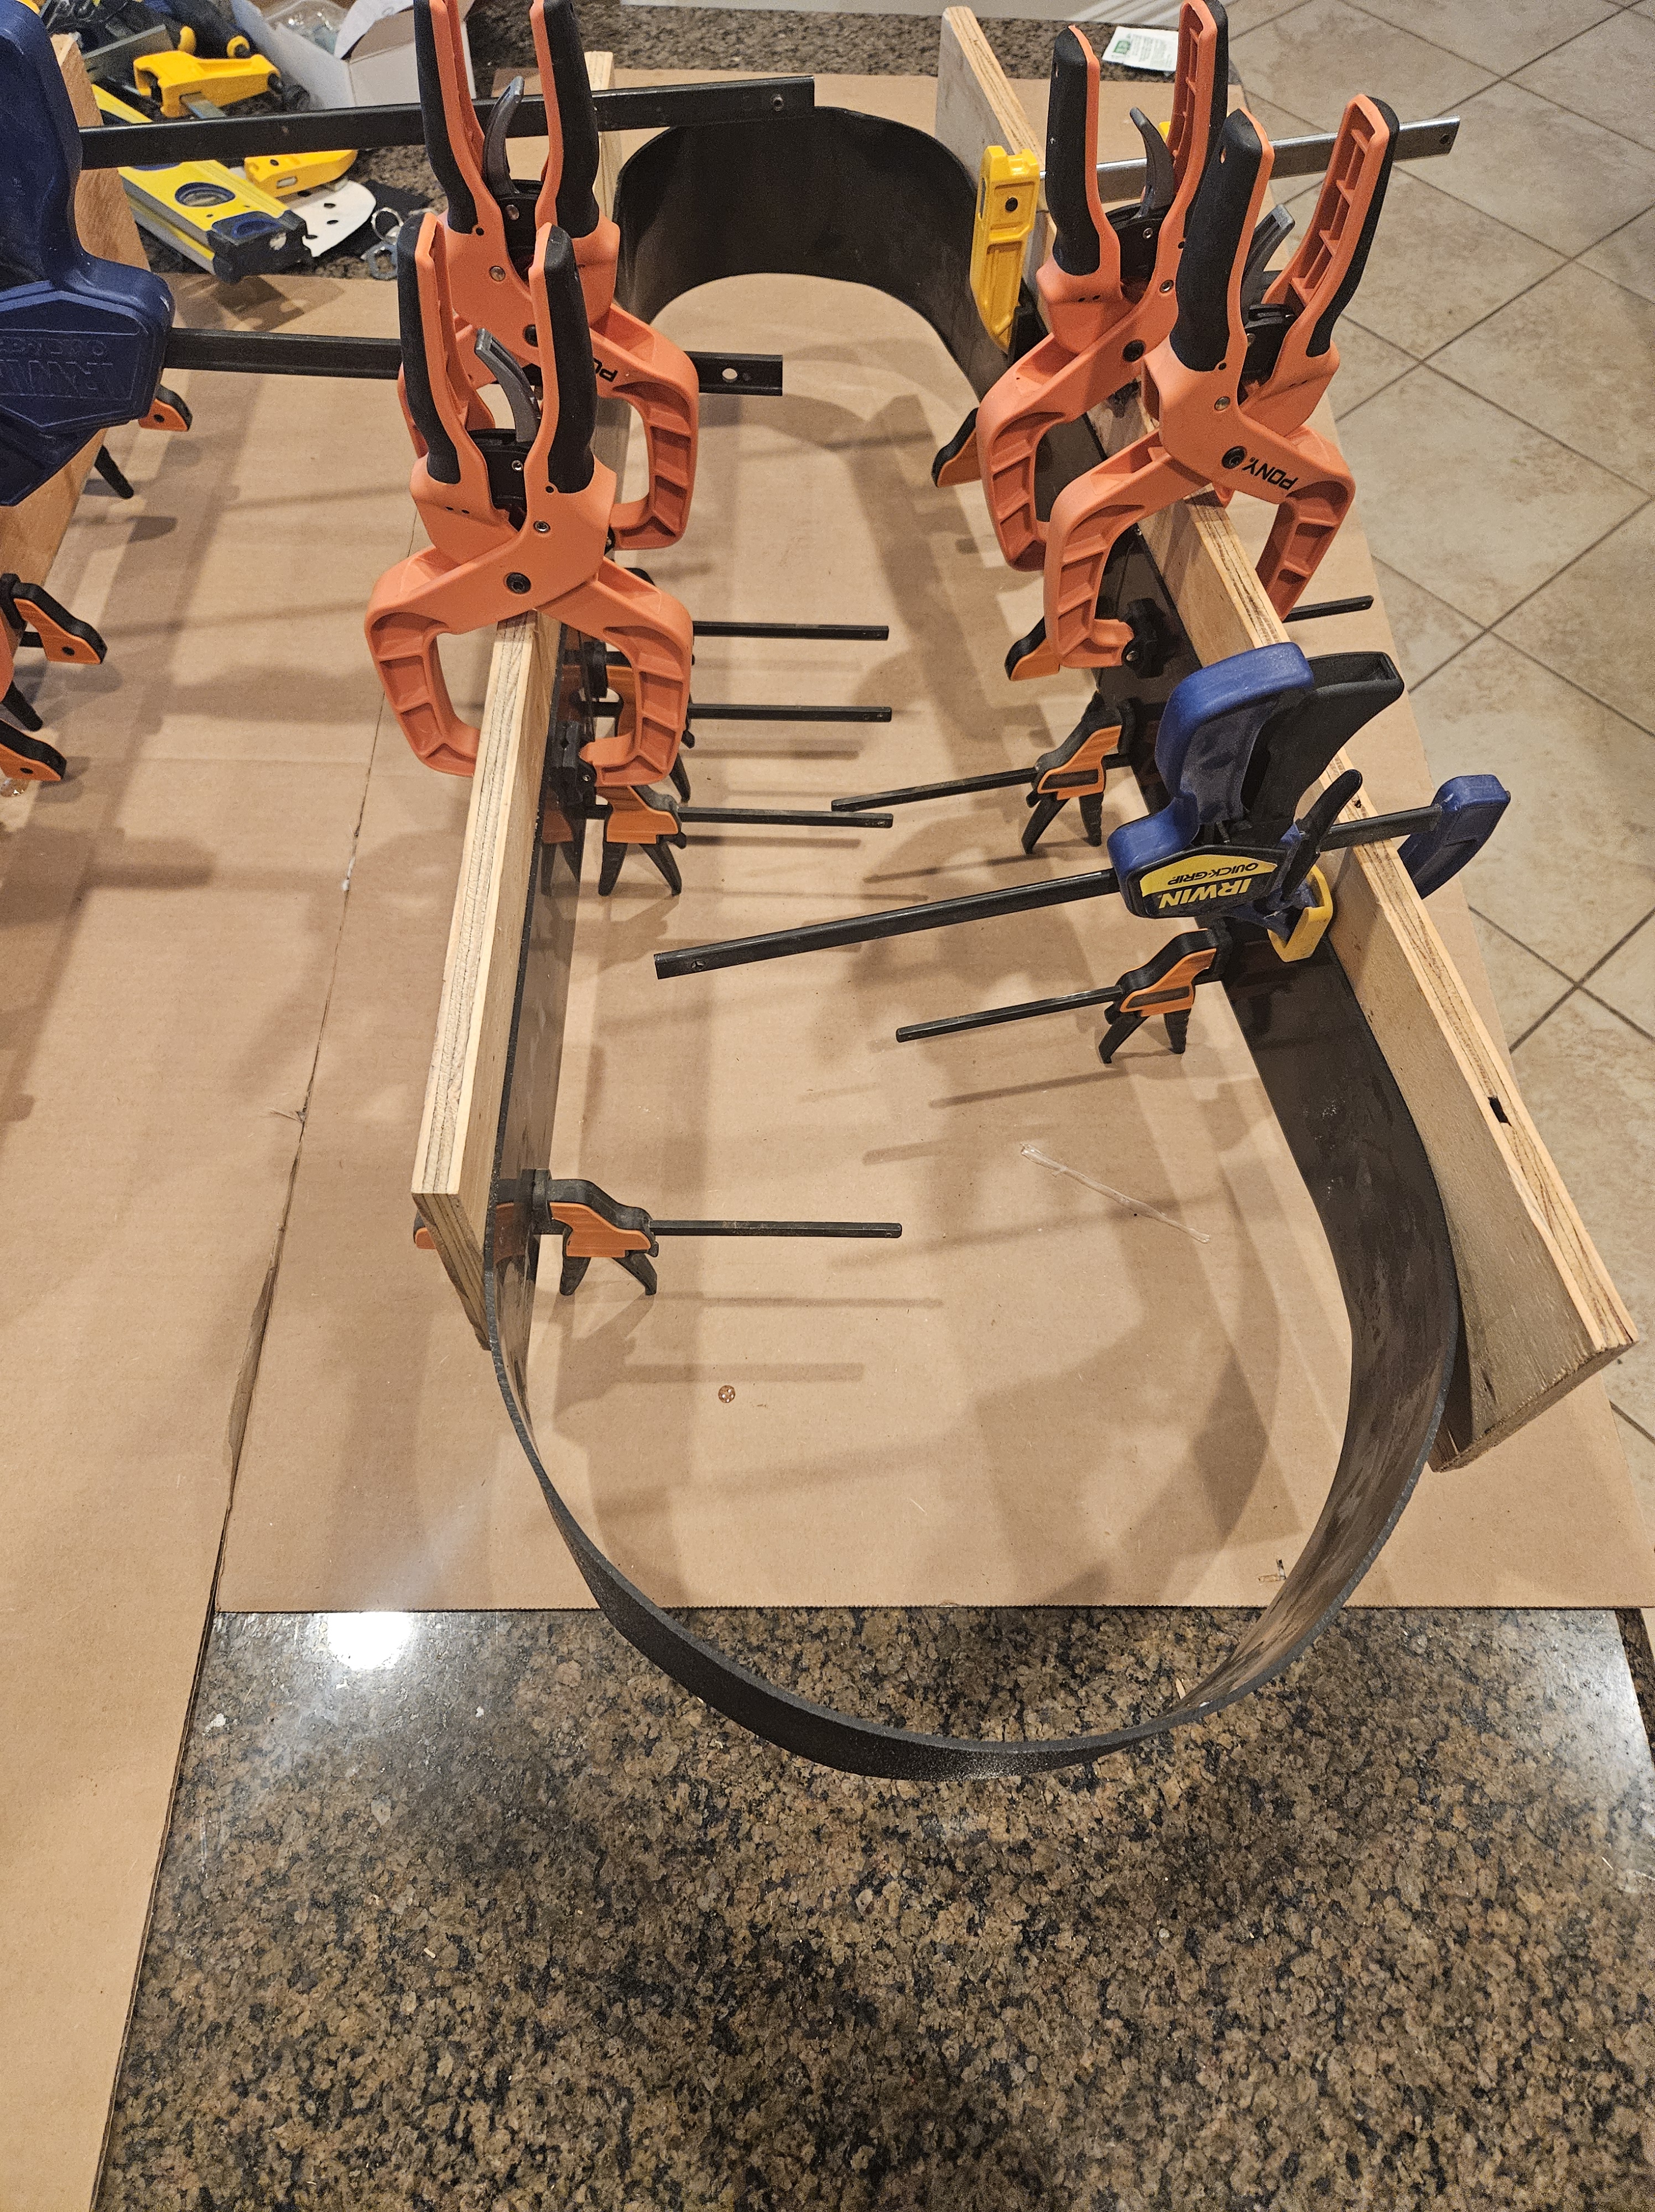
20. I first cut out the flat surface of the outer cases, and then 4 inch strips to serve as the walls or sides of the case. I then clamped the strips around the outer case mold and used a heat gun to curve the strips into the shape of the case.
21. After making the curved sides of the case, I glued the pieces together to form the outer shell of the case.
22. To make the whole case, I first made two halves of the case by combining the inner and outer shell together. To fit the inner shell inside of the outer shell, I created plastic u-shaped supports that allow the inner shell to fit inside while both surfaces meet at the same level.
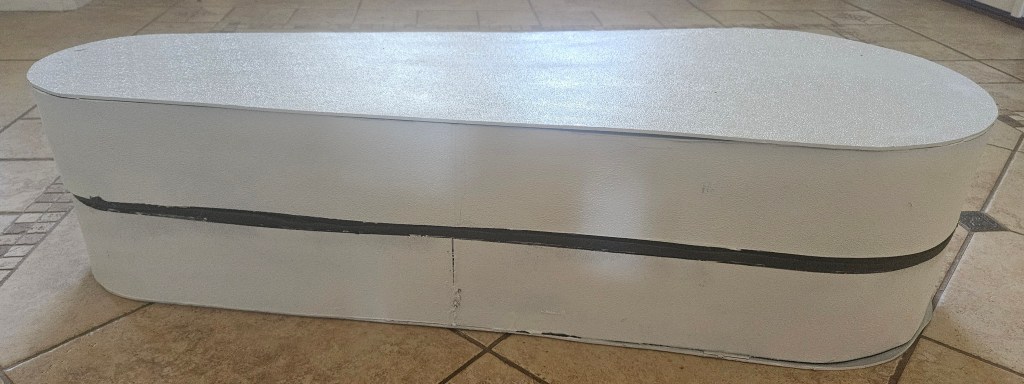
23. Then, when the two halves were finished I used polyurethane foam spray in between the inner and outer shell to create a wall of insulation. This process spanned over several days, the insulation previously expanded so I filled in the case layer by layer to make sure the shells don’t break away from each other or get disfigured.
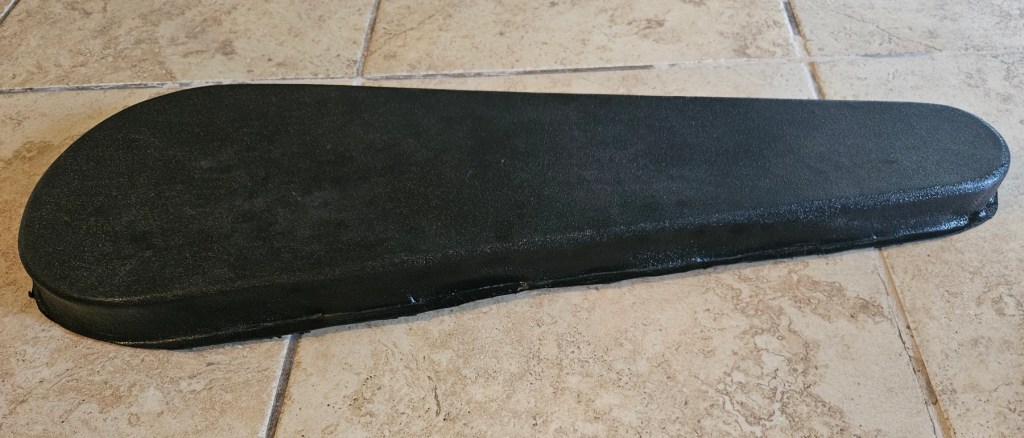
24. Below is the successful prototype of the instrument case with implemented insulation and protective sealing.
Alternative Method: Epoxy Process
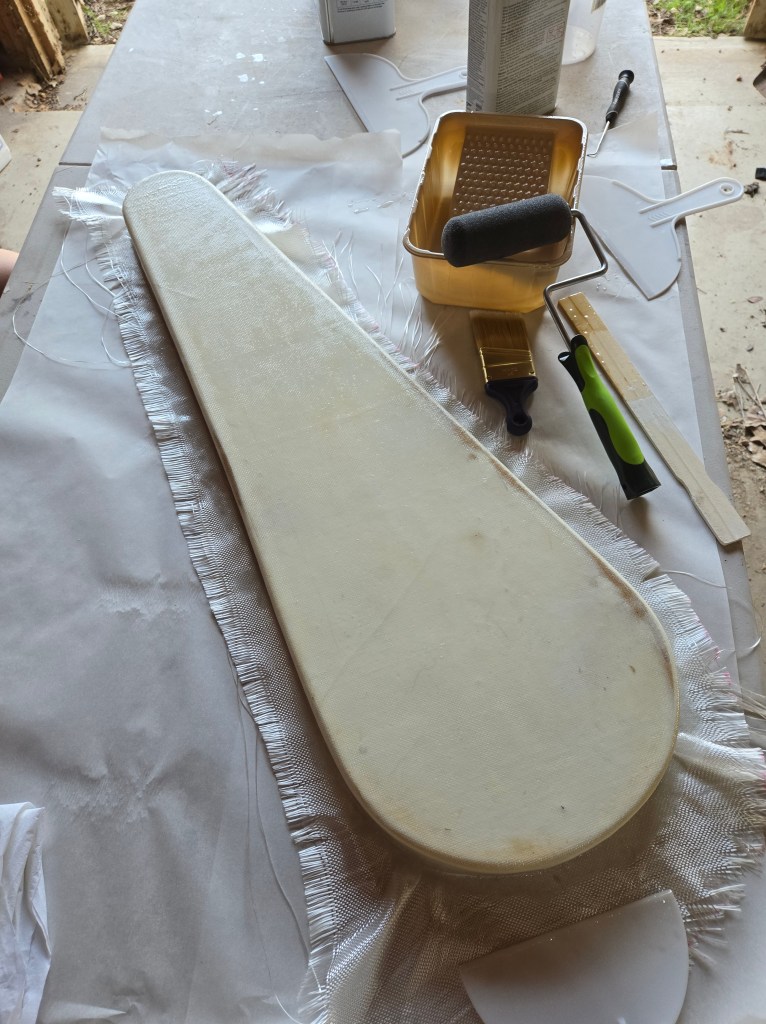
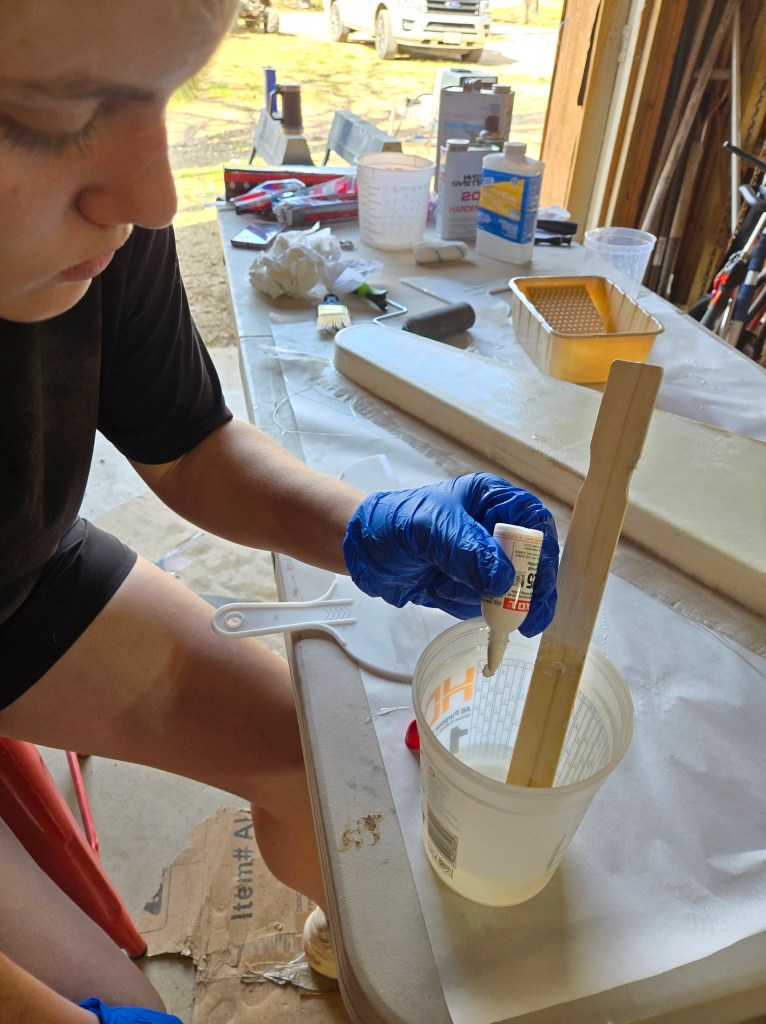
After several unsuccessful attempts at thermoforming, I decided to take a different approach to constructing the case by using epoxy and fiberglass fabric. I researched the process, considering various techniques, and ultimately chose to drape fiberglass fabric over the mold and apply epoxy to form the case shell.
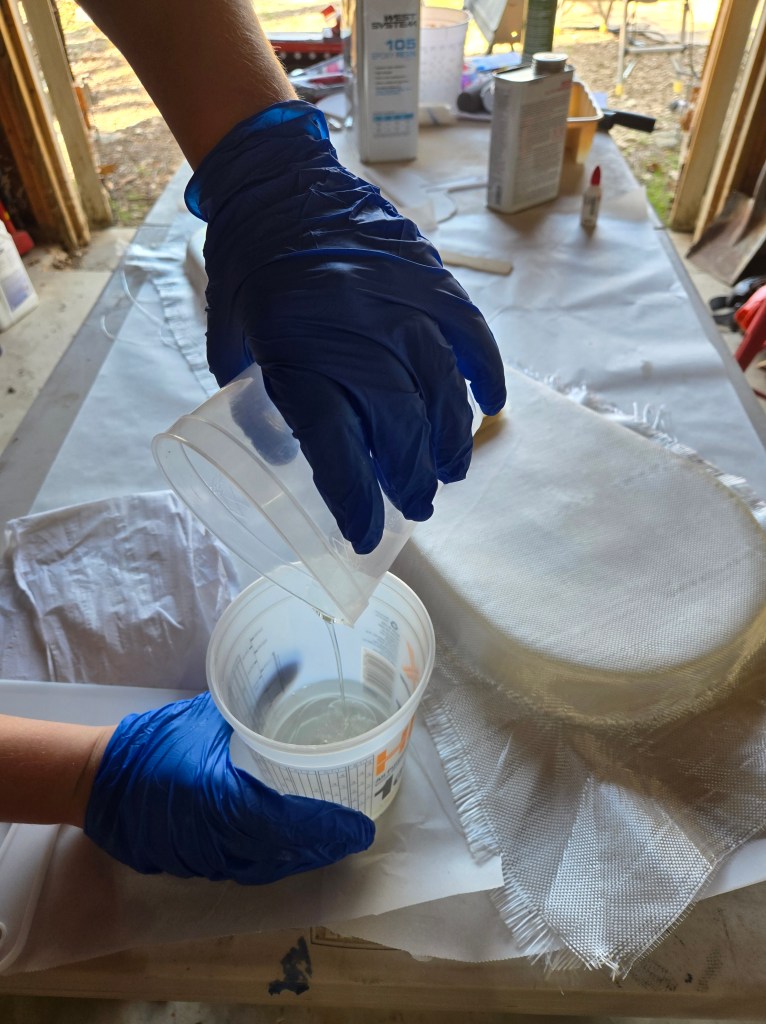
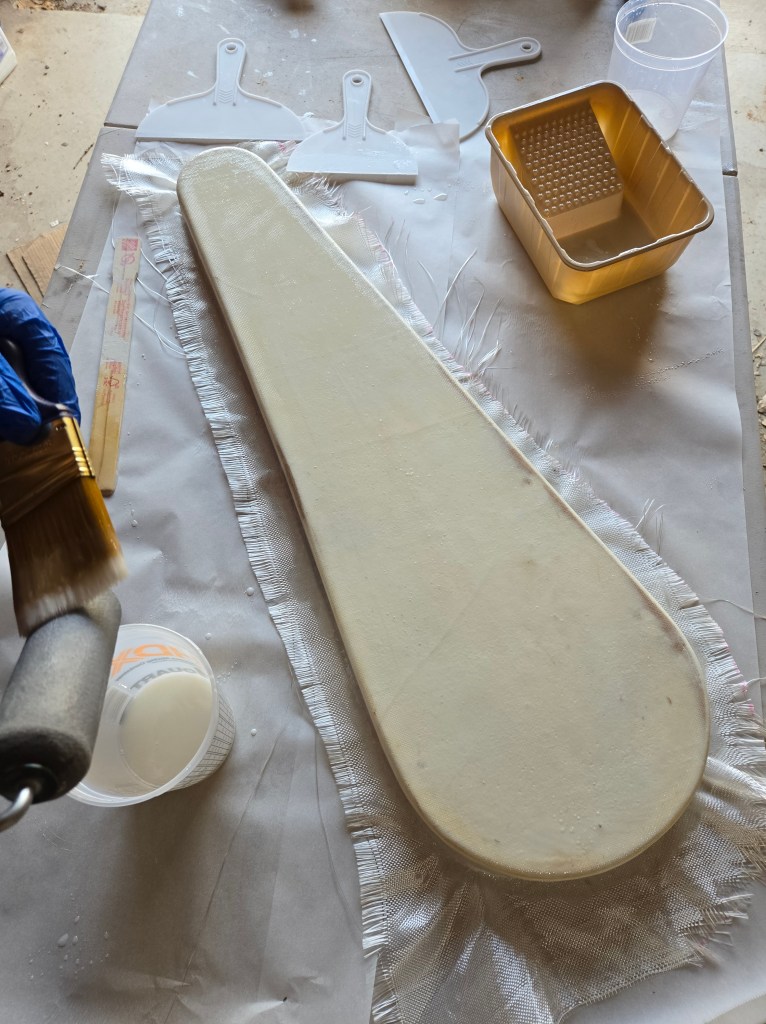
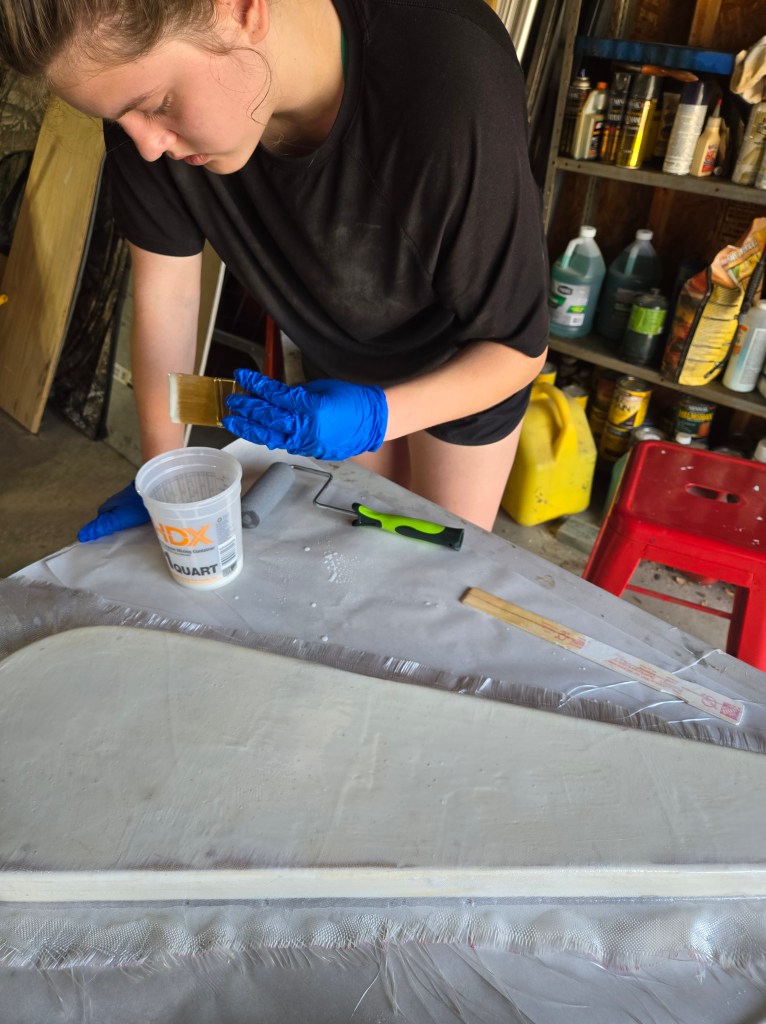
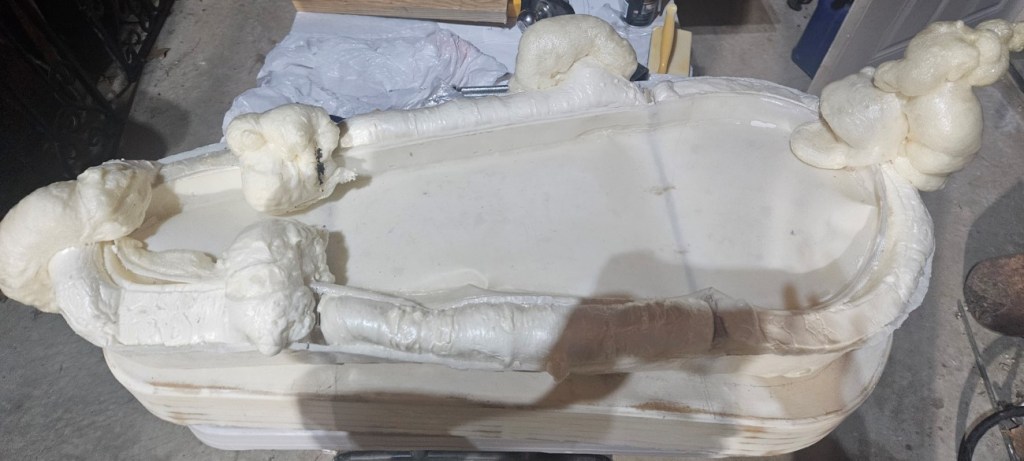
I started by cutting the fiberglass fabric into rectangular pieces that fit the size of each mold. Using wood blocks, I pressed the fabric onto the mold until it conformed into the exact shape. Once the fabric was in place, I painted a layer of epoxy over it and allowed it to harden. After the first coat had cured, I applied a second coat to reinforce the shell, giving it additional strength. When the epoxy was fully hardened, I carefully trimmed the excess fabric around the mold, leaving the shell complete.
With the shells finished, I began assembling the case by aligning the inner shells inside the outer shells, ensuring they fit perfectly. The next step was to install the polyurethane foam insulation to provide the necessary thermal protection, However, when I applied the insulation, it overexpanded, causing the case to break apart and leading to an unsuccessful prototype.